
Cat Solar Node
Introduction
The solar light used for this build has distinctive ‘cat ears’, giving this build its strange name. You will need to purchase this solar light from Amazon, approximately $7 per light.
Case dimensions: 5"(h) (not counting antenna height) x 4"(w) x 4"(d) (to rear of the mounting post).
Solar panel dimensions: 4 3/8" x 2 1/4"
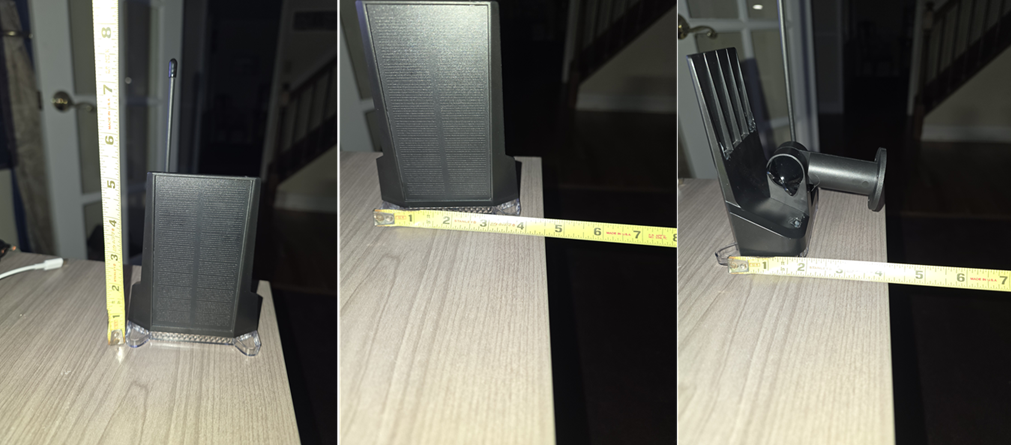
This is a simple build and the case pairs perfectly with the RAK 4631 Mini board. Do not get the larger 4631 on the 19007 base because it’s too large and will not fit.
The case includes an 18650 1200 mAh battery which works great with the RAK 4631. The lowest the battery level I’ve seen on 2 cloudy days is 85%.
Note: the pictures here show an upgrade battery because this node is going to be remotely deployed and I wanted a little extra fuel but I currently have 3 of these nodes running the stock battery and they work great.
Note: for this build you will need to do some soldering for the solar and battery connectors. You will need to supply the following parts: RAK 4631 Mini, antenna port and your antenna of choice, silicone caulk, hot glue gun, drill and small drill bit, and a small desiccant (optional).
Instructions
Step 1: Remove Front Panel
Remove the 4 screws holding the clear front panel.
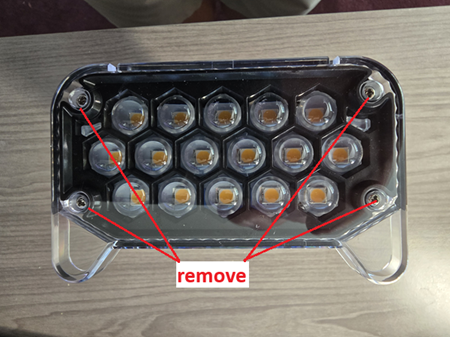
Step 2: Disassemble LED Board
Remove the 2 screws to free the LED light board (retain the screws; you will need 1 to mount the RAK 4631).
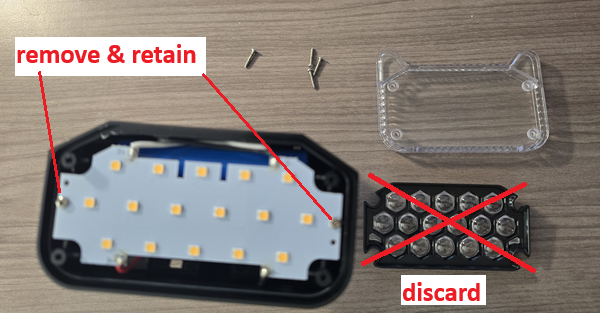
Cut the 4 wires attached to the board (2 for battery and 2 for solar).
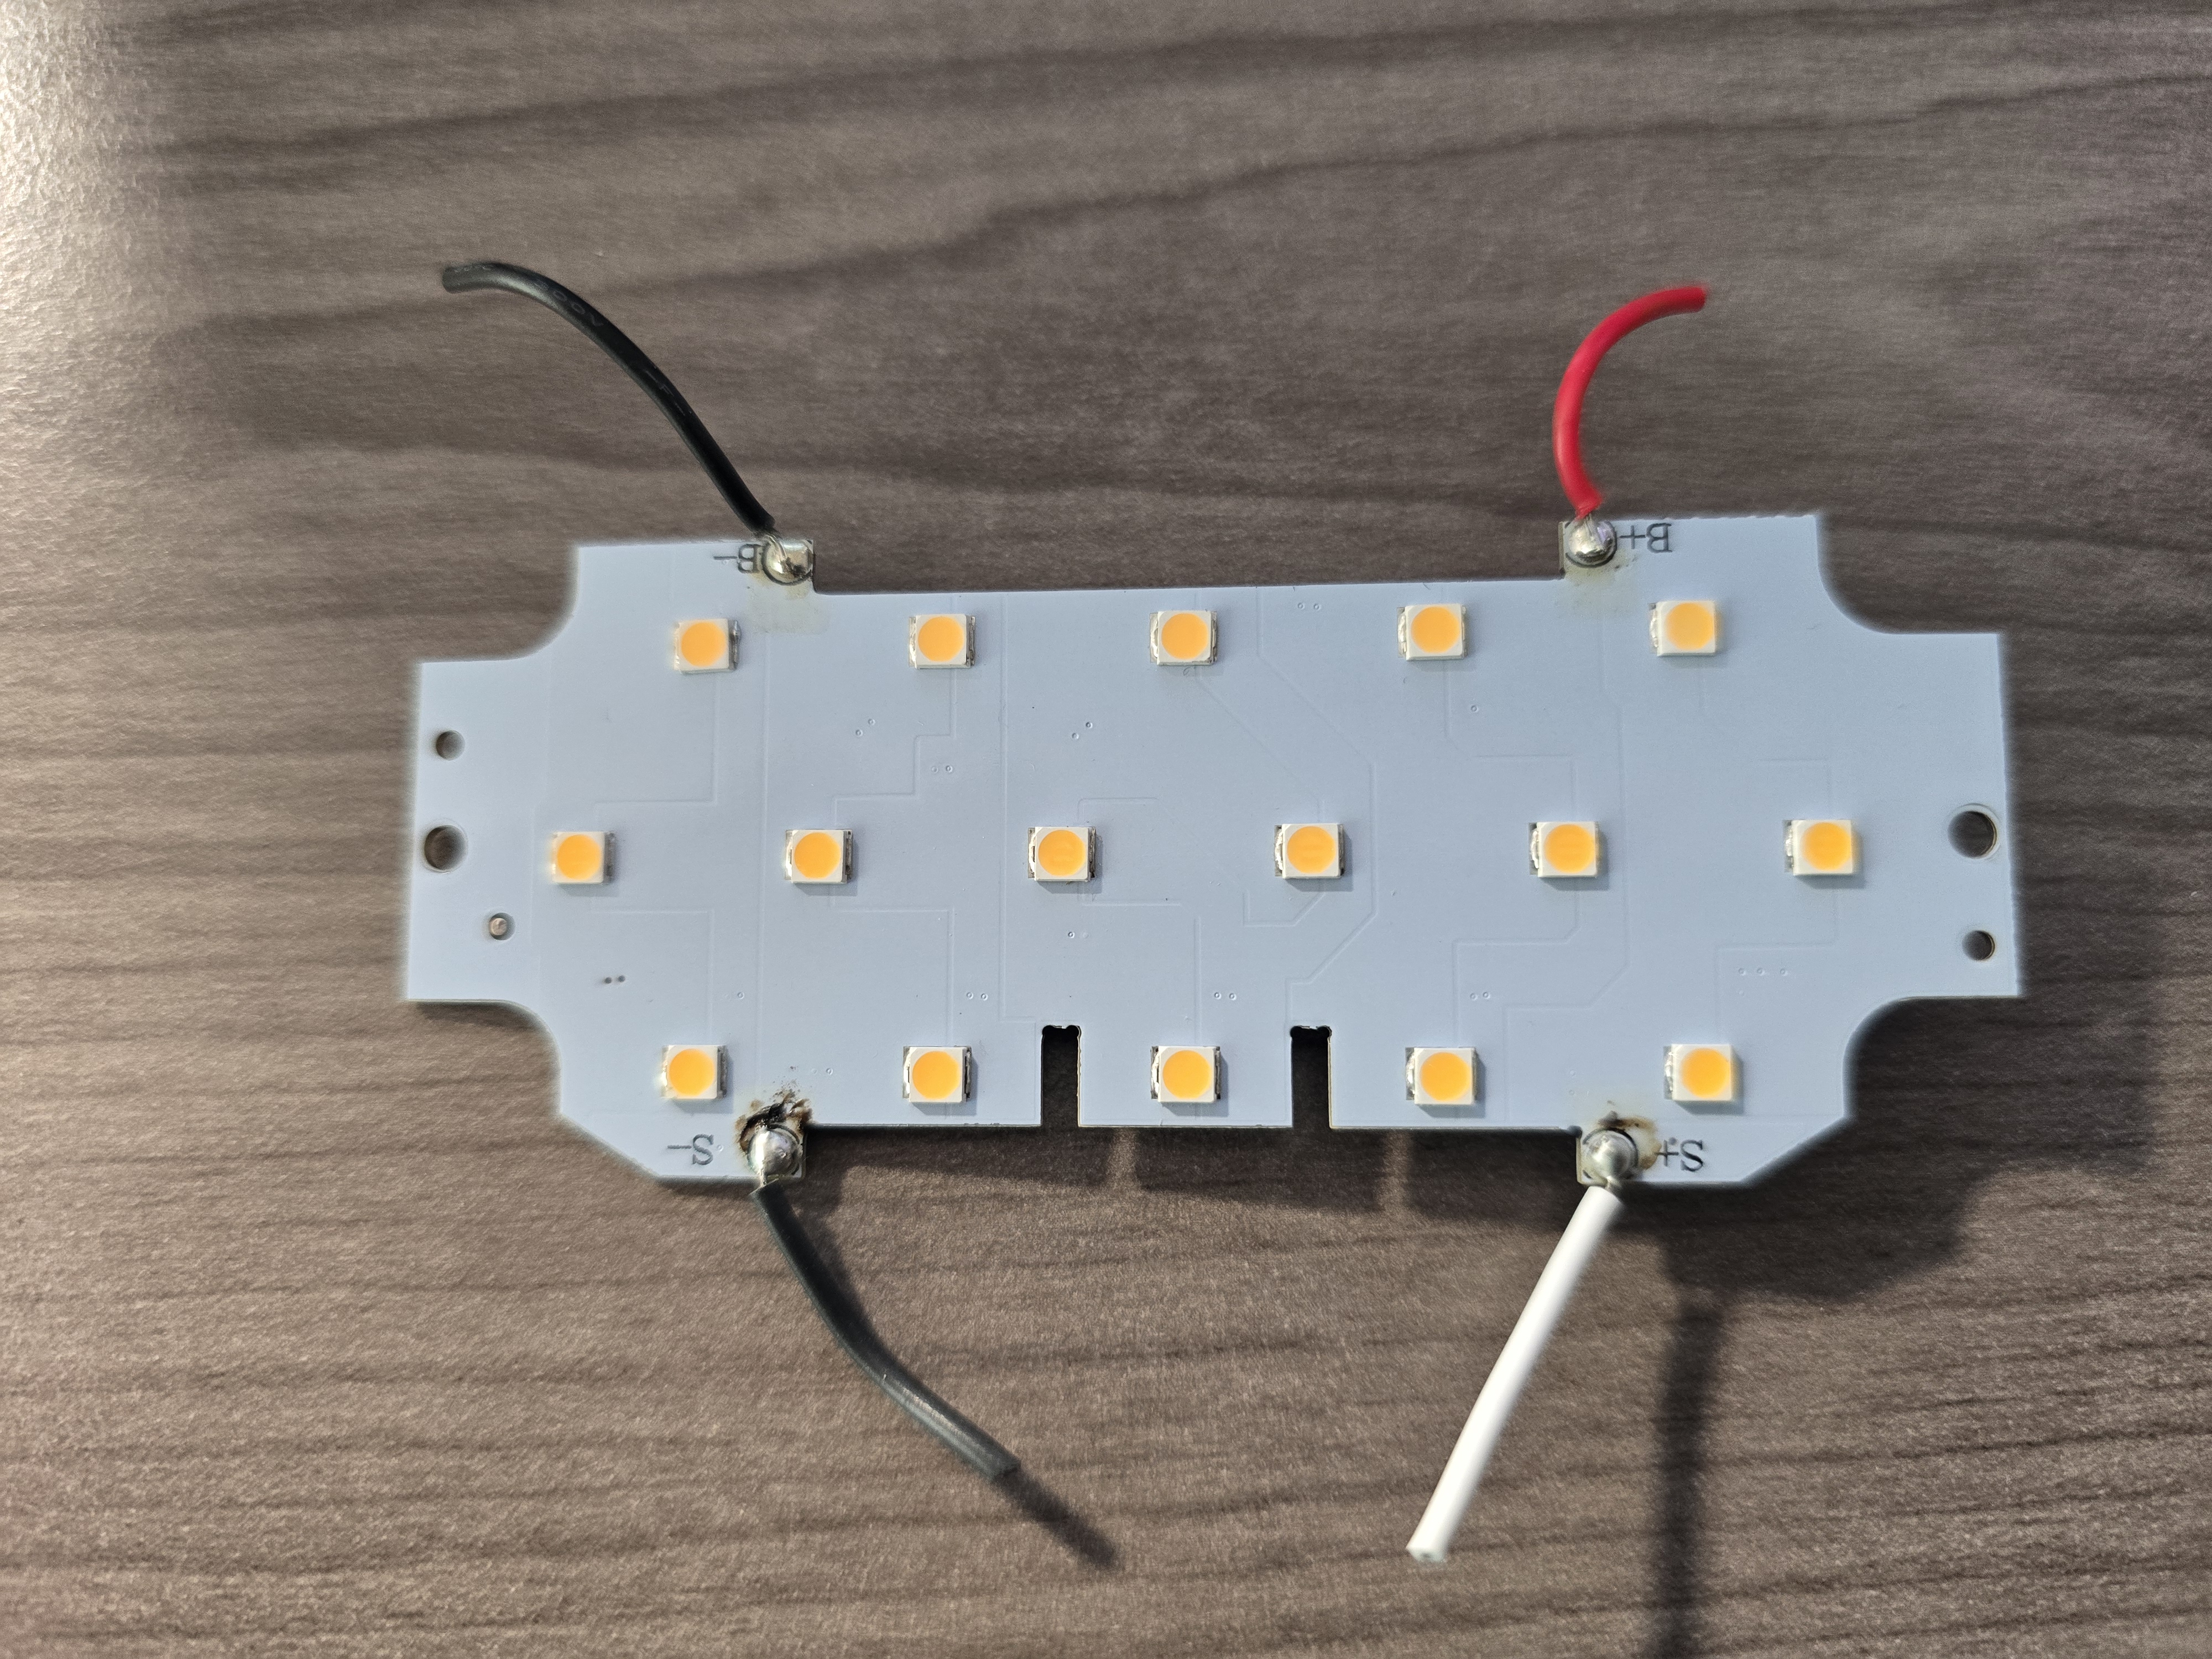
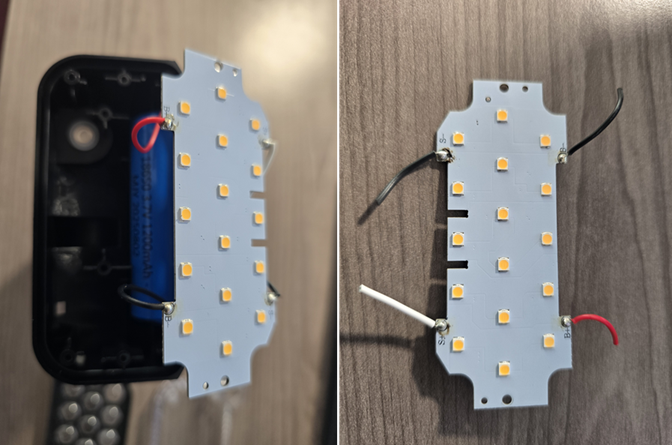
Note the polarity from the board - the solar white wire is positive and the battery uses standard red/black for +/-. Check the battery and make sure it is secure with glue (most of mine were but a few were not so I used a hot glue gun to secure the battery).
Step 3: Seal Weep Holes
There are 9 small weep holes that need to be filled with silicone:
- 4 on the back
- 2 on the top of the solar panel
- not sure these are actual holes but I sealed them and recommend you do too
- 2 on the clear front lens on the bottom, opposite of each Cat ear
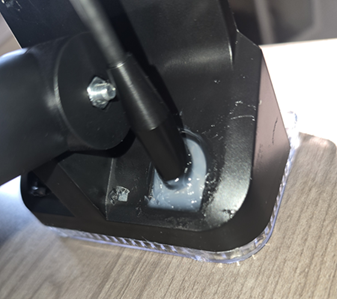
- 1 in the handle mount which requires removing the handle to get to the hole (see pic below).
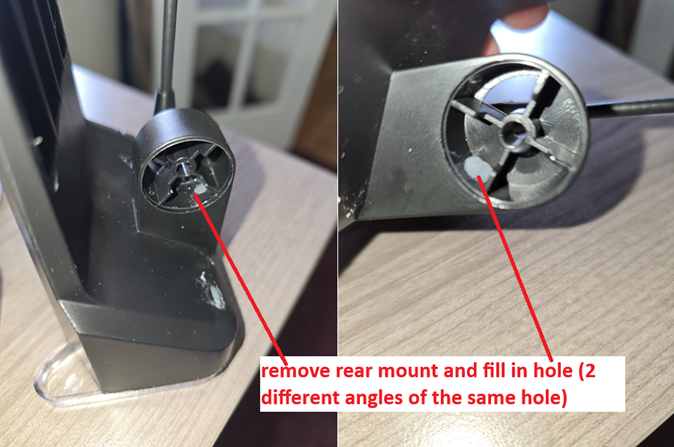
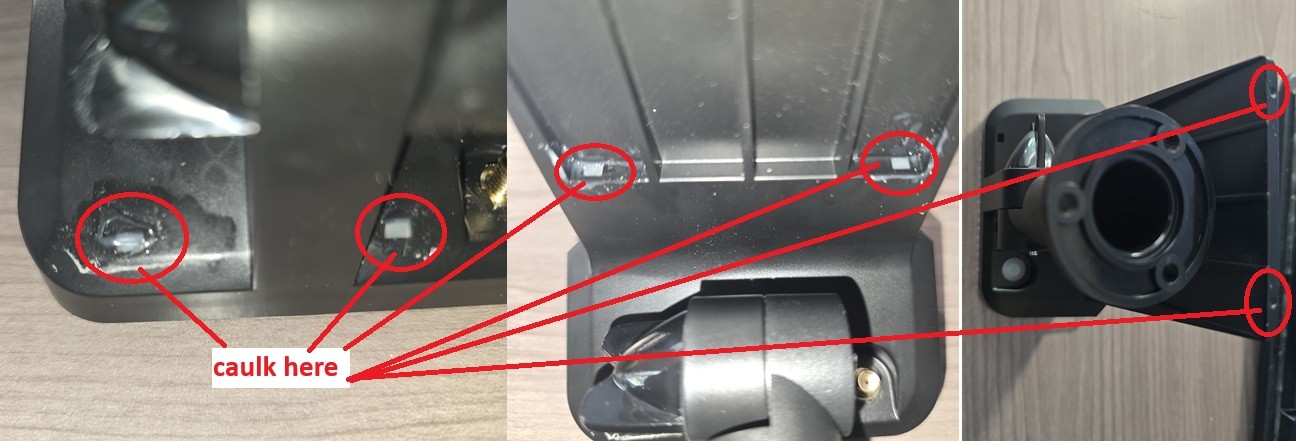
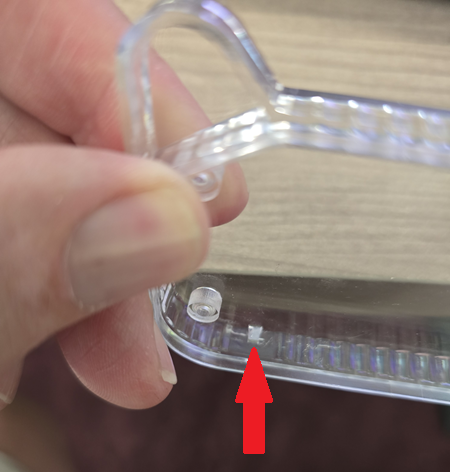
Step 4: Remove the Rubber Switch Grommet
Take advantage of the existing hole for the pusbutton switch by removing the rubber grommet.
This is where the antenna will be mounted.
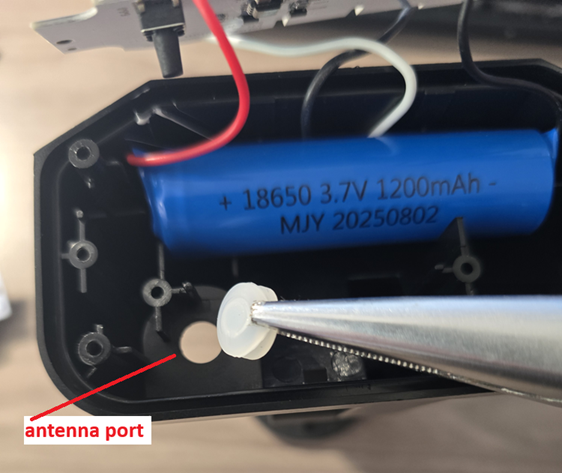
Step 5: Solder Solar and Battery Connections Leads
Shrink wrap the connections and install the antenna connector in the existing hole.
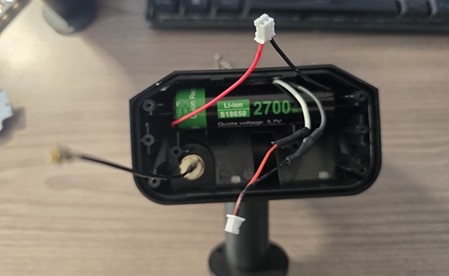
Step 6: Update the RAK Firmware
After installing the included bluetooth and LoRa antennas, plug the RAK into a PC. Flash the board with the latest build from the Meshtastic Web Flasher. After updating disconnect the small LoRa antenna, but leave the bluetooth antenna connected.
Step 7: Trim the Case
You will need to trim off a small tab next one of the mounting holes (see pics).
I used a pair of wire cutters to remove it.
Trimming this piece will allow the board to fit evenly.
Use one of the small screws that held the LED light to secure the RAK 4631 board in place.
The board will align with a screw mount inside of the case.
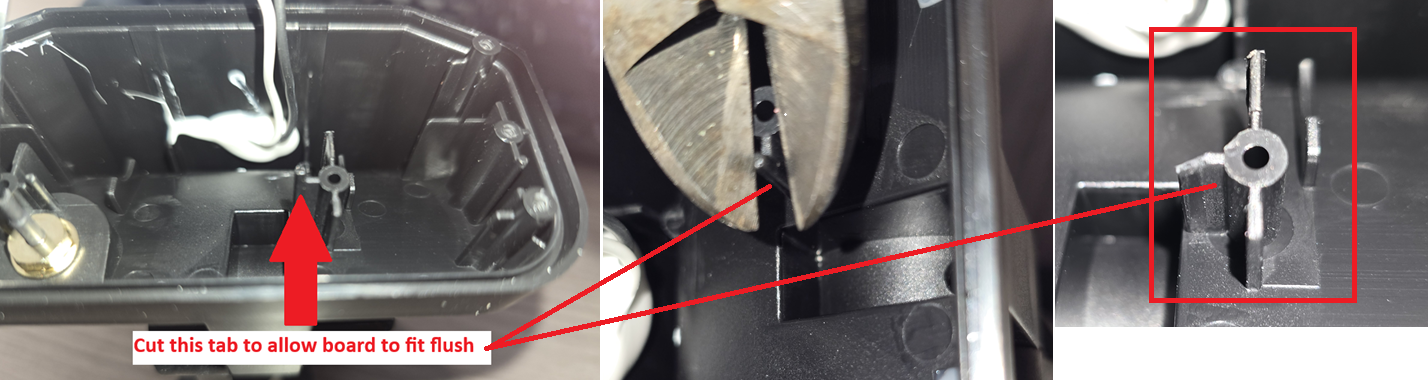
Step 8: Connections
Connect the external antenna to the RAK, then connect the solar and the battery connectors to their appropriate ports on the RAK. Make sure the antenna is connected before the power! Use the small screw that held the LED light in place to secure the RAK in place.
IMPORTANT: The RAK 4631 positive(+) is marked in red and goes on the inside (toward the center). I had to repin the power connector for the correct orientation. Incorrect polarity will kill the board.
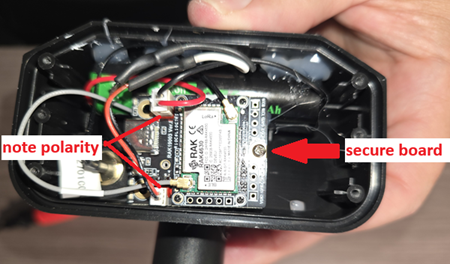
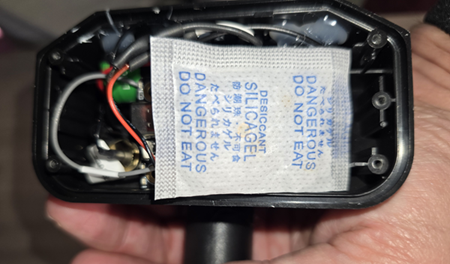
Step 9: Add a Dessicant (Optional)
This step is optional but recommended.
Adding a small dessicant packet will help mitigate any condensation inside the case from temperature changes
Step 10: Add Silicone to Seal the Case
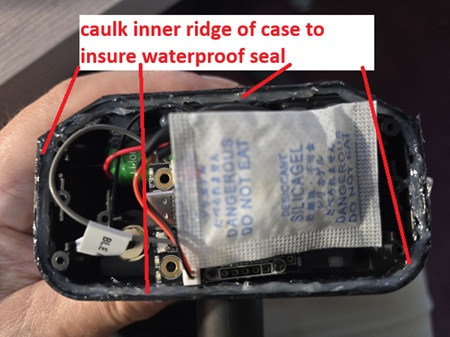
Apply a bead of silicone caulk around the inside groove of the case where the lens seats.
This step is very important because I found that the clear lens is not water tight and even though you will most likely be mounting it with the lens upside-down water can (and will) find its way in.
Step 11: Add Drainage Holes
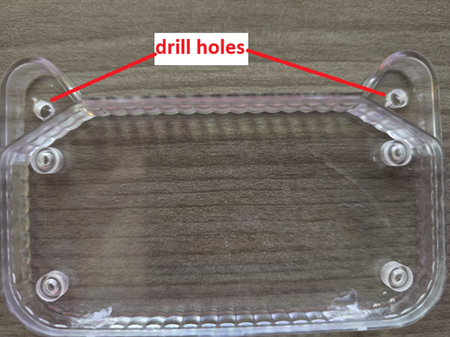
Before mounting clear front lens, drill 2 small holes in the “Cat” ears to allow water to drain.
Step 12: Reassemble the Case
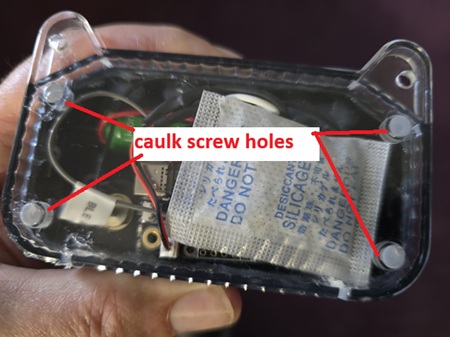
Install the 4 screws on the clear lens and apply silicone caulk over them.
Step 13: Caulk the Antenna
The orientation of the case will allow rain to contact the antenna port so I use a generous amount of caulk to insure the antenna port will not leak.
Step 14: Mounting
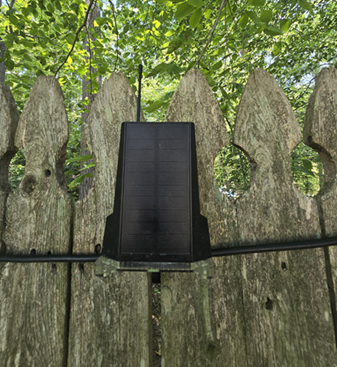
When installing the completed unit outdoor I use the round mount with 2 or 3 screws. I have installed these units on trees, fences, and even used rope for a high tree mount.
Total Cost
- Solar light, including case, battery and solar panel - $6
- RAK 4631 Mini - $31
- Antenna - $7
Total $44 (does not include your supplied silicone caulk, shrink wrap, solder, connectors, or hot glue).