
Updated Low Priced Solar Node (Harbor Breeze)
After building my Medium Priced Solar Node, I wanted to explore cheaper options. I wanted to be able to build nodes to give to friends or community members to place in advantageous locations, and not feel like I was losing $100+ if it doesn’t work out.
If you’ve been around the Meshtastic community for more than a month, you’ve almost certainly heard of the Harbor Breeze Solar Light hack. This involves using the solar panel, solar management board, battery, and enclosure from a low-cost solar light available in the USA at Lowes for less than $10. The availability of these lights can vary, but if you search hard enough you can find them.
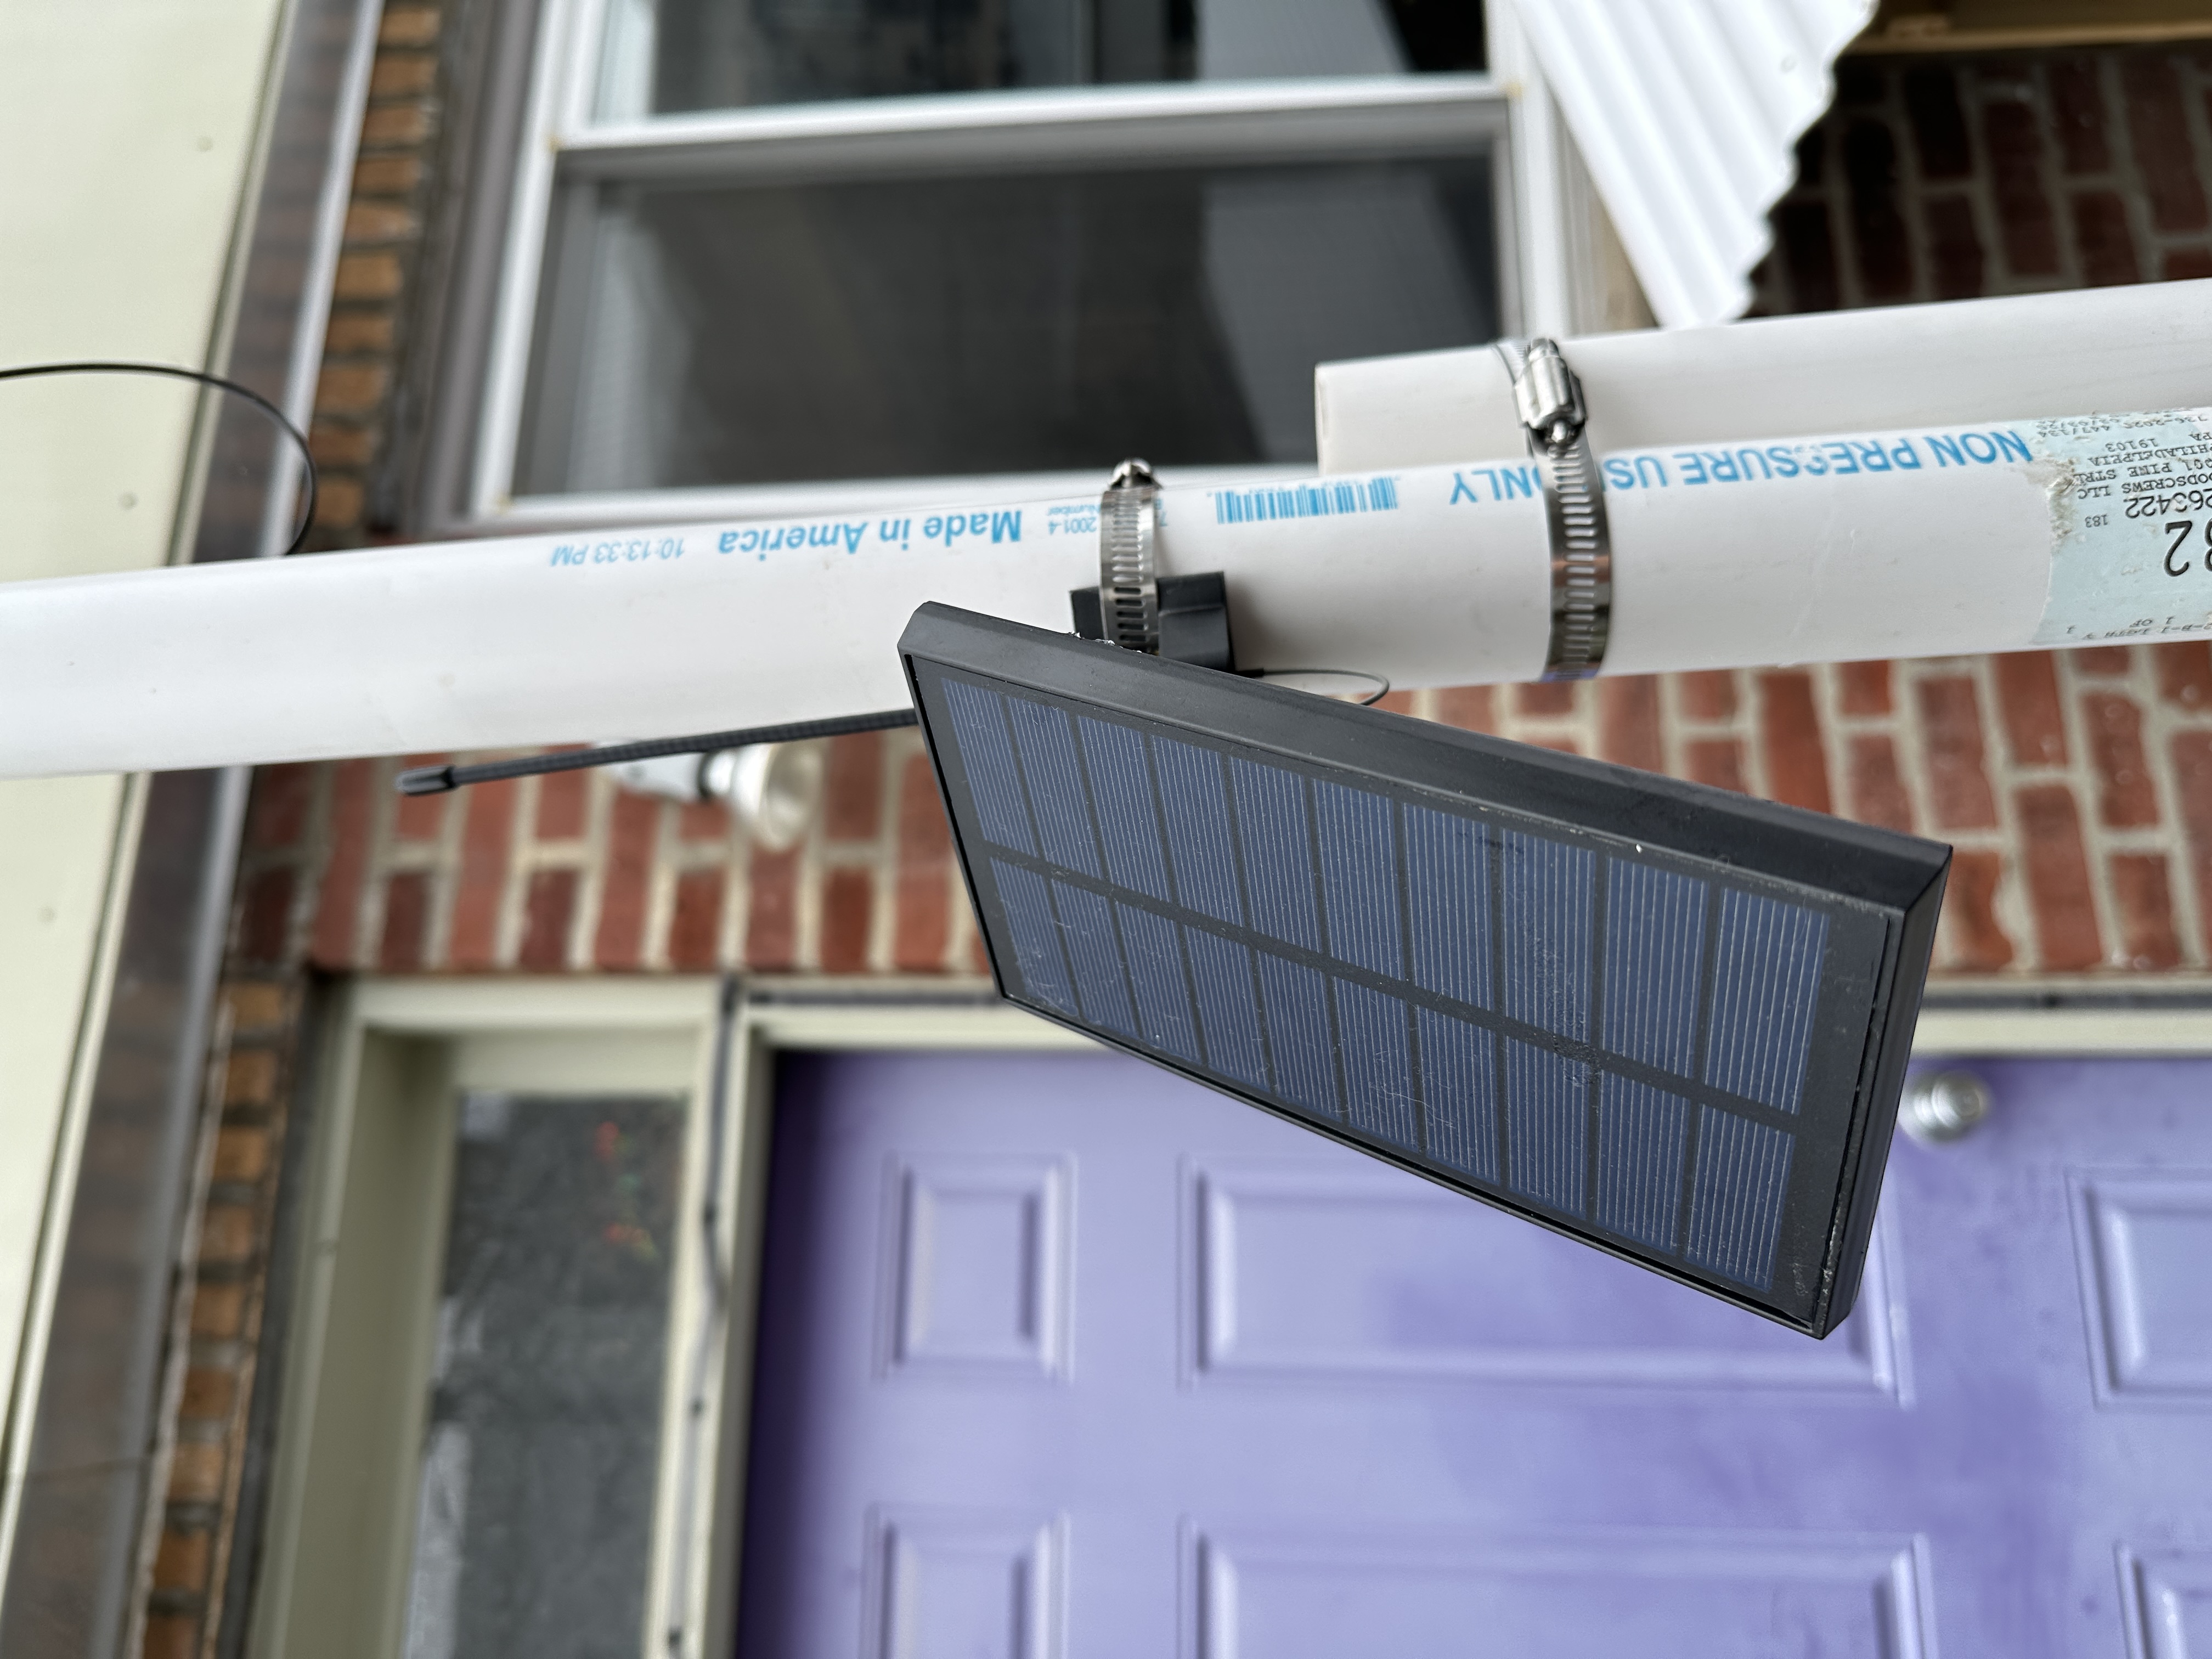
Variations
I’ve seen many variations of this hack. I believe the first came from Tavis Gustafson. This is the one that is documented in the Meshtastic docs and was featured on Hackaday.
Since this hack exploded in popularity, Harbor Breeze no longer manufacturers the original version of the Solar Light and has been replaced with a new version that has slightly different wiring, but is the same price. It has a smaller battery because the light is more efficient, and there were originally concerns that the battery wouldn’t be able to sustain a Meshtastic node. We have done almost a year of testing with the new light and we can confidently say the new version works just as well as the old version!
These instructions work great with the RAK4631 board. We have explored using a Seeed Studio Xiao, but we have found that the cheaper board is prone to brownouts (where the battery charges just enough to boot up the Xiao, but then the battery drains fully during start-up and the node gets stuck in a boot loop until a human intervenes). Mitigating this would require adding a battery management system (BMS) to the circuit, which would negate the cost savings of using a Xiao.
We also have found that the battery pads on the Xiao are very difficult to solder to, even for those experience in soldering. Since this is a beginner-friendly guide, we decided to recommend using the RAK4631 board which requires minimal soldering.
The approach I’m going with today can be applied to just about any solar light.
Parts List
Essential Parts
| Parts | Price | Description |
|---|---|---|
| WisBlock Starter Kit | $24.99 | This is the Meshtastic node. You want the RAK19007+RAK4631 (not -R) version. Pick the frequency for your region, USA is 915. |
| Harbor Breeze Solar Light | $9.98 | Make sure you verify that the Item number is 1234868. If you purchase in person, the item number will be displayed on the packaging. This is technically $14.98, but it’s almost always on sale for $9.98 |
| Heltec GT-800 868, 915 MHz Whip Antenna | $3.90 | These are cheap clones of the MuziWorks 17cm Whip Antenna that have tested just as well. You can also use the more expensive 8dbi antenna from the Medium Price Solar Node, but in Philly this will be all that is necessary for a roof node. |
Essential parts cost: $38.87 + shipping
Parts you may/may not need or already have laying around
I break this section out because 1) you may already have some of these parts laying around, 2) you could get many of them individually for very cheap if you buy local, 3) if you do have to buy online and in bulk, you will have some on hand and they will not contribute to the cost of your next build, and 4) you may not need some of these parts.
| Parts | Price | Description |
|---|---|---|
| IPEX to SMA Female Cable | $6.94 for 2 | The RAK kit comes with a cable, but it’s not long enough if you intend to run the antenna through existing holes. You’ll need a cable that’s at least 8 inches. Make sure to buy a cable that matches your antenna; this one works with the Muzi antenna from above. |
| JST PHR-2 2mm connector | $8.39 for 20 | The WisBlock board uses a 2mm JST connector. You will need one of these to solder to the solar board and connect to the Wisblock battery terminal. |
| Waterproof Sealant | $6.34 for lots | You will need to seal up some holes in the case to make them waterproof if you want to install this outside. You can also get this from Lowes if you want to reduce shipping costs, just make sure the variety you go with works with plastic. |
Total cost: $60.54 + shipping (or about $43 per node if you make lots)
Instructions
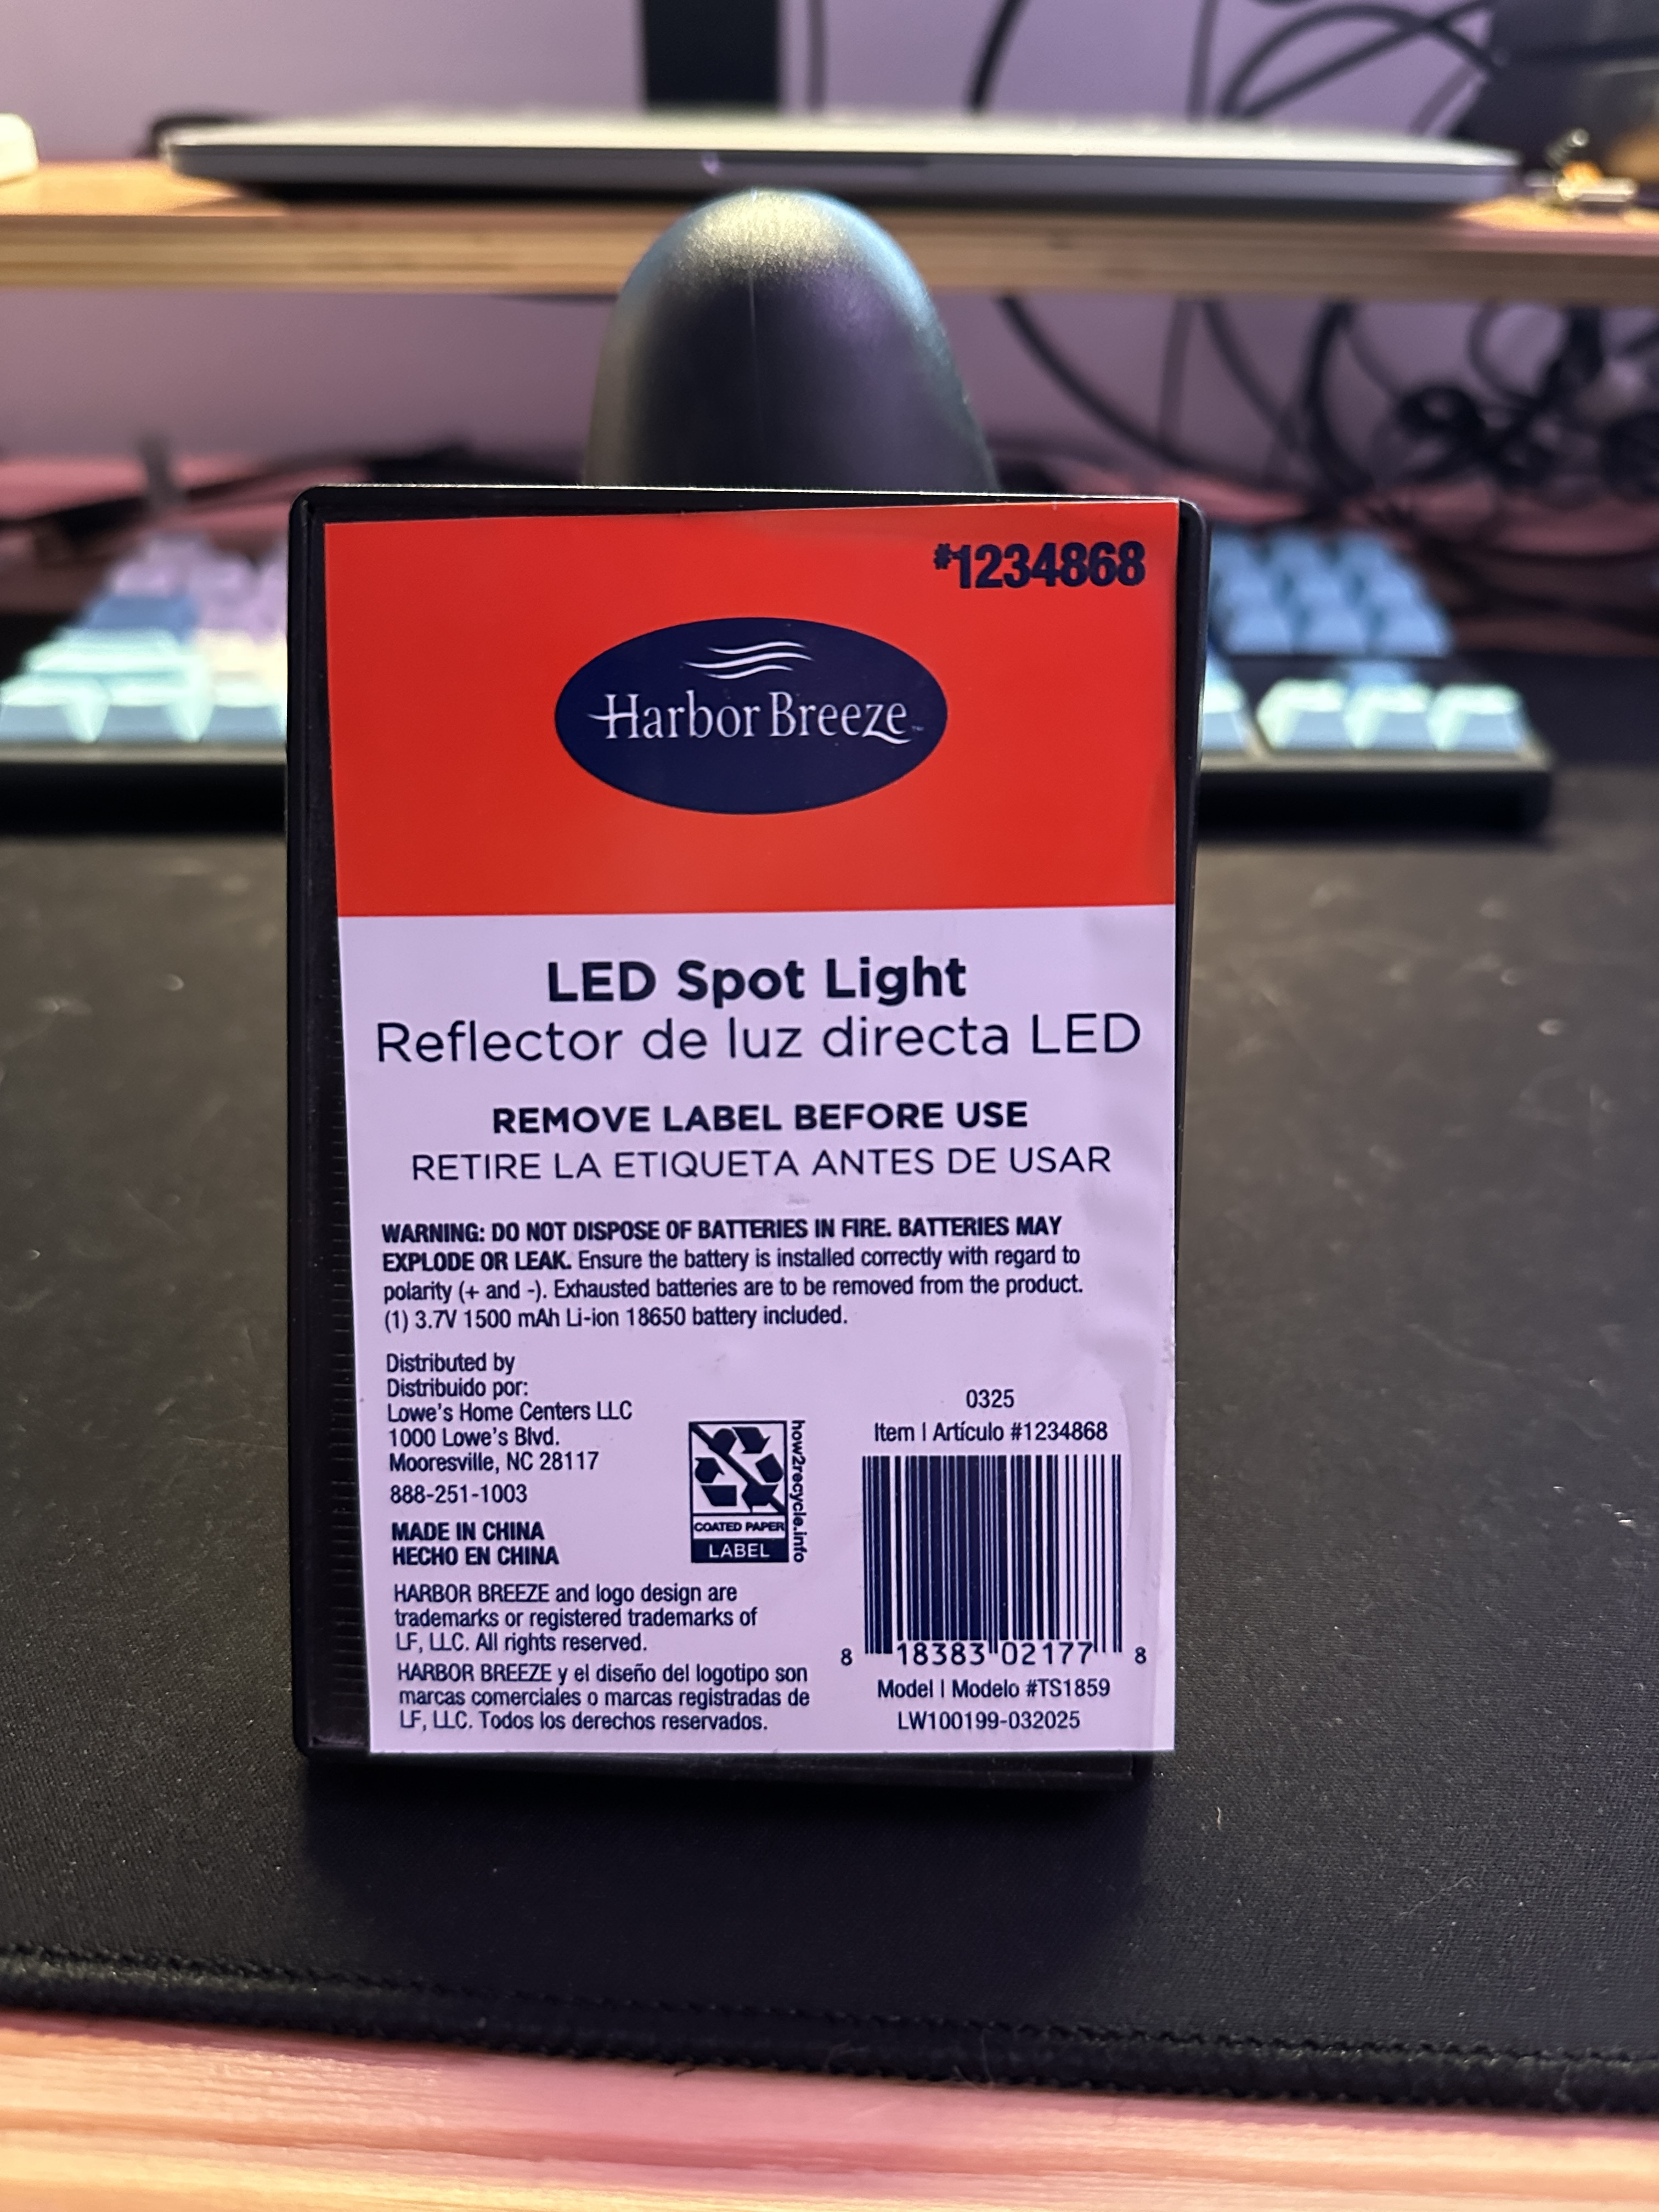
- Before opening up the node, make sure the power button is off. Face the solar panel flat on a table to make sure it doesn’t charge while you’re working on it.
Press the power button and verify that the light comes on, then press it again to power it off. If the light doesn’t come on, charge it up and then make sure it does.
- Unscrew the plastic stake and the light.
You may snip the light wires off close to the board. Make sure they don’t touch any other part of the board accidentally now or when you close it back up!
- Open up the node.
Unscrew the four screws on the underside of the board.
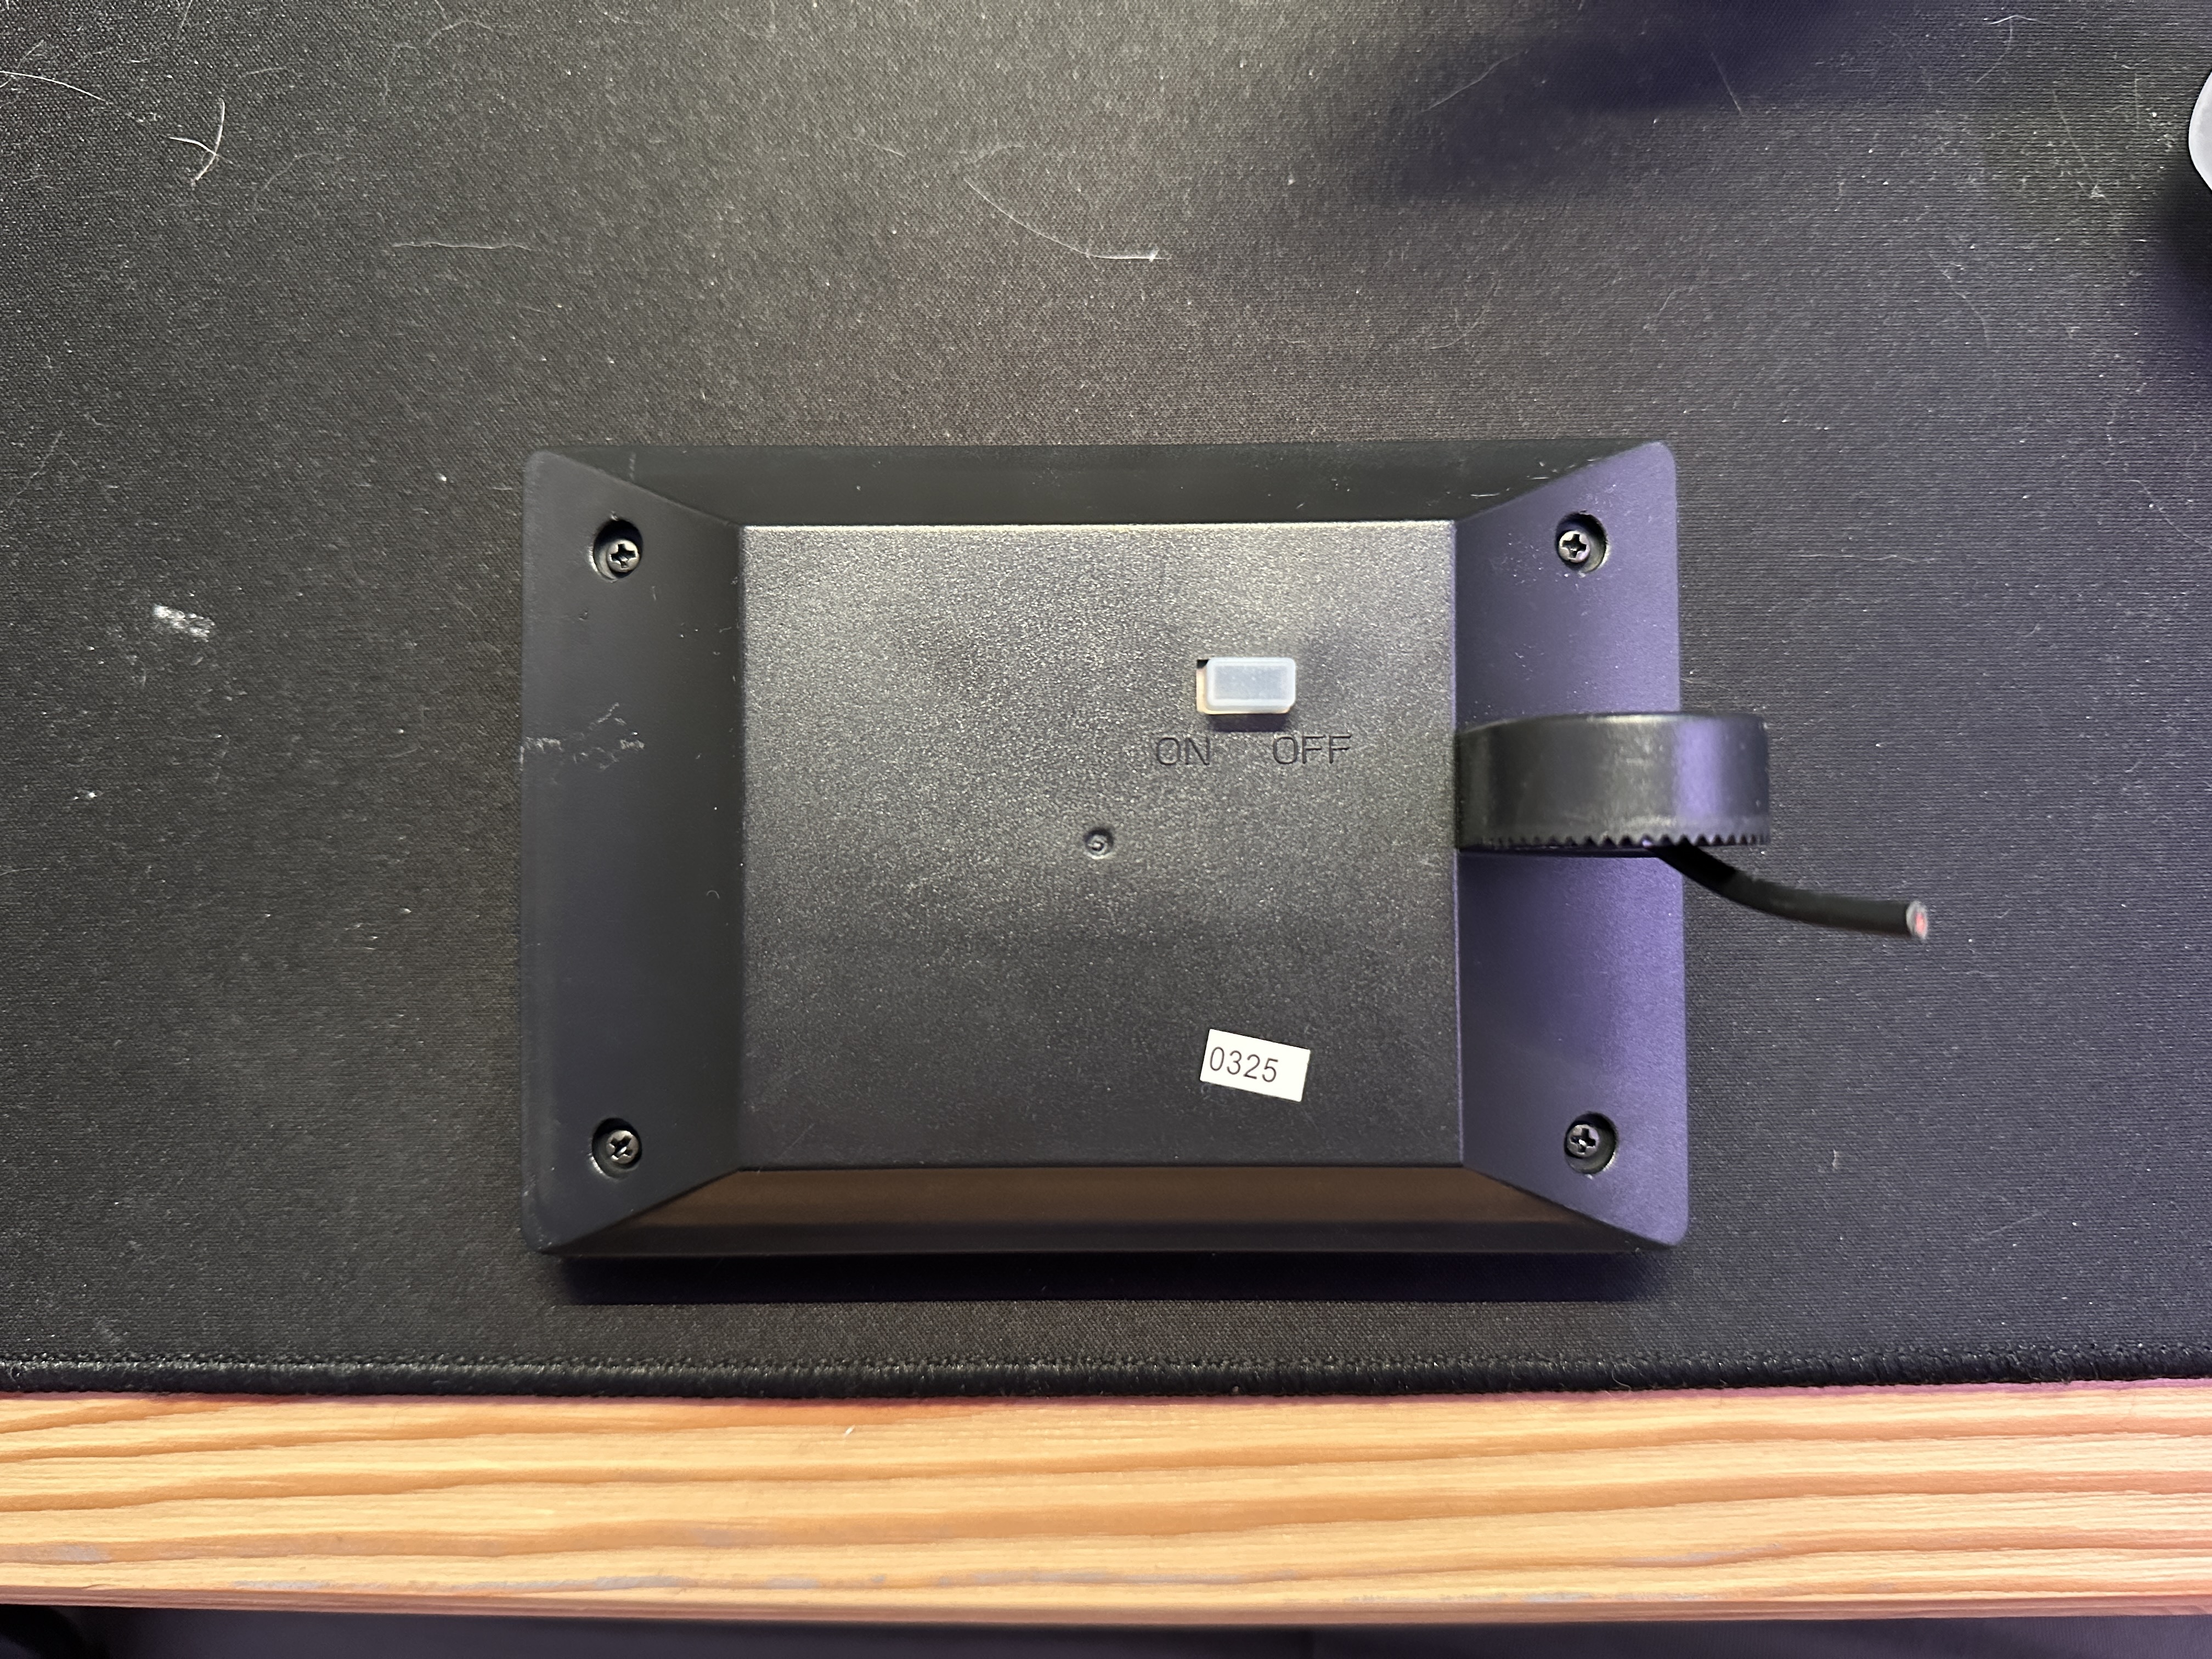
Remove the battery and turn the solar panel upside down on a flat surface to ensure there won’t be any electricity running through the circuits while you solder.
- Cut and remove the cables to the light.
You can cut them close to the circuit board.
- Review the intended wiring.
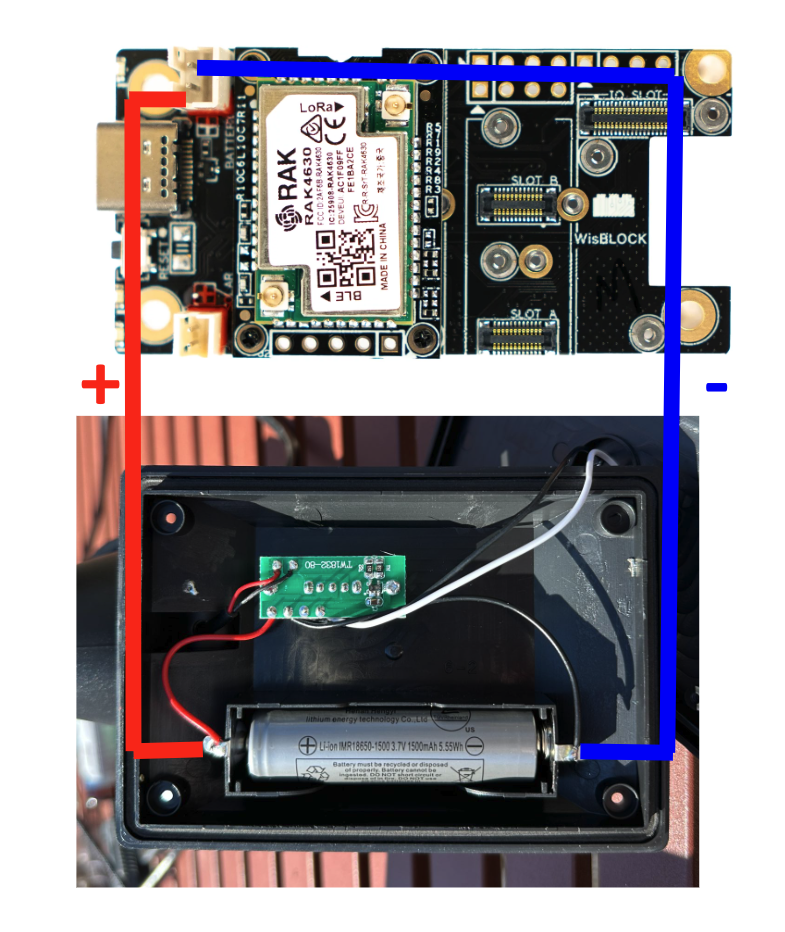
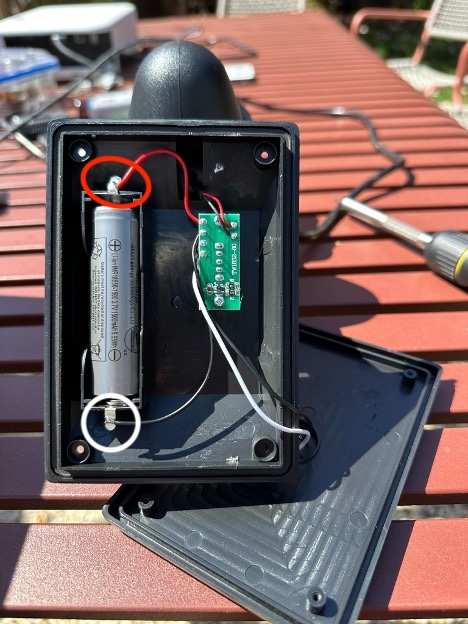
Plug in the JST connector to the port that says “battery” on the RAK4631. Take a look at which wire is on the side with “+” etched into the board. This is the positive wire! This positive wire is the one we want to connect to the positive side of the battery holder.
Are you experienced at wiring up circuits? Do not skip reading this paragraph! The RAK’s polarity is backwards for some reason! Do not assume the red wire on your JST connector is the positive one or you will let out the magic smoke when you power on the RAK and you’ll need to buy a replacement of the most expensive component in this build.
Again, look to see which wire is on the side with the “+” etched into the board. That is the positive wire! Solder that one into the positive side of the battery holder. Solder the other wire into the negative side.
- Test fit the wiring.
I usually place the RAK4631 upsidedown to the left of the circuit board inside the light housing. See if the JST connectors will reach the battery holder for solering, or if you need to extend the wiring.
If you need to extend the wiring, use wire from the female JST cables that came in your JST wiring pack. You won’t need those.
- With the JST wire disconnected from the RAK, solder the JST connector wires to the battery holder.
Solder the negative wire from the JST connector to the spot marked negative on the battery holder and the positive end to the tab on the positive side the battery holder.
- Plug in LoRa and bluetooth antennas.
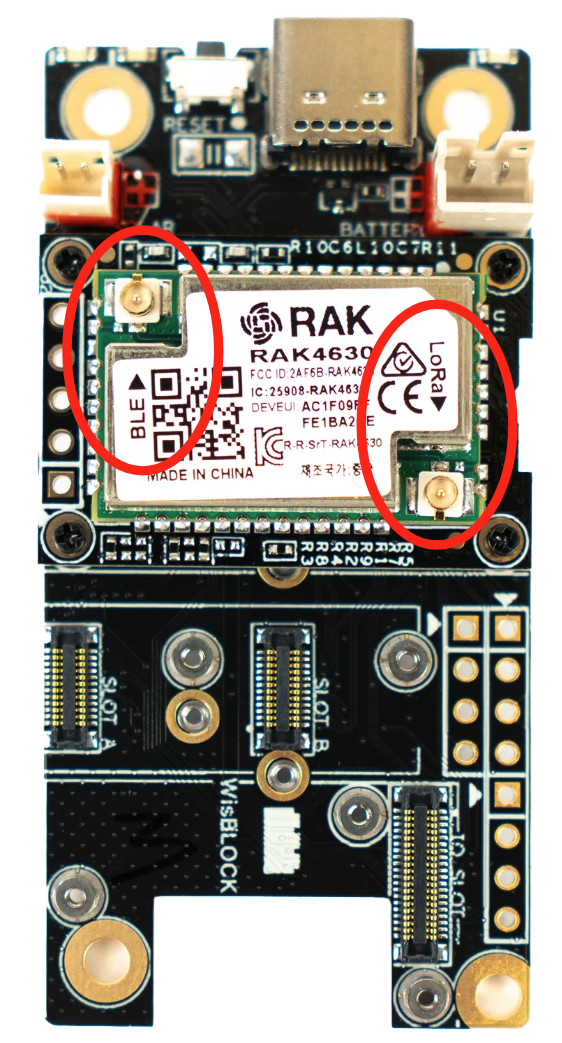
Your Bluetooth antenna will be plugged in to the push connector labelled “BLE”. Push the two circular parts of the antenna and connector right on top of each other. It’ll require quite a bit of force, but too much force can break it.
Your RAK4631 kit came with a tiny LoRa antenna, but we’re going to use the better one we ordered.
Snake the IPEX to SMA Female antenna cable you ordered through the hole where the light cable was and connect the circular end to your RAK where it says LoRa. Screw the antenna into the other end.
- Plug the JST connector into the RAK4631.
Warning: if you accidentally power on your RAK board without the antenna connected, you can irreversibly damage the board!
Place the battery back into the holder and verify the RAK powers on.
If it doesn’t power on right away, you may want to allow the battery to charge for a little while. While you wait you can verify the RAK is working and set it up by powering it with a USB-C cable. Again, make sure the antenna is connected when you do this.
- Waterproofing
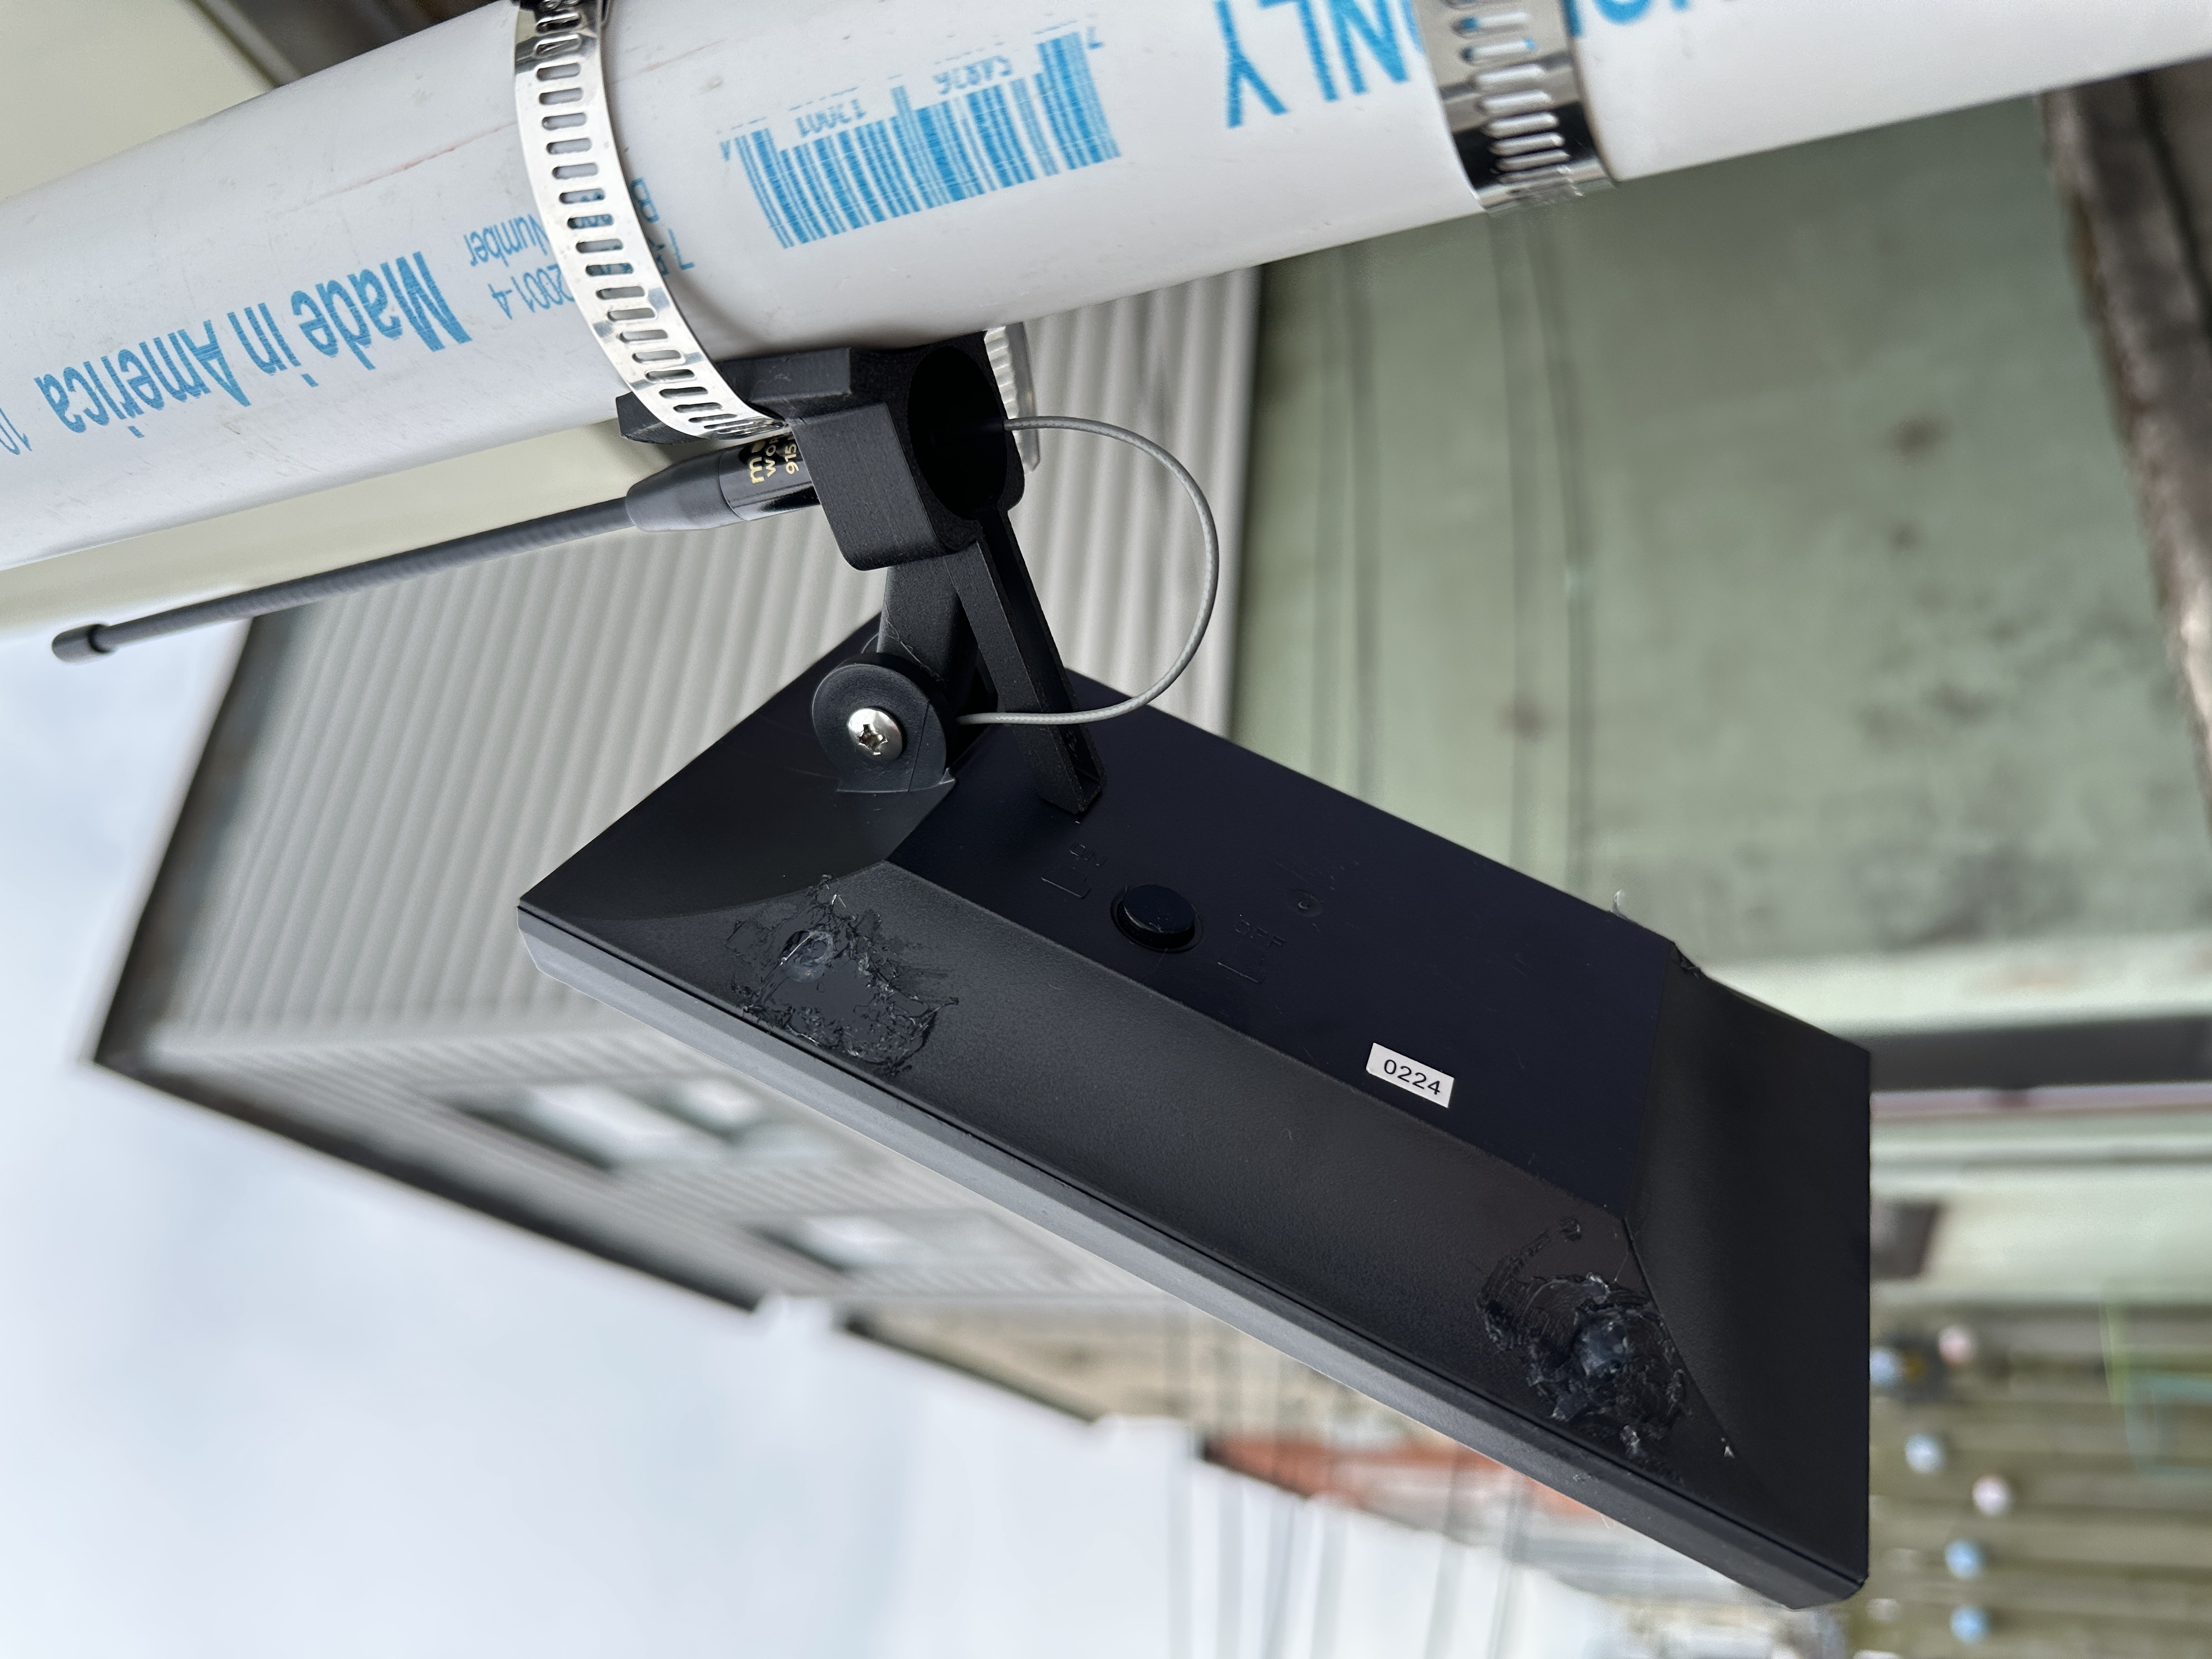
You will want to waterproof any holes that you’ve made in your case, including the original one that the light cables were running through. I also ended up adding a little extra sealant to the screws on the rear of the case.
Mounting
If you plan to mount to wood or something else you can screw into, this mount will work well.