Attic Vent Antenna Mast Mount
As someone who is averse to high unsecured locations and wobbly ladders, I faced a problem. My attic node was underperforming. I tried a quick test with the antenna sticking out the louvered vent and saw a marked improvement, but it was still well below the roof line, and the house itself was shadowing a large portion of the signal.
I needed a way to get an antenna outside, and above the ridge line, without drilling into siding or doing anything that felt permanent. I also didn’t want it to look temporary or sketchy once it was in place. It had to pass the spouse and neighborhood sniff test.
This ended up being a simple solution using conduit and off-the-shelf fittings. It’s been solid, easy to deploy, easy to adjust, and easy to remove if I ever need to.
This was built around a louvered attic vent, but could possibly be adapted to other vent styles and window types.
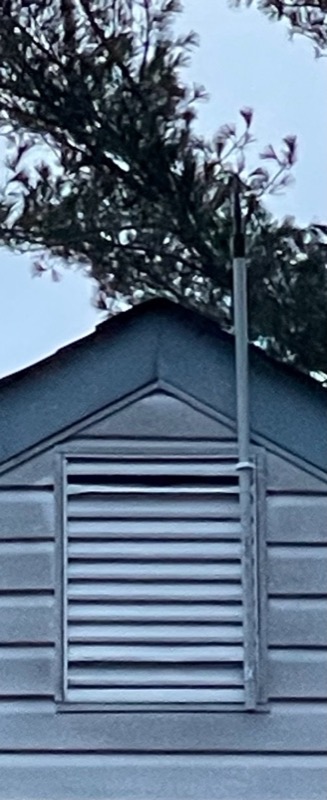
Mast installed through the attic vent, with the antenna up above the roof line.
Materials
Most of this came from a big box hardware store, nothing exotic. I used a 1 inch outer diameter non-conductive electrical conduit in a 10 foot length. It was under $10 and gave me plenty of room to cut and adjust without worrying about being short. One length was more than enough to complete the project, and then build a second one to document for this guide.
The basic parts pile. Conduit, fittings, the feedthrough parts, and the access panel box.
For bracing, I used standard pivot T fittings sized for the OD of the conduit. They allow you to adjust the angle to match your install location exactly. The exact number depends on how you want to support the mast. For my build, I used one main T for the side arms and a pipe hanger from the plumbing aisle near the top as a guide and secondary support. You could also use a second T fitting if you want everything to match, or to provide additional support. I was not able to locate the T fitting at the local store but was able to purchase them online for next day delivery.
You’ll also need an end cap or similar fitting to drill for the antenna mount, or find one that already supports your connector size. In this guide I used a bulkhead style SMA connector, but Type N would work just as well. In fact, that is what I used for my installed build.
For coax, use the lowest loss cable you can reasonably get and keep it short. Four to six feet max if possible. Shorter is always better here and makes a big difference with these devices. But remember, height usually wins. You may suffer some loss but gain more from the improved antenna position.
Beyond that, it’s mostly just basic hardware. A few screws to secure the side arms to the vent frame, and some sealant to protect the antenna connector if it’s recessed or exposed to moisture. Self sealing tape is your friend. The pipe fittings also have secondary holes that you can put a short self tapping screw into for peace of mind.
Before you start cutting
Before cutting conduit or tightening anything down, think through where the antenna connector and coax are going to live.
If you’re mounting the antenna in a recessed fitting, drill a small drain hole at the lowest point. Water will find its way in eventually, and giving it a way out is easier than pretending sealant alone will solve it forever.
Plan your coax path. The cleanest route is down the inside of the conduit, exiting at the bottom. Leave some slack to form a drip loop before it enters the vent. That loop becomes very important over time.
Also think about connectors. Every adapter adds loss and another failure point. Pick SMA or Type N and keep the run as short as you can manage.
Access Panel Option (Top Mounted Node)
There is also the option of adding an access fitting at the top of the mast, mounting your node there, and running power up the mast vs bringing coax down and into the space.
There are inline straight-through and right-angle access panel options. My local store did not have the straight-through option, and online pricing was running three to four times higher than the right-angle option, so that’s what I used for this guide.
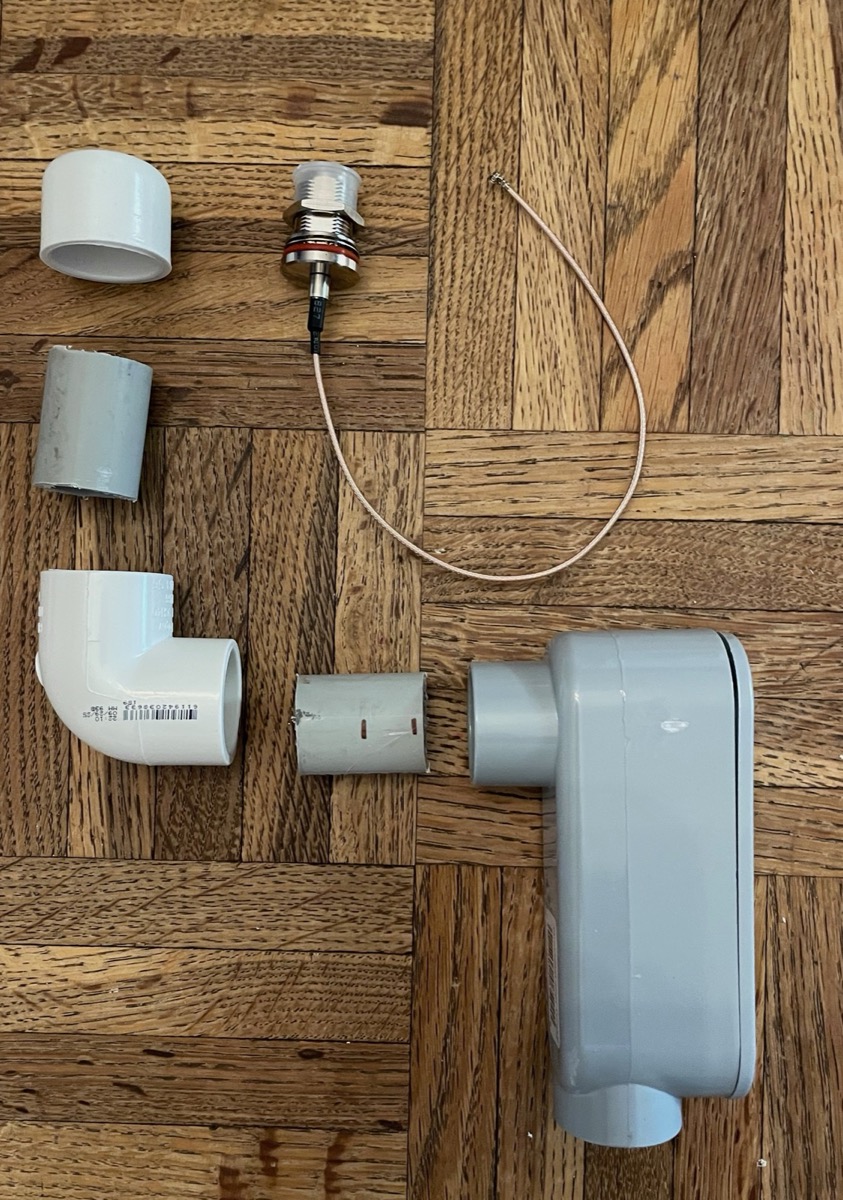
Exploded view of the access-panel feedthrough before it got assembled and sealed up.
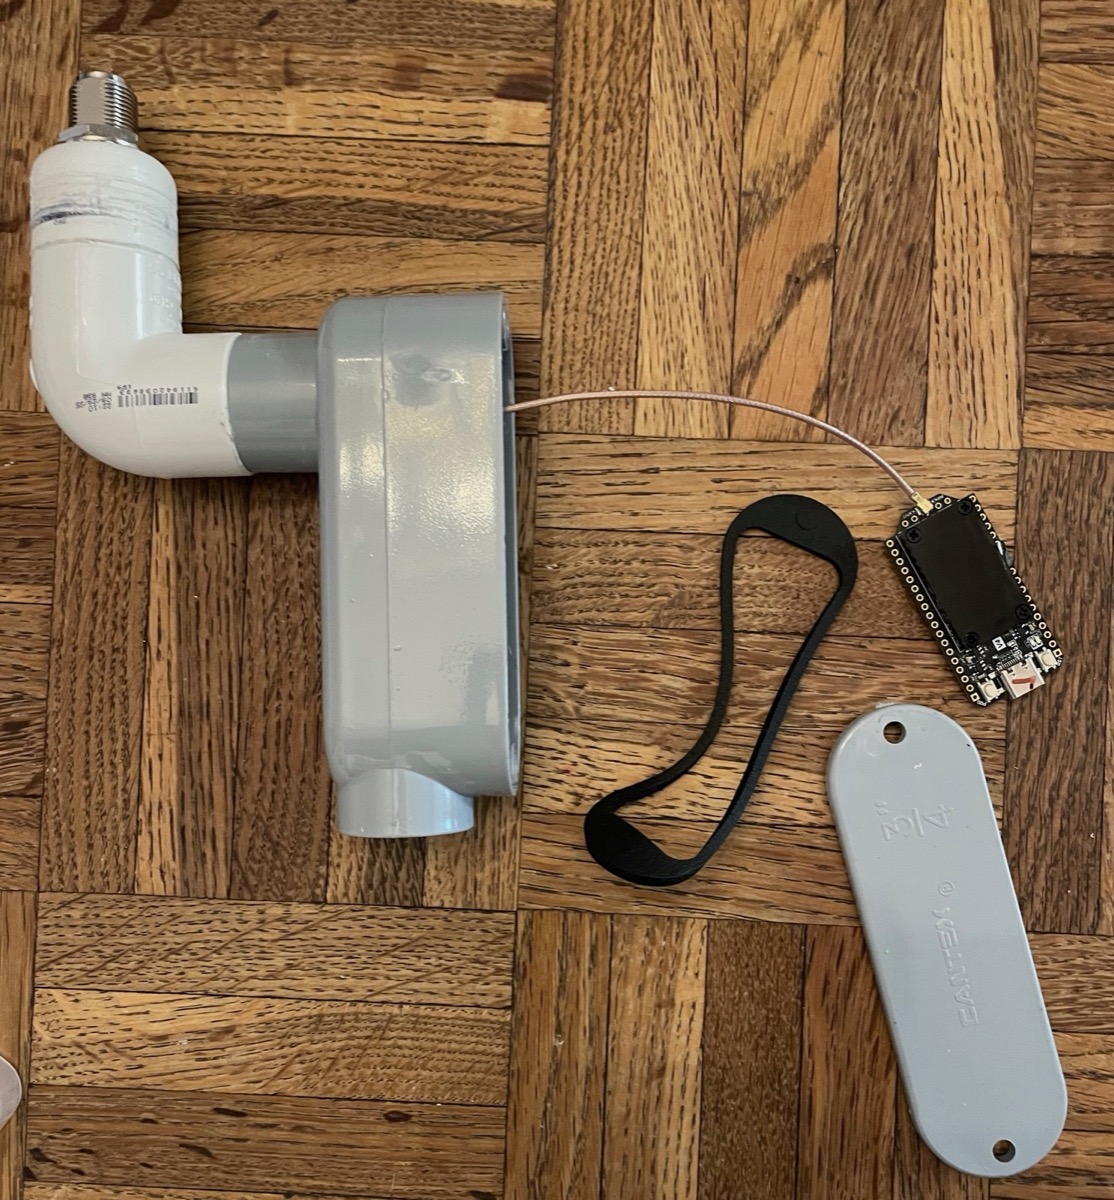
Same feedthrough assembled, with the coax pigtail running to the node inside the box.
If you go this route, make sure the power cable is rated for outdoor use and long enough to run the full length of the mast and into your space without tension.
Ensure all fittings are properly sealed. If this fitting leaks, your node is most likely done for.
For my use case, I needed interior access to the node in the attic and planned to add a cavity filter, so I went with a short run of KMR240 instead of this variant for my final install.
Assembly
I started by cutting the conduit to a length that made sense for the vent location and roof line. There’s no exact number here. You are better off leaving yourself extra length and trimming some off versus going too short and cutting a whole new piece. If that does happen you could use the bad piece as material for the arm(s).
The main mast gets a T fitting with a short side arm, about a foot. That arm is what braces against the inside of the vent frame. I adjusted the angle so it roughly matched the angle of the louvers. Hold off on any threadlocker until you have done a test fit.
If, like me, you can’t easily reach the outside of the vent, tighten the bottom fitting fully and carefully slide most of the assembly out through the vent opening. This part is interesting, because you feed it downward to get it out the vent. I positioned it one or two louvers up from the bottom so the base of the mast lined up with the bottom of the vent. That left room for the coax to exit cleanly and form a small loop downward before feeding back through the lowest louver.
Once it was roughly where I wanted it, I slowly rotated the mast until it was vertical. Take your time here, you don’t want to drop it. A second set of hands or a firm hold on the antenna cable may alleviate any anxiety.
For the top support, I used a simple pipe hanger. I slid it out through the top of the vent, hooked it onto the conduit, and gently pulled until it snapped into place. It’s smaller and less noticeable than a full second T fitting bracket, and with the bottom fitting tightened down, the top support is there mostly to keep the mast vertical. Either method works.
With the mast held in position, I ran screws through the pre drilled holes in the side arms and into the interior vent frame. I avoided over tightening. The assembly already felt solid. If you have a gap between the vent opening and inner frame a small block of wood or plastic standoff may be needed. I added a couple of screws to the pipe hanger up top as well.
Cable routing and power up
I ran the coax inside the conduit and exited at the bottom of the mast, avoiding drilling any additional holes. From there it loops downward before heading back into the vent. That drip loop is intentional. It keeps water from following the cable inside.
Once inside, route the cable to your setup. The less coax you use, the better.
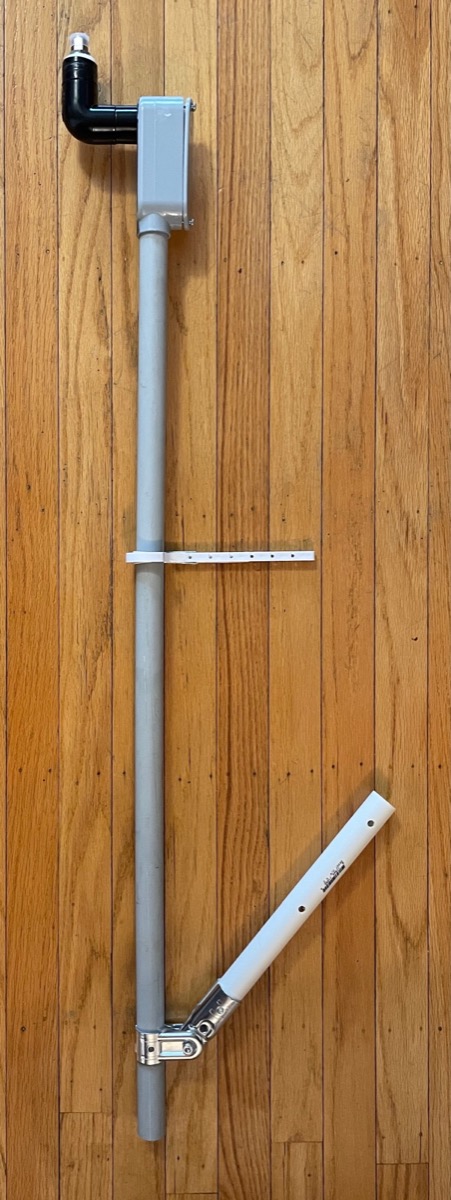
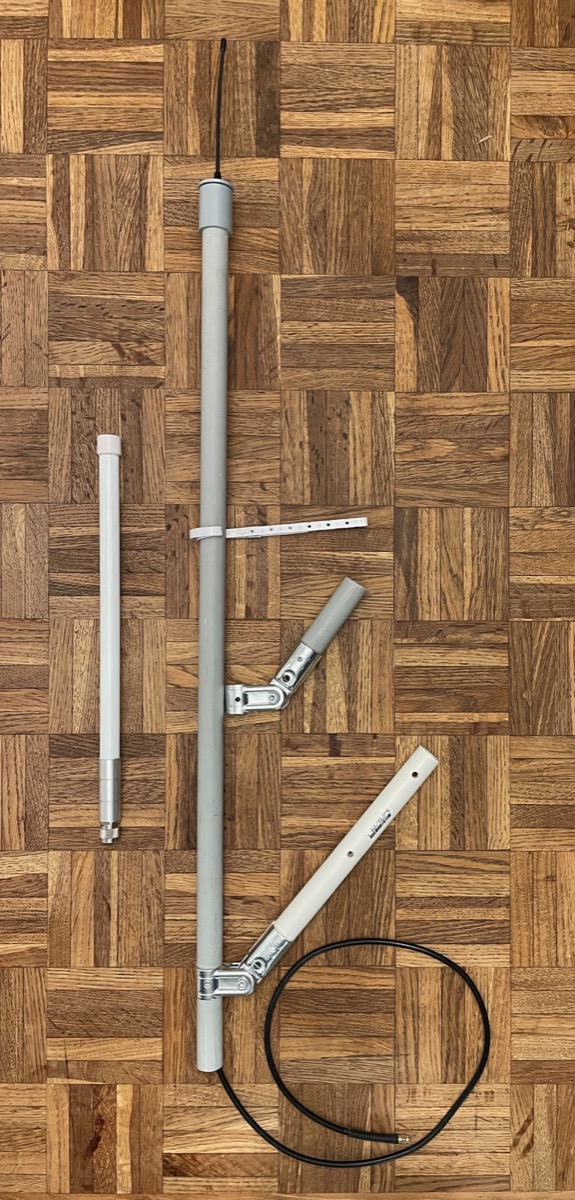
Full mast assembly laid out before the install. This is the part you end up feeding through the vent.
Power the node up before closing anything up, you may need to make adjustments, my node is in a simple IP65 case right inside the vent. RSSI and SNR were showing improved values over the old setup. Once everything looked stable and reasonable, I buttoned it up and double checked the mounts and connections.
Final notes
For a higher wind location or a taller mast, I’d skip the pipe hanger and go with a second T fitting for the top brace. This setup has been solid where it is, but extra support never hurts if conditions are harsher or if you don’t like the look of the hanger.
Some folks will want to add a lightning arrestor here, and that’s fair. An inline arrestor tied into a proper ground can help with static and nearby activity, but it’s not magic. A direct strike is still a direct strike. I chose to keep this install simple, but if your location or risk tolerance is different, it’s an easy addition.
Getting the antenna fully outside and above the roof line was my main goal. Currently, the vent louvers haven’t shown any meaningful impact on performance. There may be a more elegant or permanent way to do this, but this hit a good balance for me. It solved an RF problem without turning into a home improvement project, and it blends in well with the siding of the house. It’s also easy to undo if I ever need to move or rethink it.
I also did and alternative version with another vent to mount a weather sealed yagi. It provided an easy way to mount the yagi, and allowed for easy adjustment/rotation.