Low Priced Solar Node (Harbor Breeze)
After building my Medium Priced Solar Node, I wanted to explore cheaper options. I wanted to be able to build nodes to give to friends or community members to place in advantageous locations, and not feel like I was losing $100+ if it doesn’t work out.
If you’ve been around the Meshtastic community for more than a month, you’ve almost certainly heard of the Harbor Breeze Solar Light hack. This involves using the solar panel, solar management board, battery, and enclosure from a low-cost solar light available in the USA at Lowes for less than $10. The availability of these lights can vary, but if you search hard enough you can find them.
Variations
I’ve seen many variations of this hack. I believe the first came from Tavis Gustafson. This is the one that is documented in the Meshtastic docs and was featured on Hackaday. This one is tried and true, but does not allow the user to press the included power button to turn on/off the node.
These instructions work great with the RAK4631 board. We are exploring a new version that uses a Seeed Studio Xiao. Unfortunately, if you wire up a Xiao the way we have in these instructions, the node can often suffer from brownouts (where the battery charges just enough that the Xiao powers on, but then the battery drains fully during start-up and the node gets stuck in a permanent boot loop until you can go and charge it up yourself).
There is an alternate wiring to avoid these brownouts that requires scraping off the R6 resistor so you can use the Harbor Breeze node’s internal solar management system (which may or may not have a brownout-preventing feature, we’re still testing it) but prevent the board from turning the node off during the day. I’d consider scraping off a resistor and wiring to the Xiao’s absolutely miniscule battery pads to be a “hard mode” node, so once we vet that this way prevents brownouts, we will make a new article for the Dirt Cheap Hard Mode Solar Node.
The approach I’m going with today is very beginner friendly. It is the one that I found in the description of this 3D printed mount for the light. This allows us to use the power button and doesn’t require any modifications to the included solar management board. Even if you’re new to soldering, this should be pretty easy.
Parts List
Essential Parts
| Parts | Price | Description |
|---|---|---|
| WisBlock Starter Kit | $24.99 | This is the Meshtastic node. You want the RAK19007+RAK4631 (not -R) version. Pick the frequency for your region, USA is 915. |
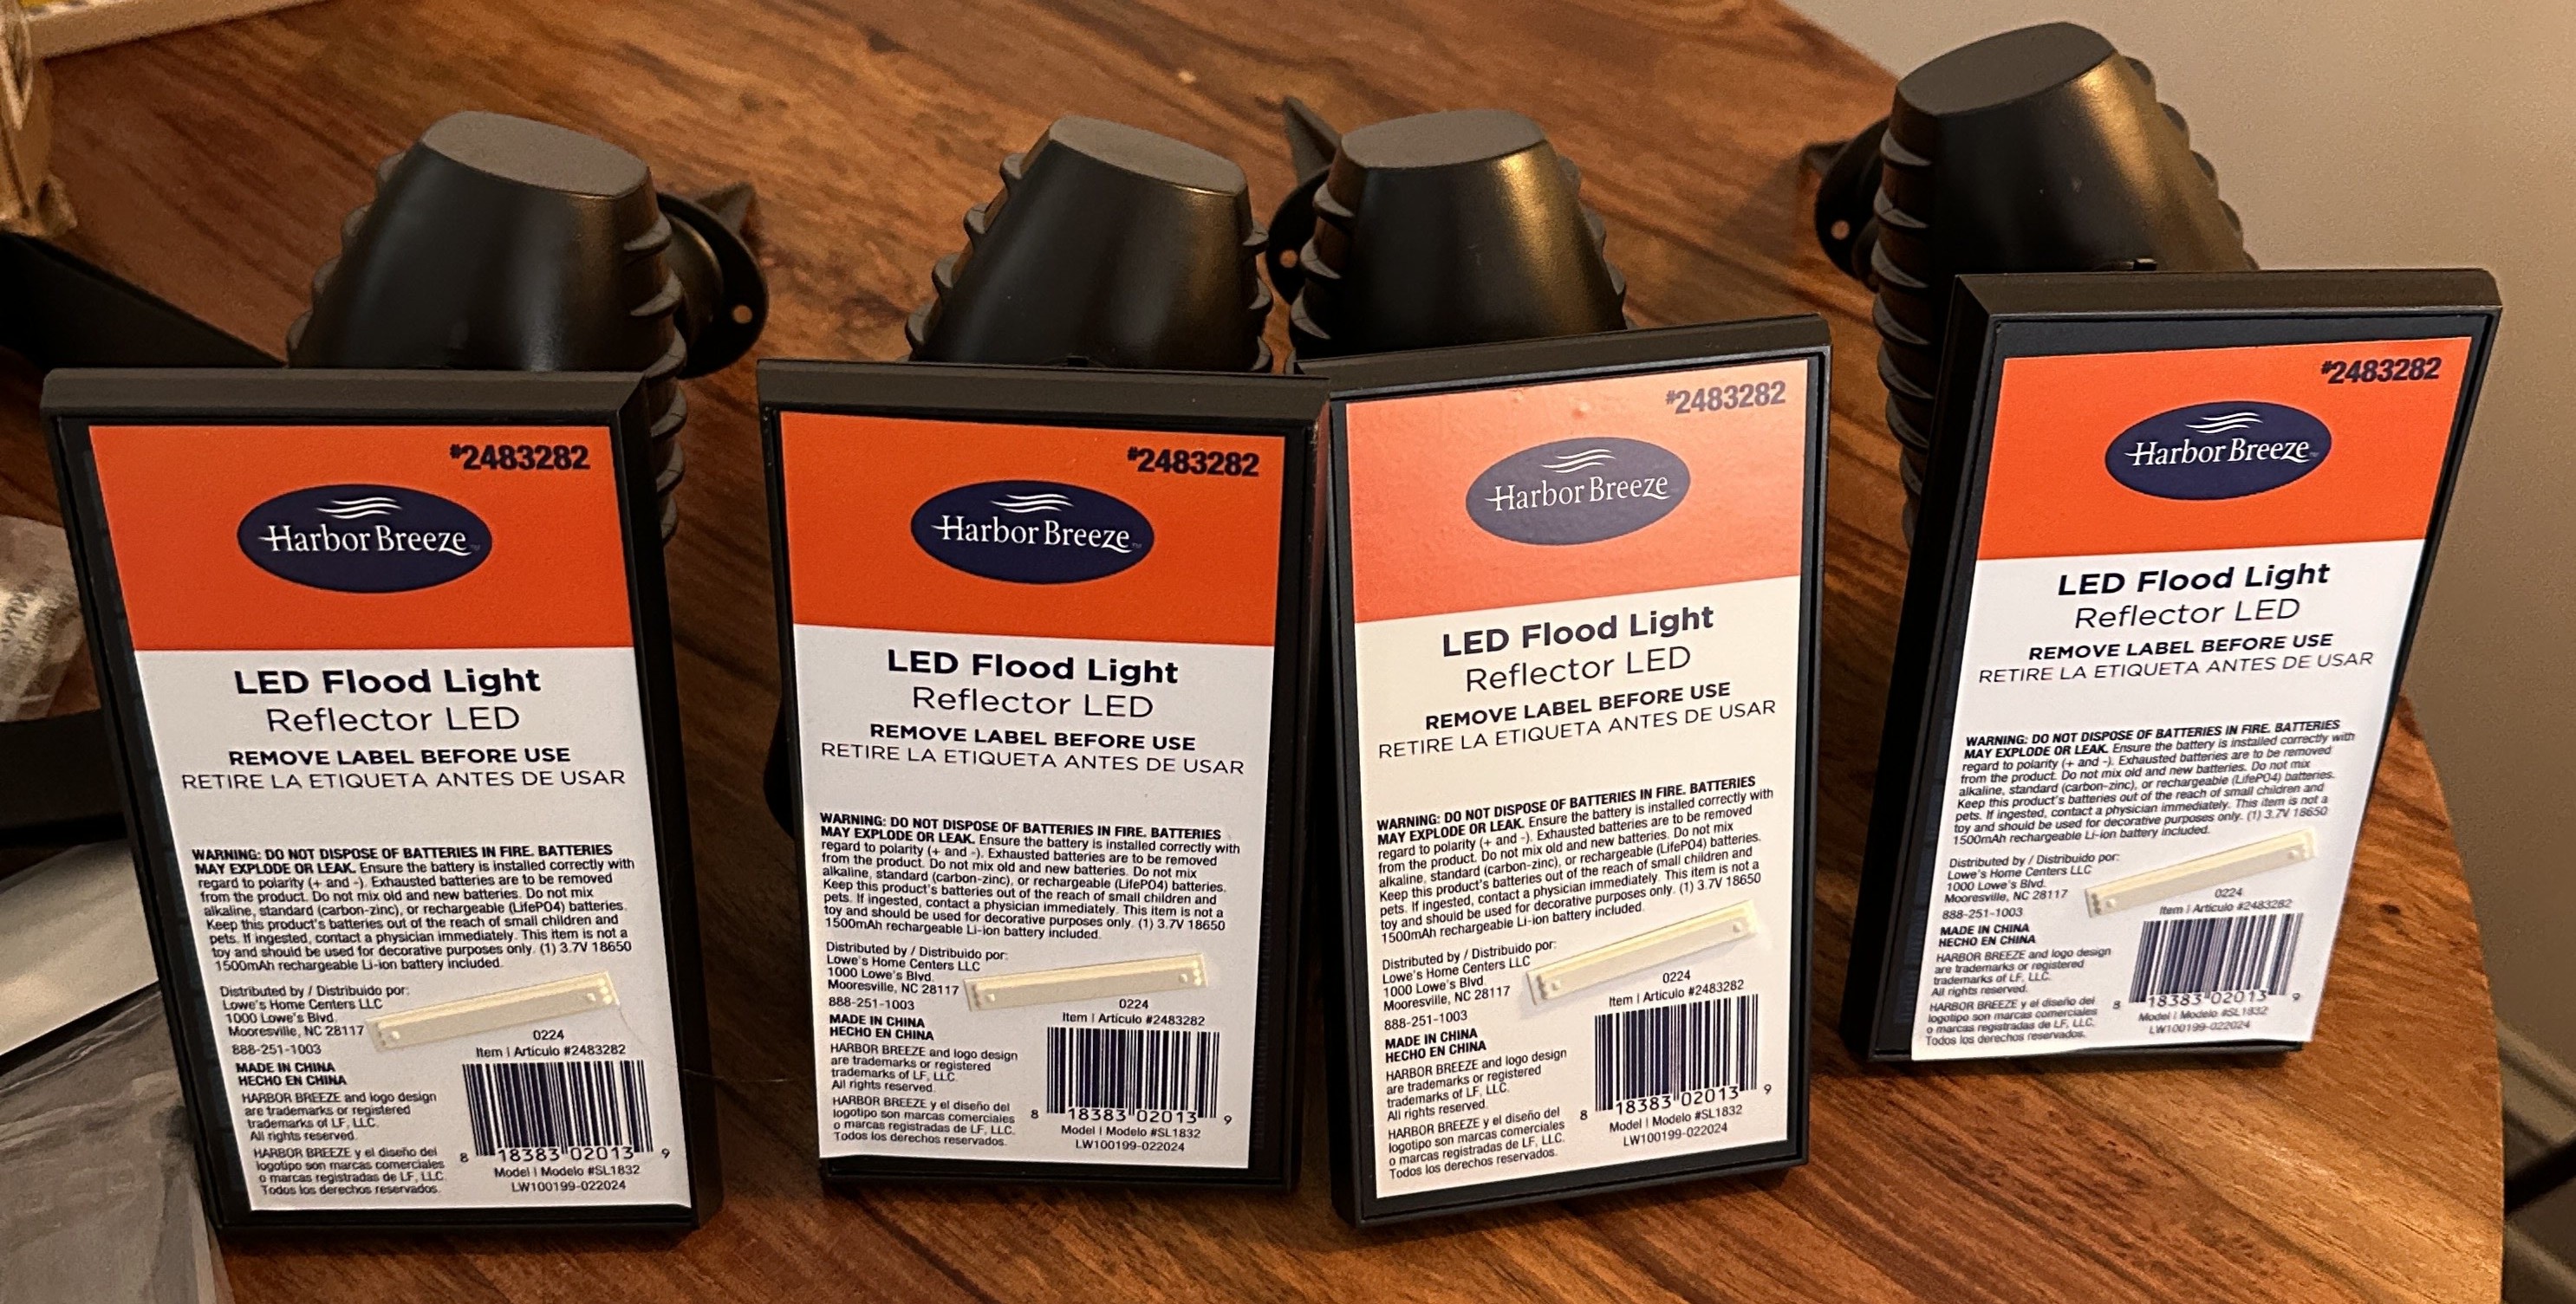
| Harbor Breeze Solar Light | $9.98 | Make sure you verify that the Item number is 2483282. If you purchase in person, the item number will be displayed on the packaging. There is a newer version of this light and whether it works with this hack has not yet been verified. |
| Heltec GT-800 868, 915 MHz Whip Antenna | $2.99 | These are cheap clones of the MuziWorks 17cm Whip Antenna that have tested just as well. You can also use the more expensive 8dbi antenna from the Medium Price Solar Node, but in Philly this will be all that is necessary for a roof node. |
Essential parts cost: $37.96 + shipping
Parts you may/may not need or already have laying around
I break this section out because 1) you may already have some of these parts laying around, 2) you could get many of them individually for very cheap if you buy local, 3) if you do have to buy online and in bulk, you will have some on hand and they will not contribute to the cost of your next build, and 4) you may not need some of these parts.
| Parts | Price | Description |
|---|---|---|
| IPEX to SMA Female Cable | $6.94 for 2 | The RAK kit comes with a cable, but it’s not long enough if you intend to run the antenna through existing holes. You’ll need a cable that’s at least 8 inches. Make sure to buy a cable that matches your antenna; this one works with the Muzi antenna from above. |
| JST PHR-2 2mm connector | $8.39 for 20 | The WisBlock board uses a 2mm JST connector. You will need one of these to solder to the solar board and connect to the Wisblock battery terminal. |
| Waterproof Sealant | $6.34 for lots | You will need to seal up some holes in the case to make them waterproof if you want to install this outside. You can also get this from Lowes if you want to reduce shipping costs, just make sure the variety you go with works with plastic. |
Total cost: $59.63 + shipping (or about $42 per node if you make lots)
Instructions
- Before opening up the node, make sure the power button is off
Press the power button and verify that the light comes on, then press it again to power it off. If the light doesn’t come on, charge it up and then make sure it does.
- Open up the node
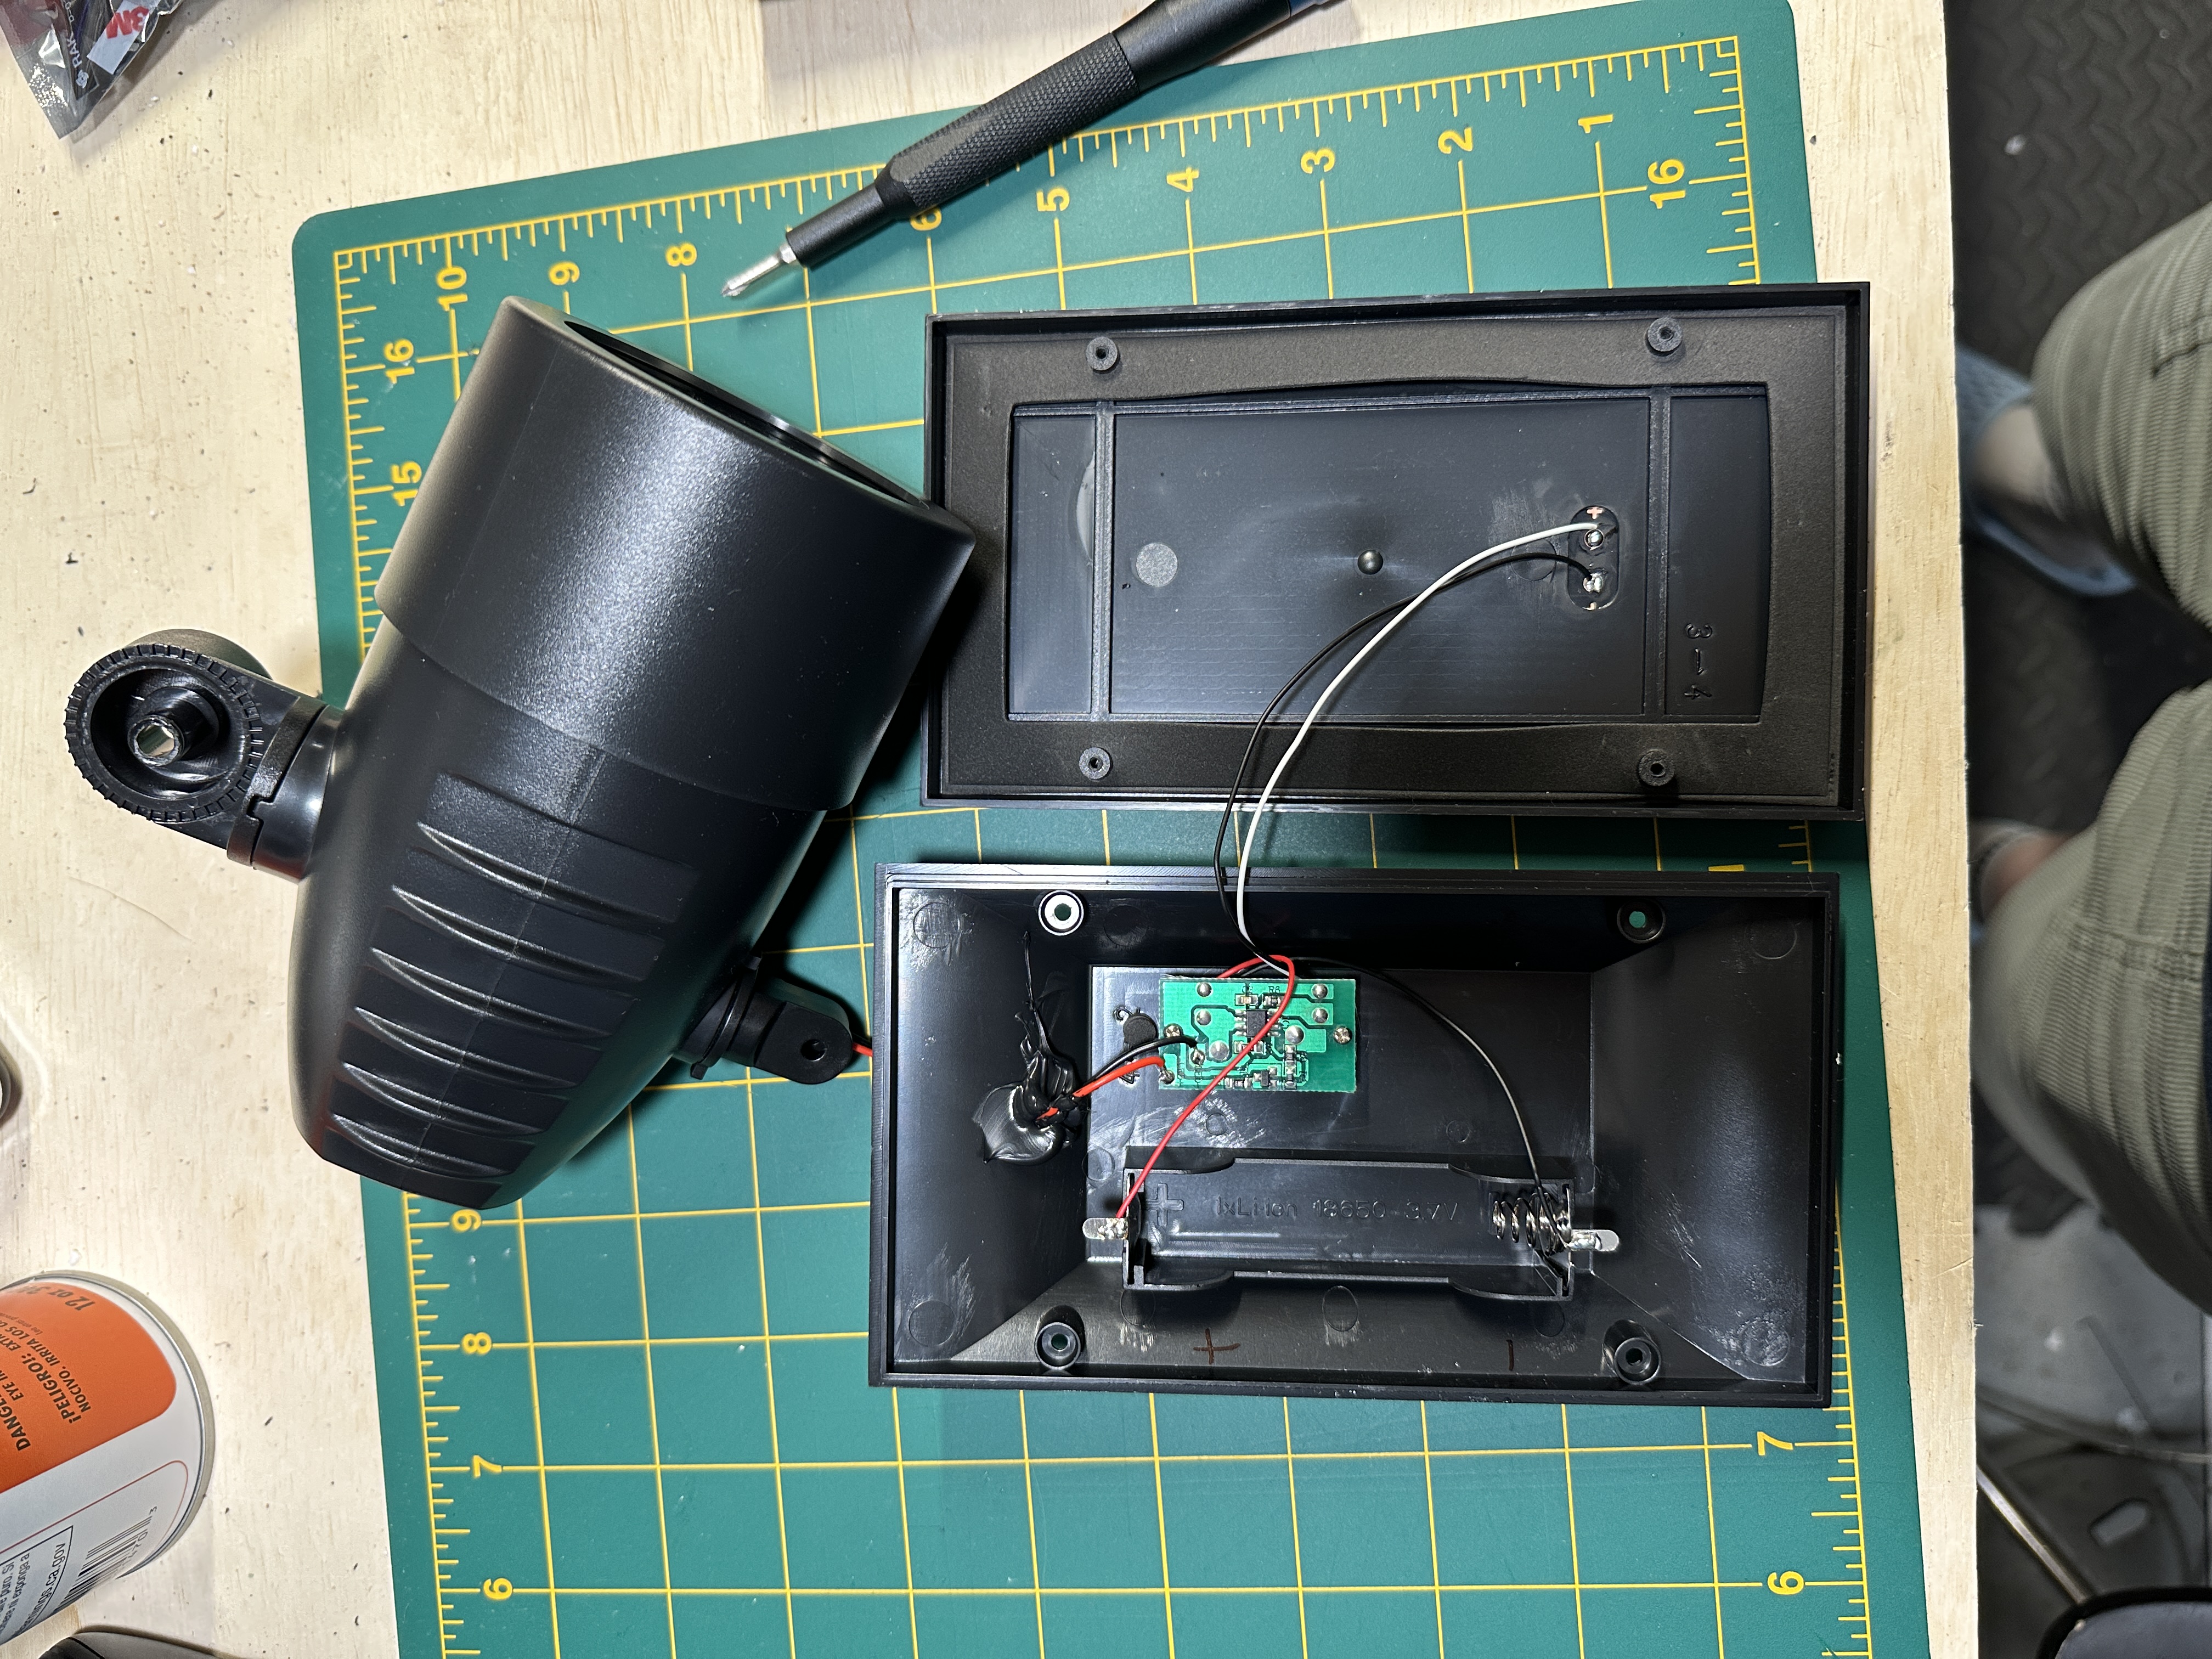
Remove the battery and turn the solar panel upside down on a flat surface to ensure there won’t be any electricity running through the circuits while you solder.
- Cut and remove the cables to the light. Remove the weather-proofing here, too.
You can cut them close to the circuit board.
- Determine which is the positive and which is the negative side of the JST connector
Don’t skip this step! The JST connectors don’t have a standard and the one’s you ordered are likely BACKWARDS from the standard that RAK uses. This means it is likely that the red cable is negative and the black cable is positive. Plug the JST connector into the Battery connector on the RAK, look at which color is on the side with the plus symbol. This color is positive and the other color is negative.
- Solder the JST connector to the light circuitry.
Solder the negative end of the JST connector to the spot marked negative and the positive end to the tab on the positive side the battery. You might need the JST connector cable to be a little longer (do a test fit before soldering), if so you can use the wire from one of the extra female JST cables that you don’t need.
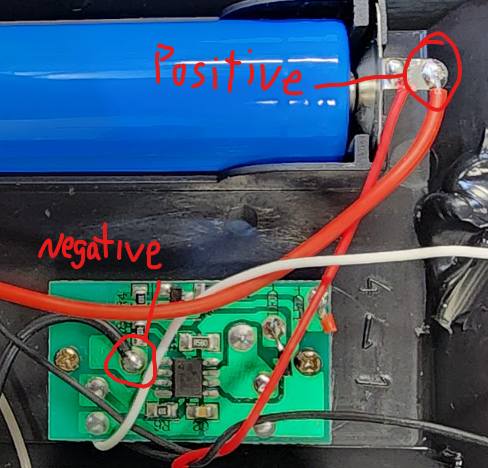
The above picture is instructions I found online, the color of your wires may be reversed!
- Make sure you haven’t accidentally turned on the power button and plug in the JST connector to the battery connector on the RAK
Warning: if you accidentally power on your RAK board without the antenna connected, you can irreversibly damage the board!
To be safe, you should connect your antenna to the RAK before plugging the JST connector into the battery connector. Verify that the RAK didn’t power on (that the power button is still off) and then unplug the IPEX connector and feed it though the hole where the light cables used to be, then plug it back into the RAK. Then put the battery back into the battery holder and hit the power button.
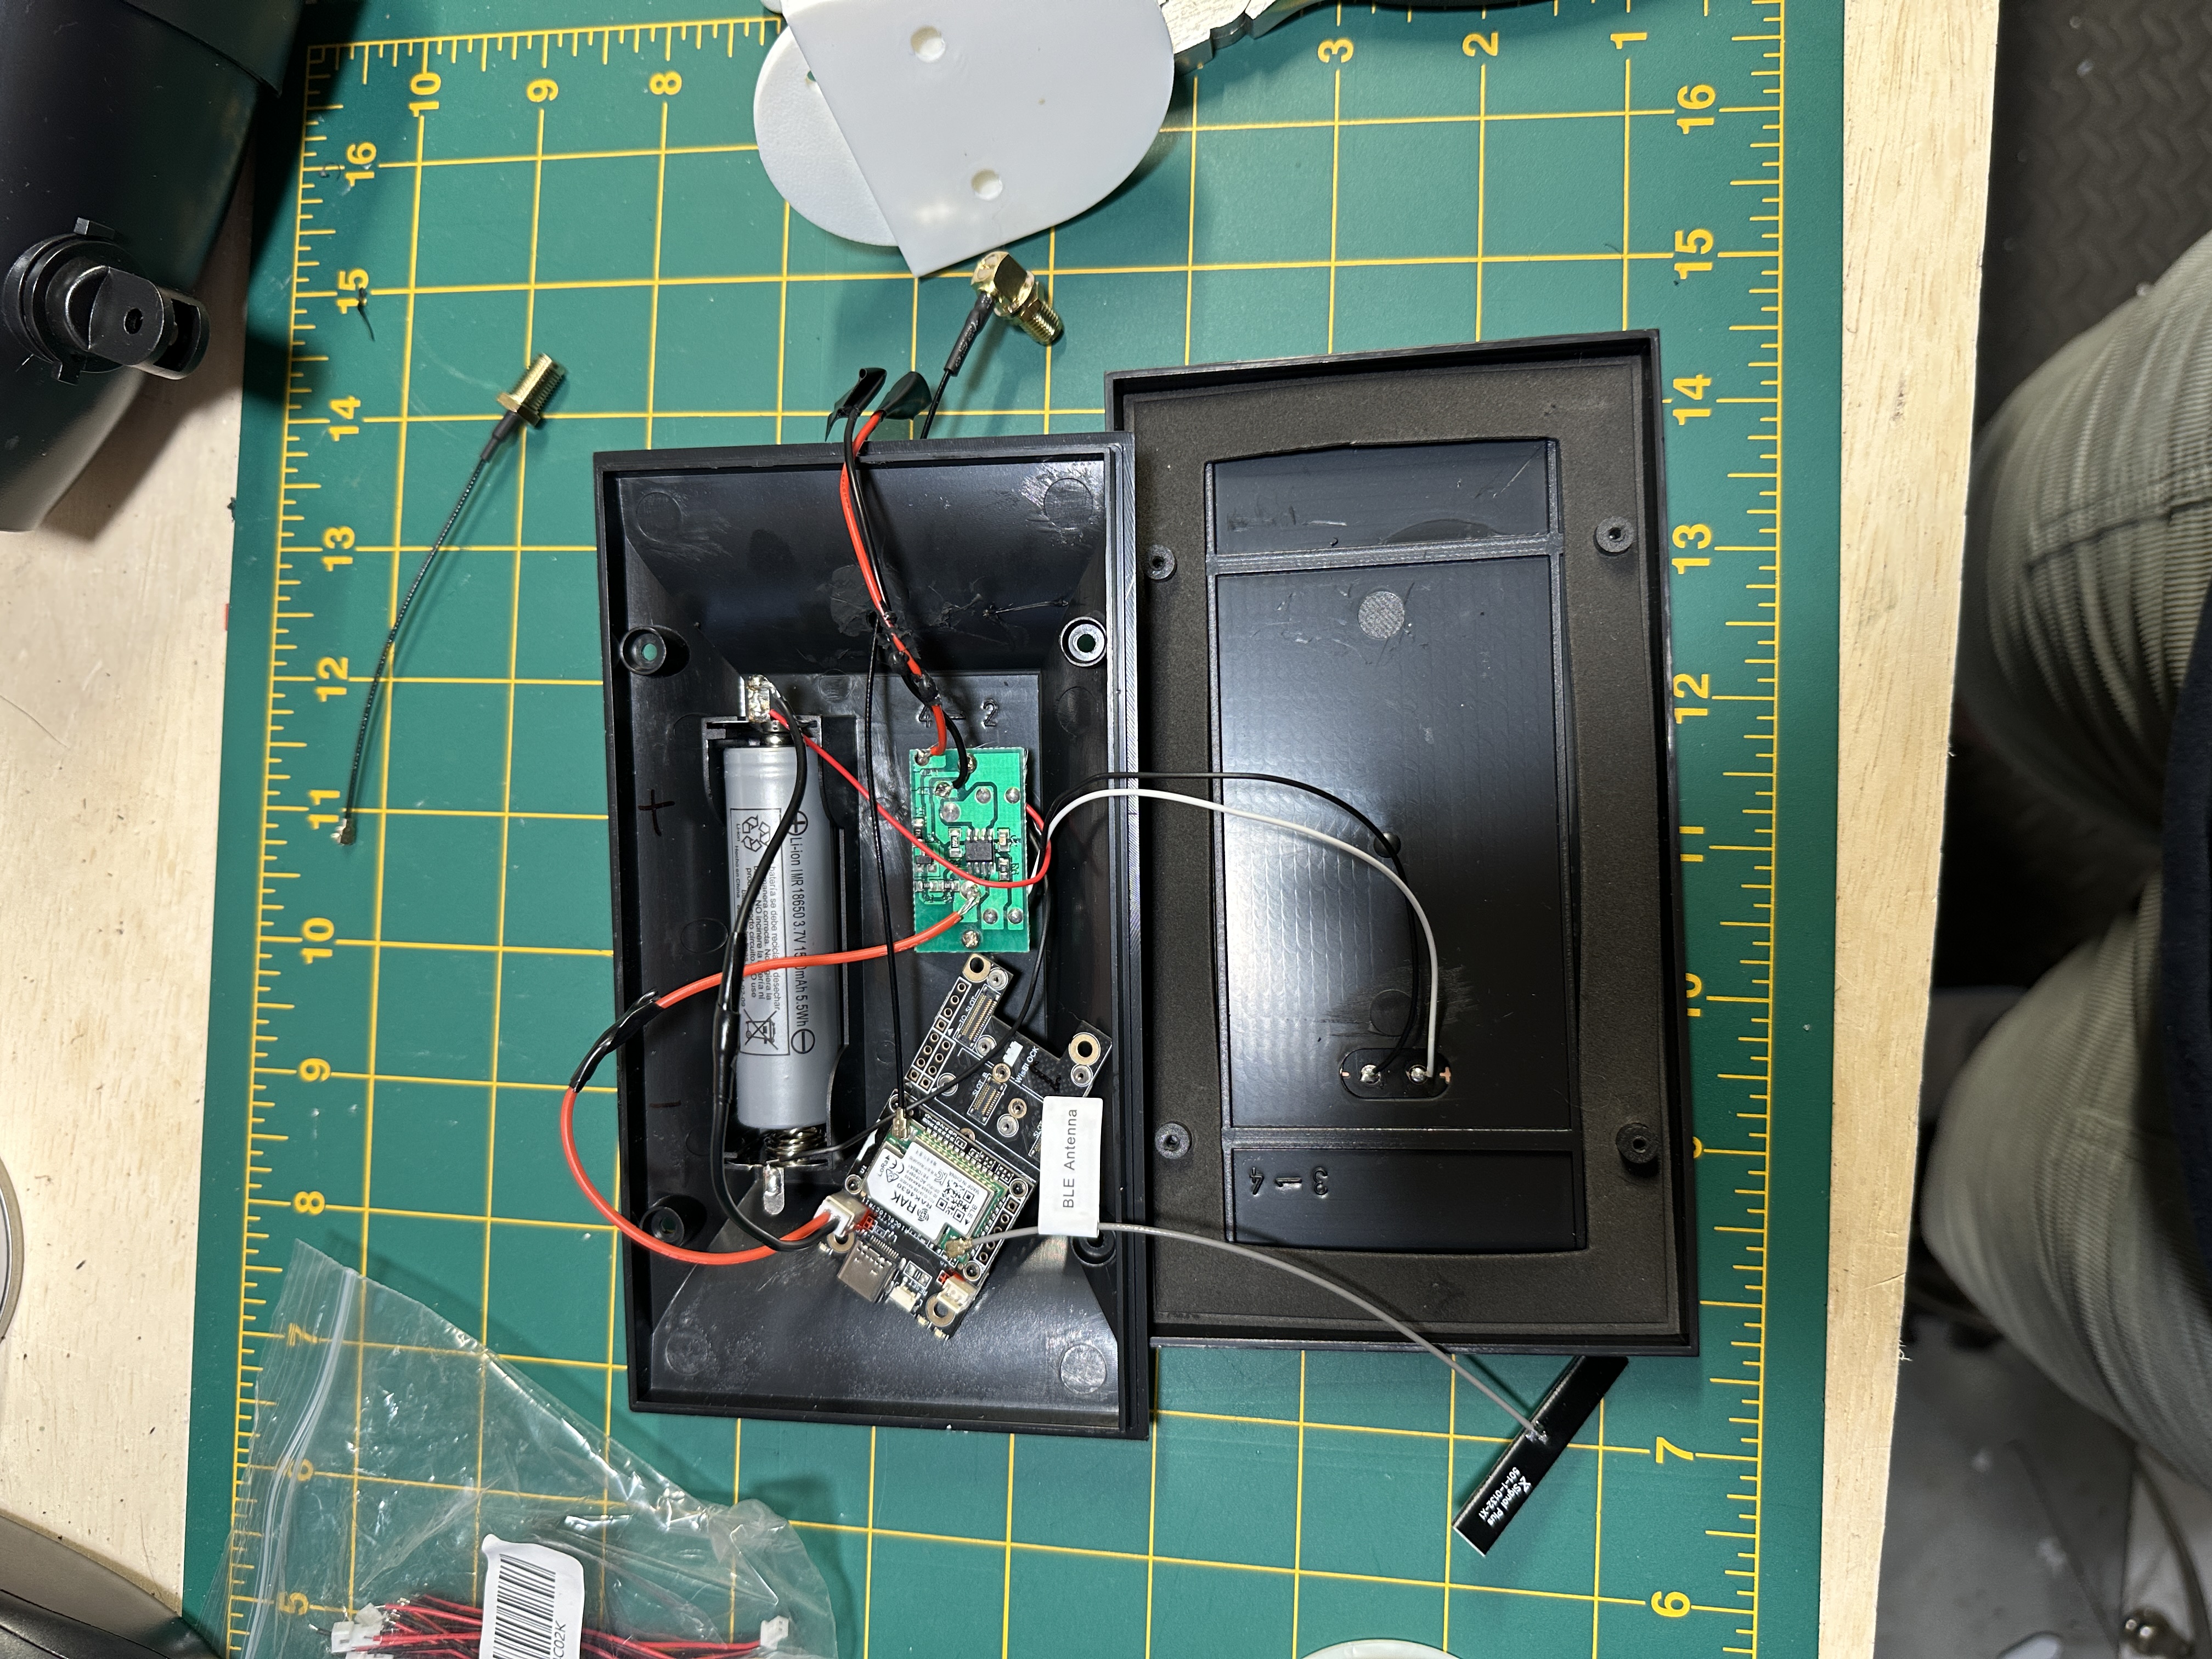
You can see the original IPEX antenna cable at the top of the image, it was not long enough to reach back out the pre-drilled antenna cable hole.
You can also see that in my case, the wire running to the positive end of the battery is black. That’s because my JST connector is reverse from the standard and my positive wire is black. In this picture I left the original light cables long in case I wanted to try a different variation. However, I got lucky and this variation worked well!
- Waterproofing
You will want to waterproof any holes that you’ve made in your case, including the original one that the light cables were running through. I also ended up adding a little extra sealant to the screws on the rear of the case.
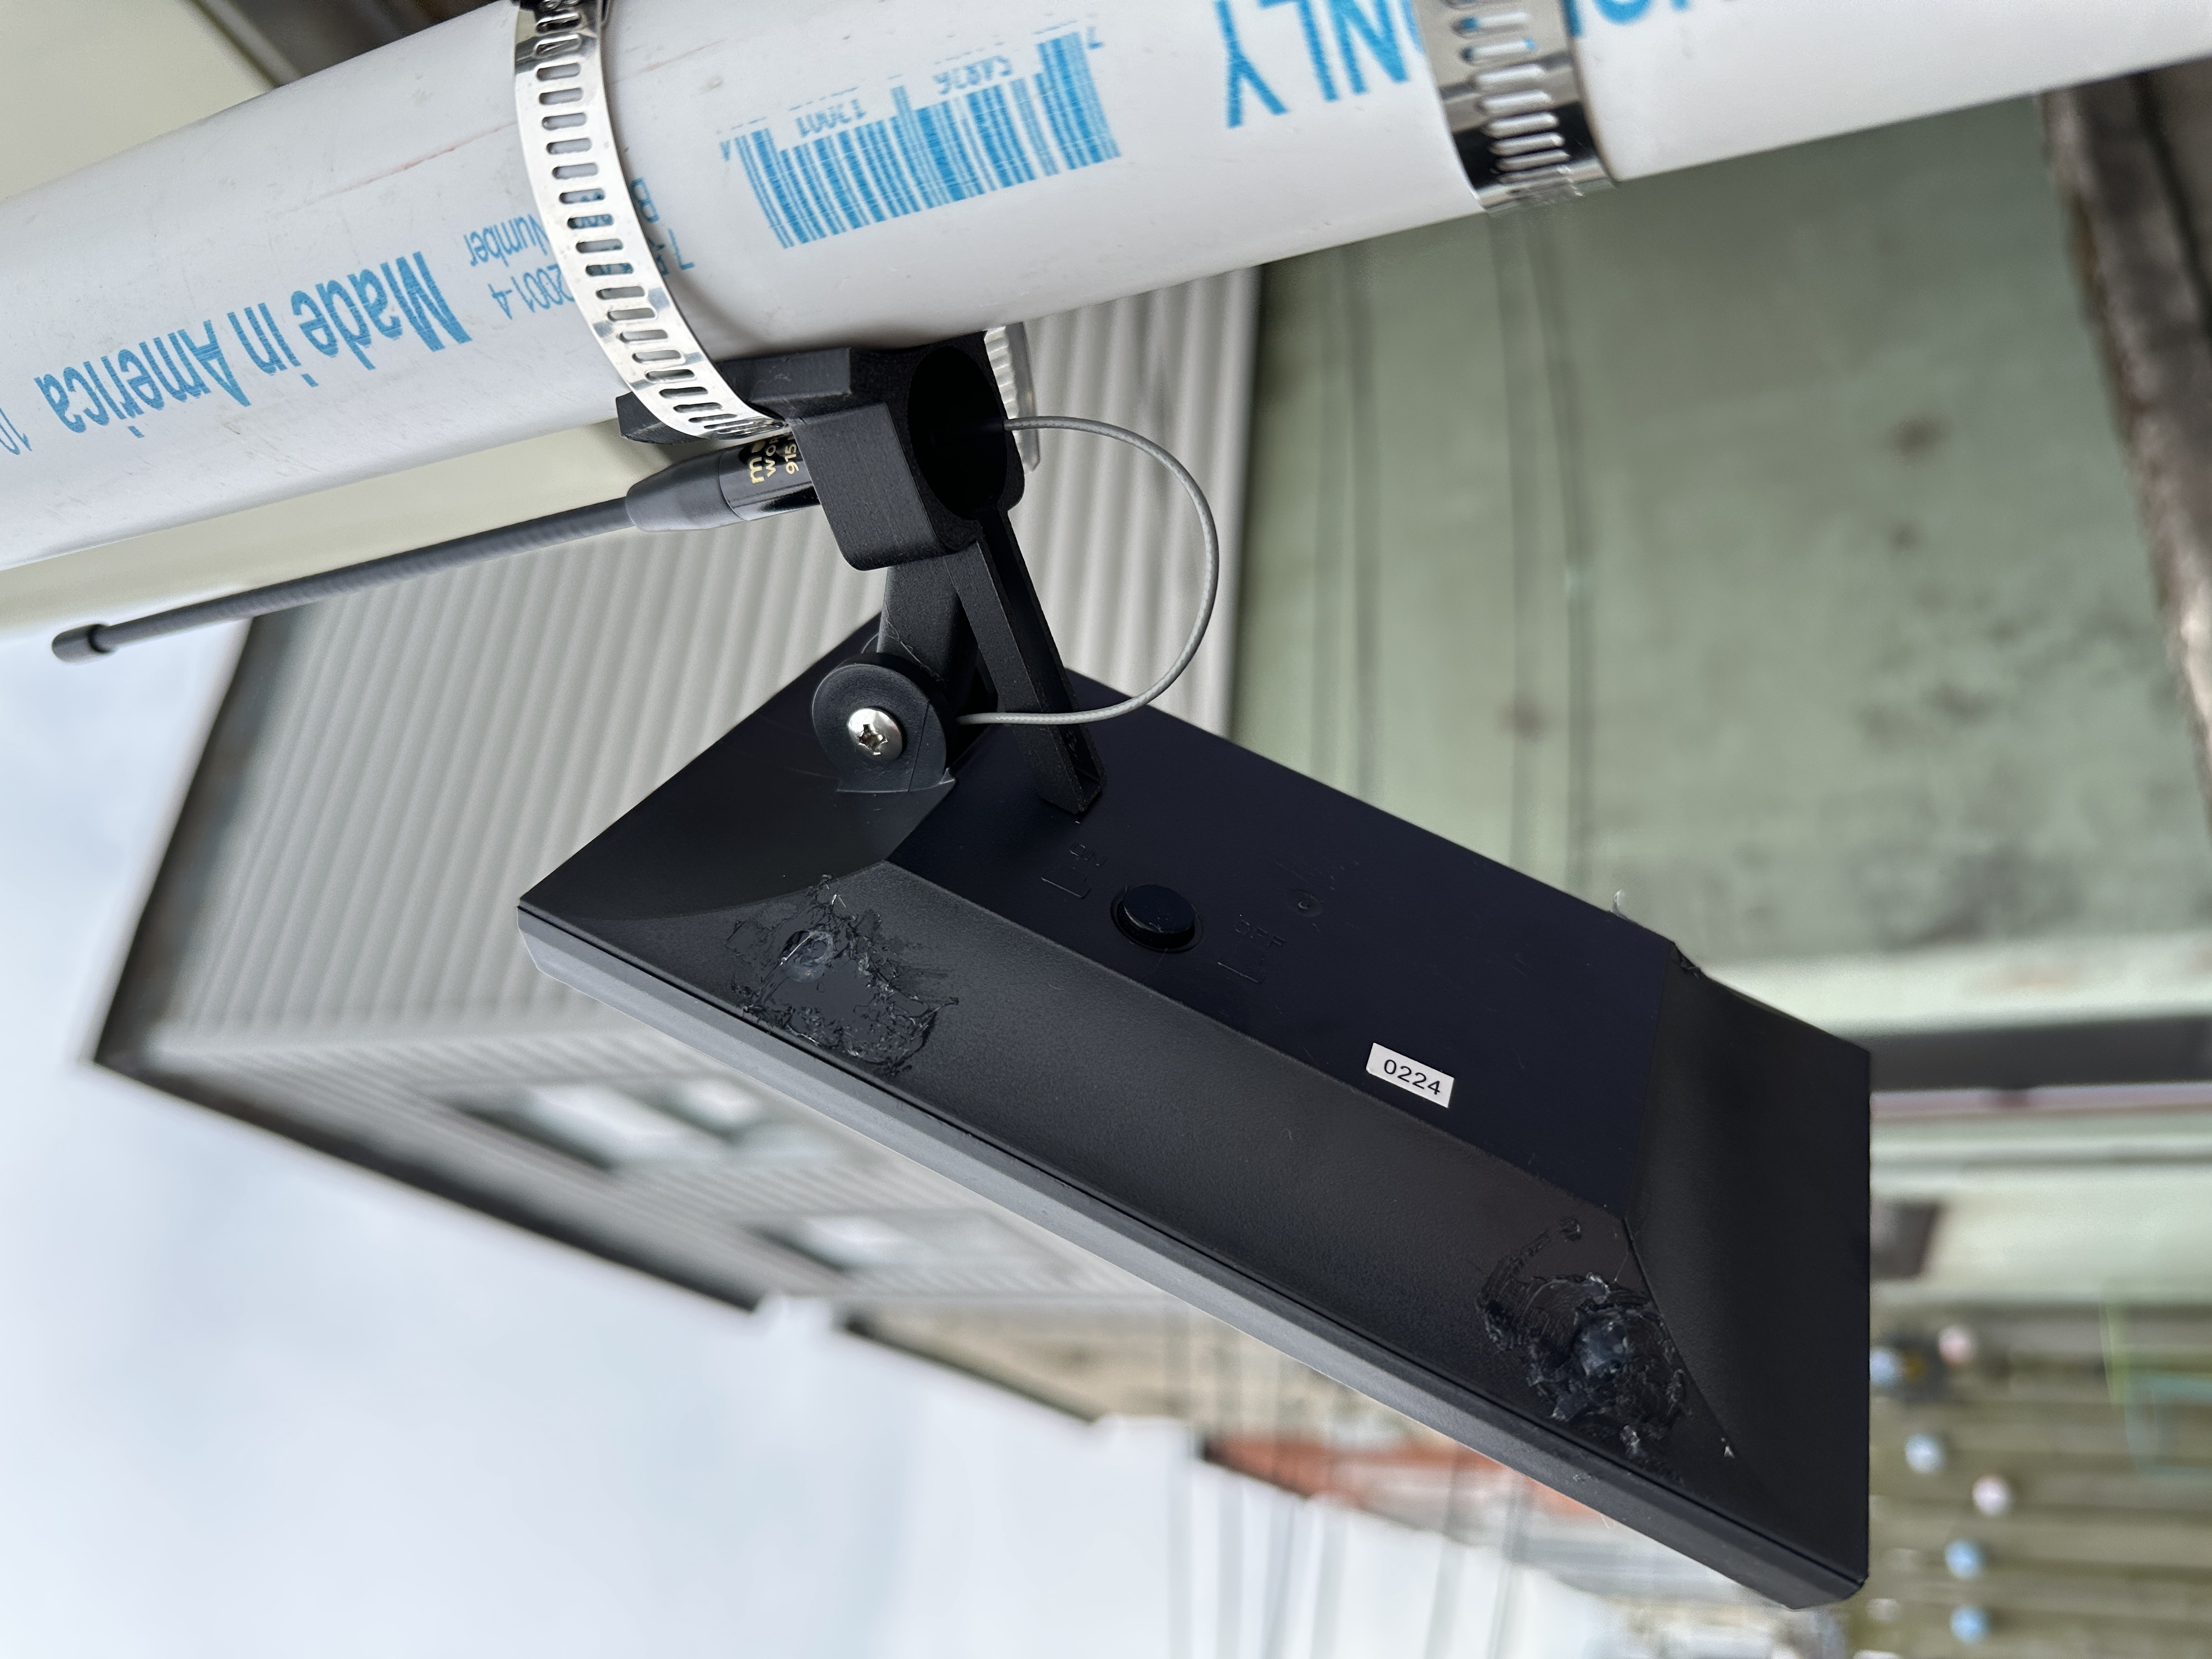
Mounting
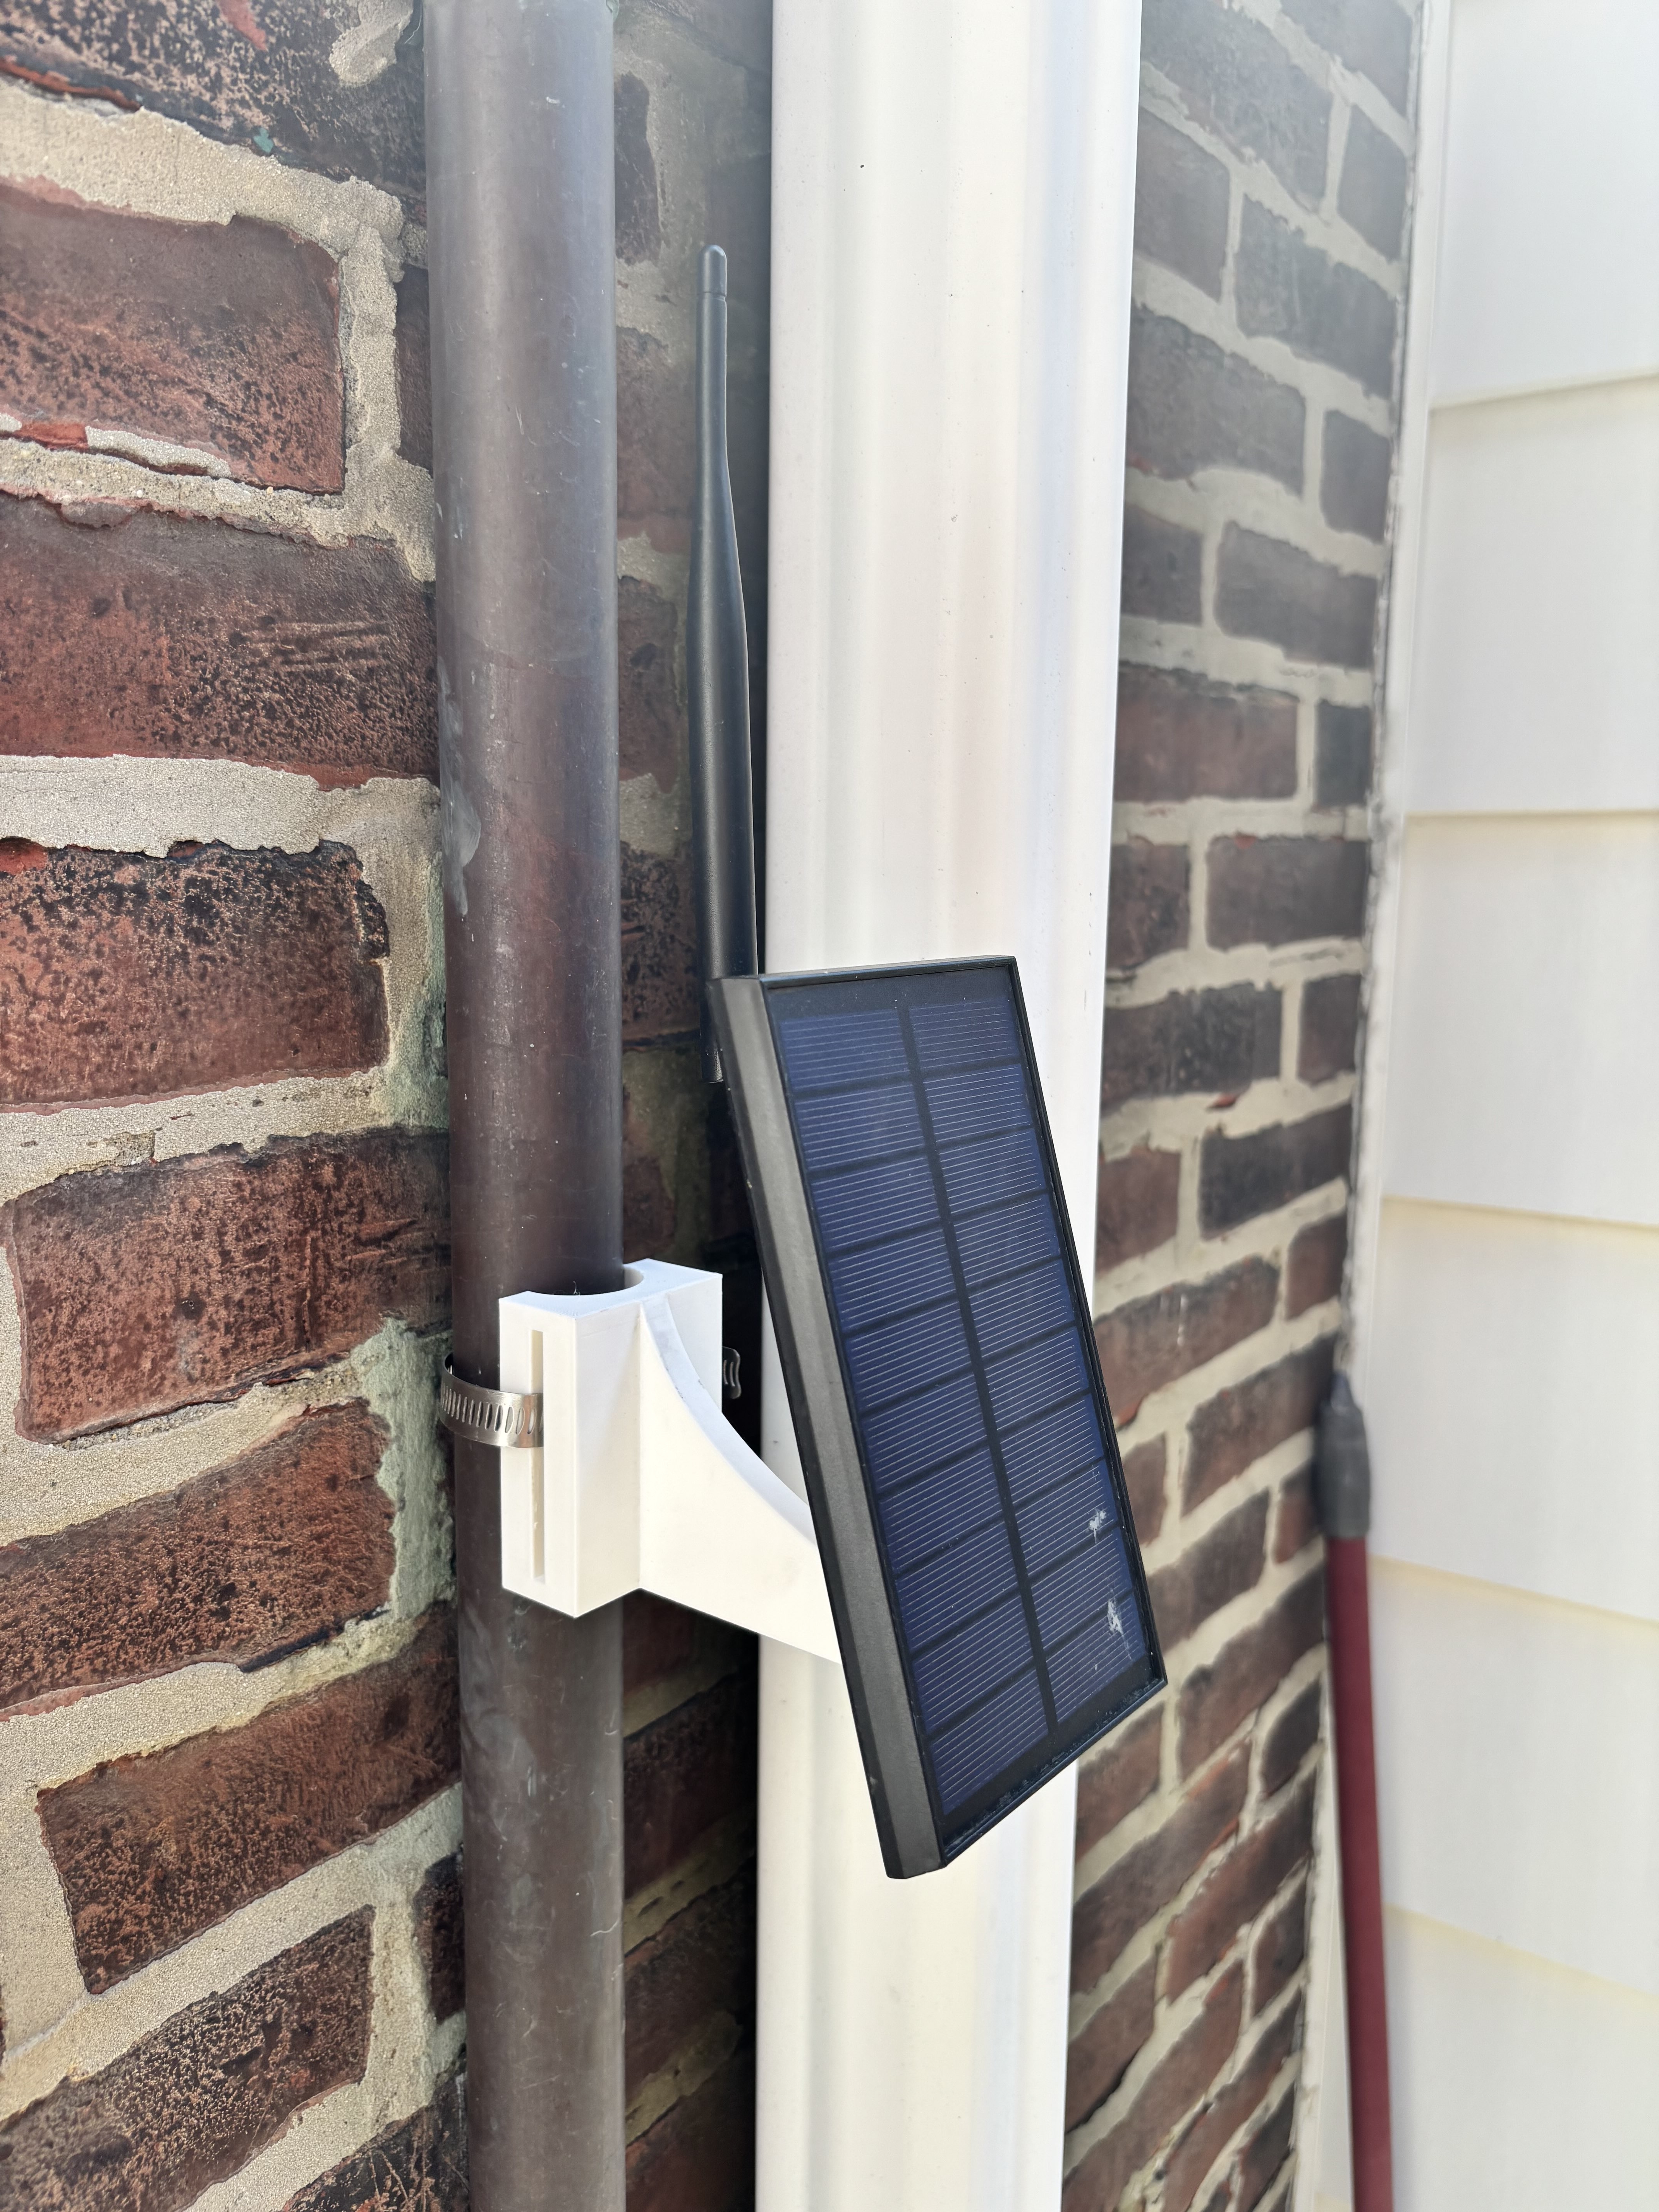
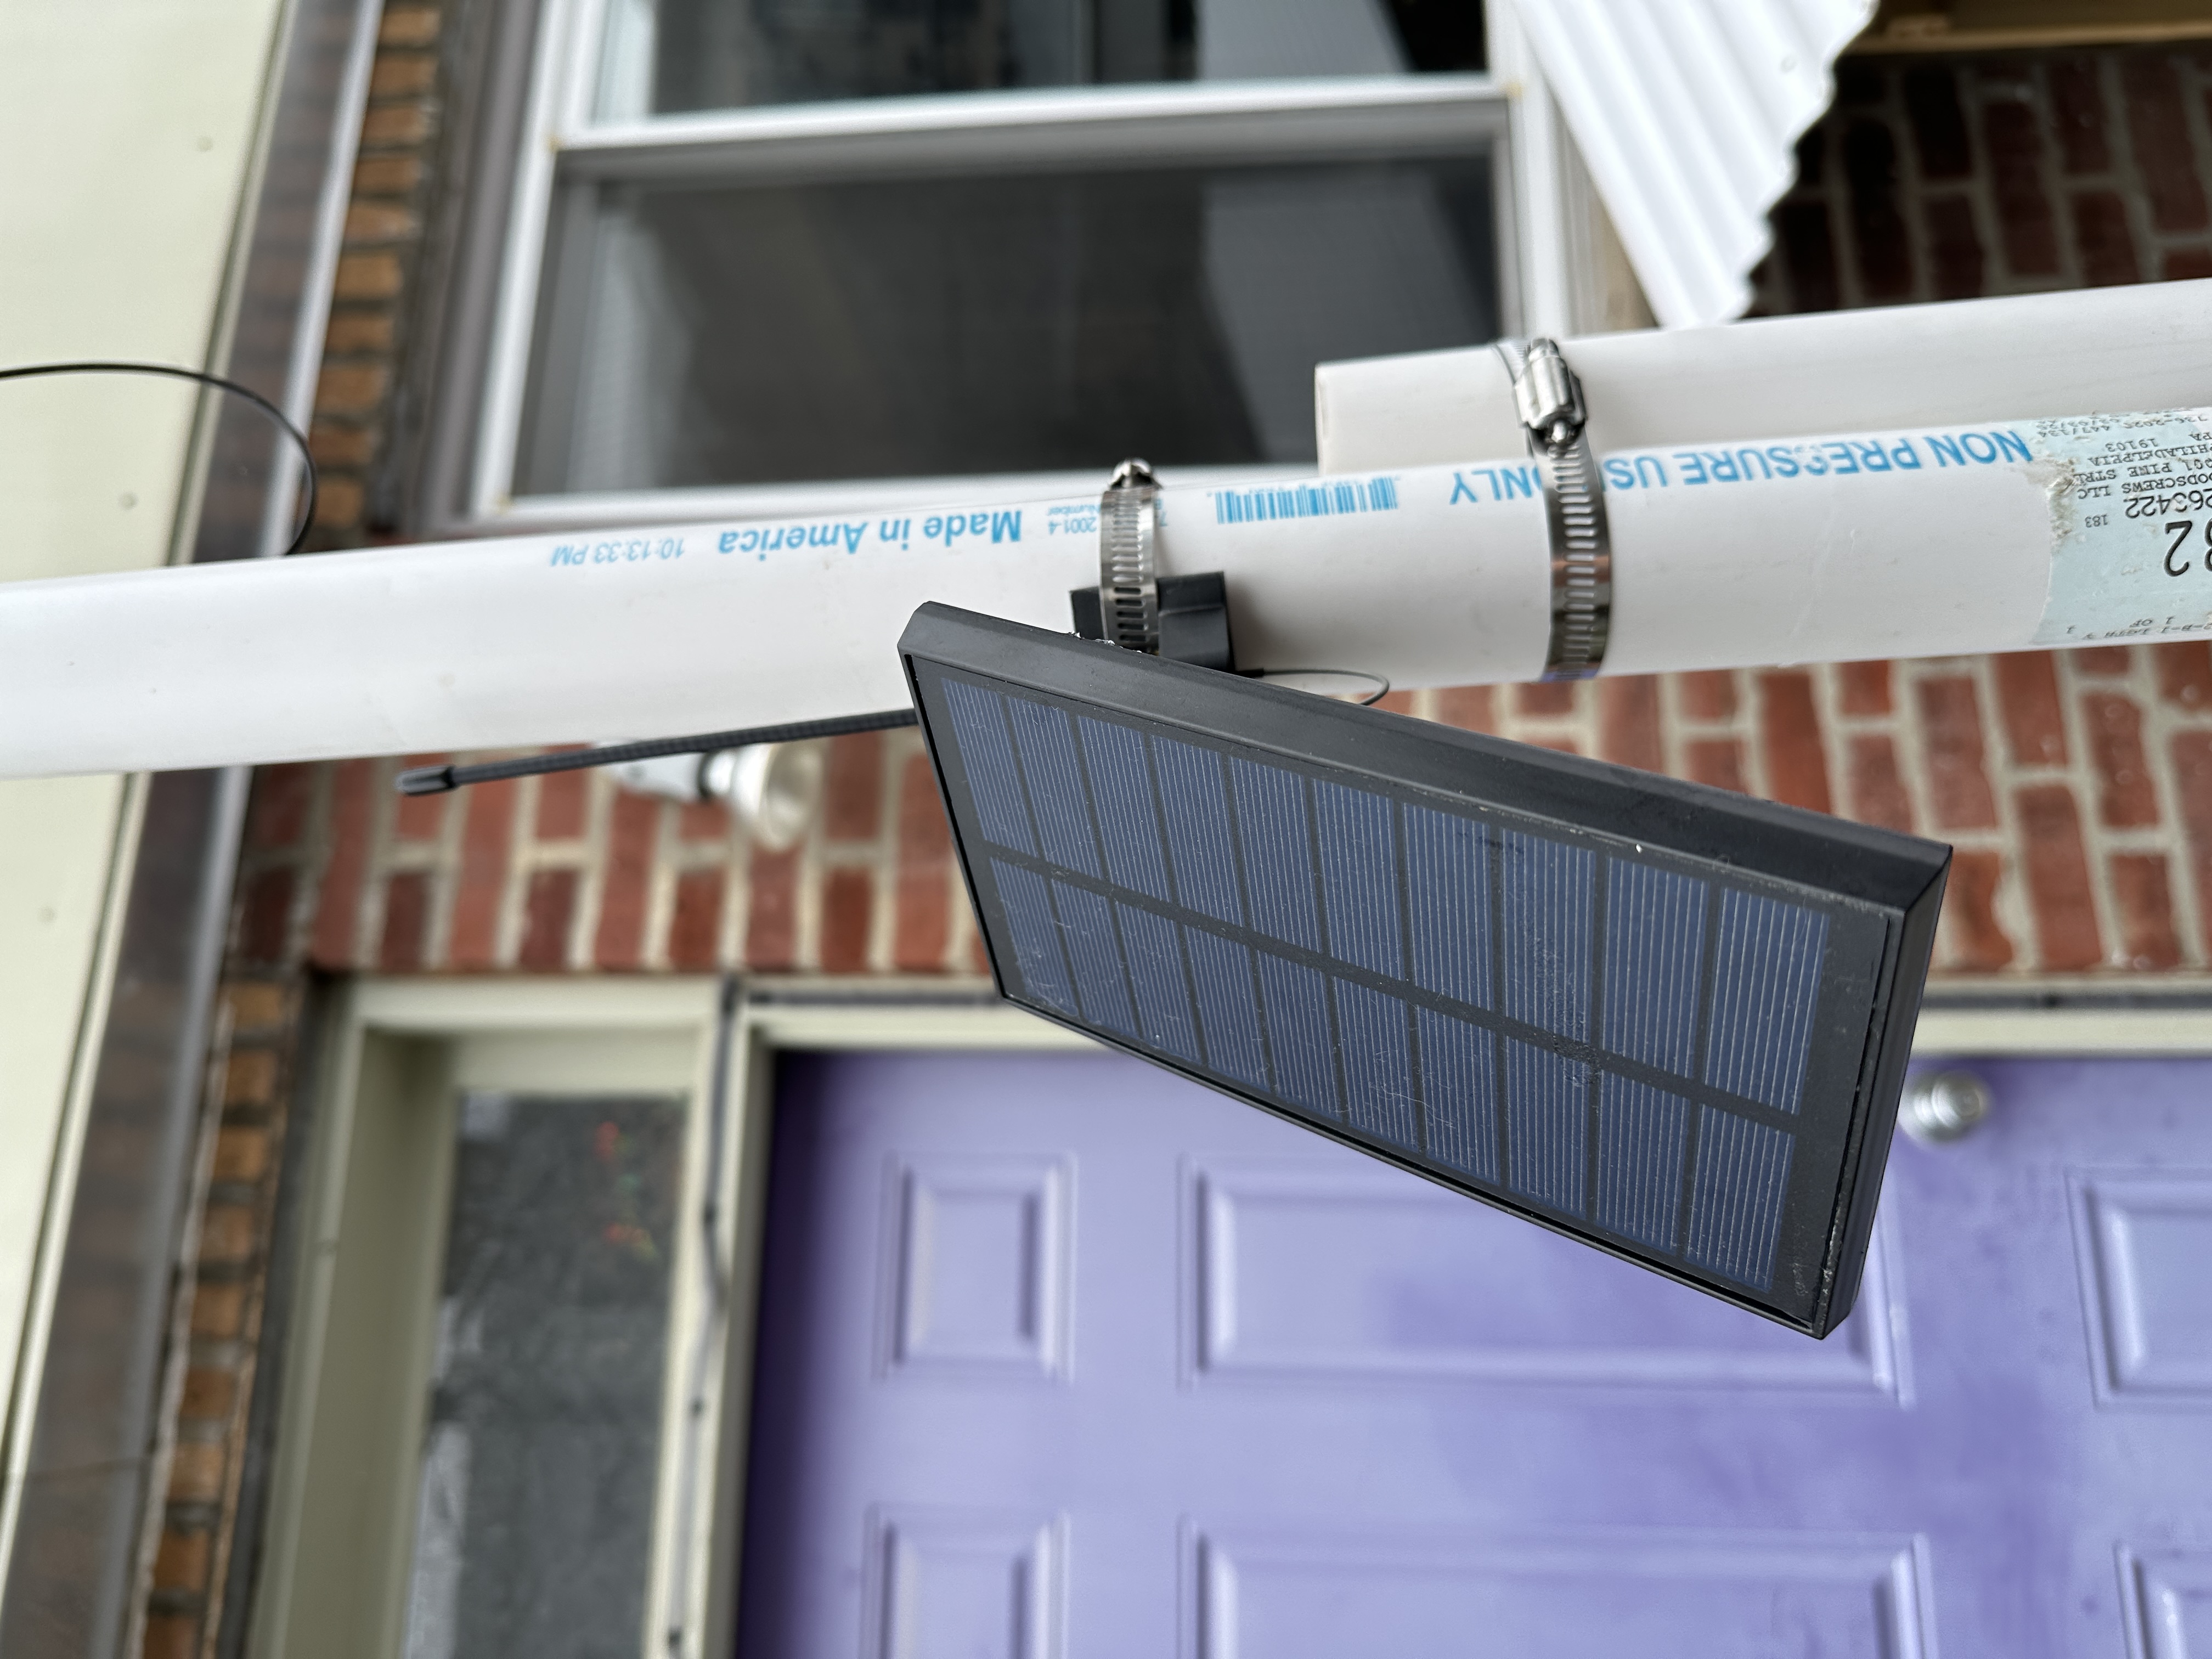
If you have a pole to mount to, you may be interested in printing a remix of the original 3D printed mount that I made. If you plan to mount to wood or something else you can screw into, the original 3D printed mount would be better.
Many of the 3D printed mounts online, such as the example below that another Philly Mesh member made, do not include an antenna mount, so you’re required to drill an antenna hole directly into the case. Oftentimes this requires the antenna to be bent 90-degrees. The Muzi antenna I linked does not offer this option and in practice many of the cheap plastic antennas have reduced range when bent. Make sure you test your antenna and confirm that it still performs well when bent, if that’s how you plan to use it.