Medium Priced Solar Node
I’m calling this a “medium priced” node because I didn’t really budget and just bought parts as they became necessary. There are also many examples of cheaper nodes, such as the Low Priced Solar Node (Harbor Breeze). The low cost node depends on the availability of the Harbor Breeze solar lights, whereas this node uses more generic parts that will almost surely be available in the future.
For now, here’s a reasonably reliable node that costs around $110 for just the essential parts.
Parts List
Essential Parts
| Parts | Price | Description |
|---|---|---|
| WisBlock Starter Kit | $24.99 | This is the Meshtastic node. You want the RAK19007+RAK4631 (not -R) version. Pick the frequency for your region, USA is 915. |
| Unify Enclosure 150x100x45mm | $46.00 | This one comes with pre-drilled antenna holes and is the right size for our RAK4631 and some batteries. |
| Enclosure Mounting Kit | $4.00 | I picked type A, the vertical mounting version. This is optional, but great if you want to mount on a pole. Keep an eye on the recommended pole diameter (65-89mm). |
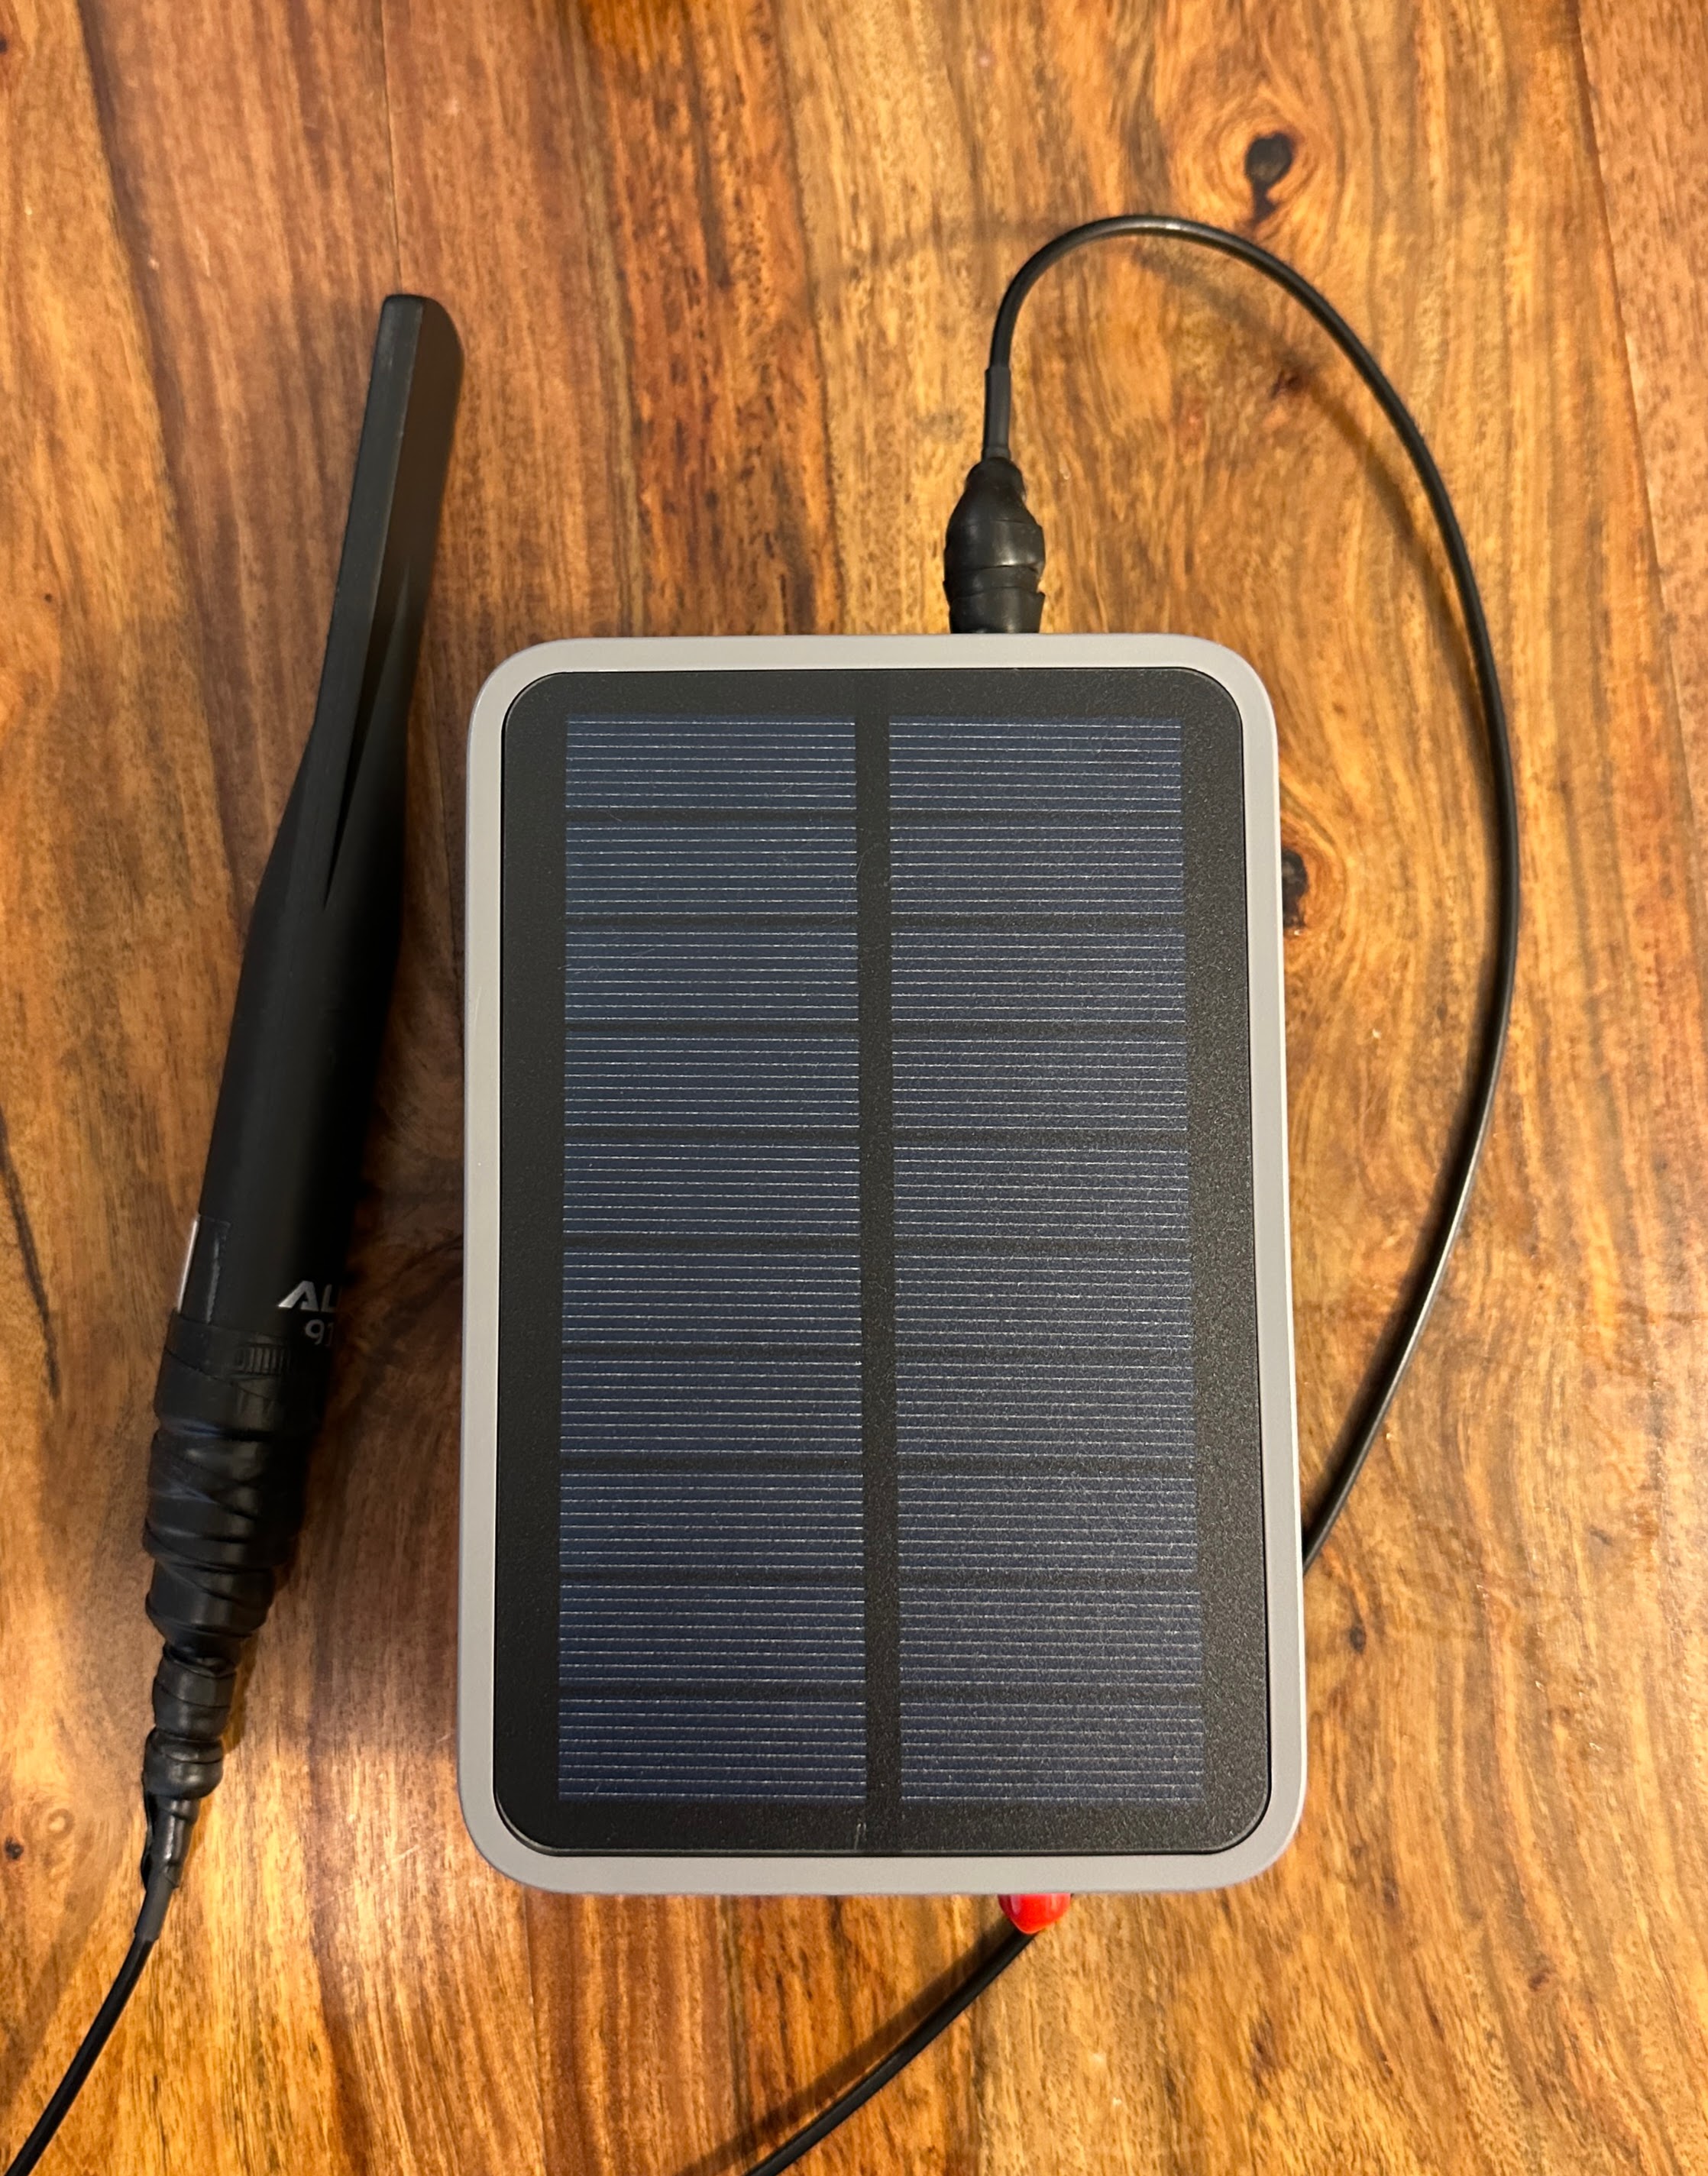
| Alfa 915 5dbi antenna | $17.97 | I picked this one because I’ve tested a couple and they seem to be well-tuned and the quality seems consistent. YMMV. |
| Adapter from RP SMA Female to N Type Male | $8.99 | The enclosure comes with a waterproofed RP SMA female adapter (reverse polarity) which is atypical, and the Alfa antennas are N Type Male. The included is an example, but you may also want one with a length of cable between them so as to separately attach the antenna to wherever you’re mounting it. |
| Two 18650 rechargeable batteries | varies, maybe $10? | I bought mine from Amazon, but this is not recommended. Check out this list that someone made of reputable distributors. |
Essential parts cost: $111.95 + shipping
Parts you may already have laying around
I break this section out because 1) you may already have some of these parts laying around, 2) you could get many of them individually for very cheap if you buy local, and 3) if you do have to buy online and in bulk, you will have some on hand and they will not contribute to the cost of your next build.
| Parts | Price | Description |
|---|---|---|
| Antenna Tape | $8.80 | Although the antenna connector on the top is waterproofed, your adapter connections are not. This is a great option to waterproof your connections. |
| Battery holders | $7.99 | I bought this pack of a million from Amazon. I had to solder them in series. If you’re not good at soldering find one that you don’t need to solder. Make sure the ones you buy are in parallel (not in series!). When I doubt, check the voltage with a multimeter before installation. |
| JST PHR-2 2mm connector | $8.39 | The WisBlock board uses a 2mm JST connector. Depending on what kind of battery pack you buy, you may need to solder these JST connectors on. |
Total cost: $137.13 + shipping
Picking a Meshtastic Node
nRF Meshtastic devices (like the RAK4631) are far superior to other types when it comes to power efficiency. While an ESP32 Meshtastic device (like a Heltec v3) might last 24 hours on a battery, that same battery will power a RAK4631 device for a week. For that reason, for solar powered devices, the RAK4631 is a great pick.
You may also wish to add environmental sensors to your RAK4631. See this page on Meshtastic’s website for supported sensors. This will allow your device to report measurements like temperature and humidity. Keep in mine those measurements will be from inside the enclosure, so they’re better for reporting the status of your node’s environment than the outside weather.

What about high/low temps?
18650 batteries generally have a stated temperature range for charging between 0 and 45C (32 to 113F). While your summer might top out at 90F, the temperatures inside a sealed enclosure in the direct sunlight might be closer to 135F. I’ve actually seen nodes in the Pioneer Valley reporting that temperature in the summer. On the other end of the spectrum, most of North America reaches below 32F in the winter for weeks at a time.
From what I understand, these recommended charging temperatures aren’t as big of a deal as they might seem to be at first glance. A group from Alberta wrote a great article about their node deployments in the frozen Canadian winters. They recommend overspeccing the battery capacity (three 18650s instead of two) in your node due to reduced charging performance during the winter, but other than that their nodes are pretty much fine. There’s no long term capacity effects.
I’m not as worried about high heat either. I’m of the opinion that I’m likely going to have to open up this node probably once a year to do firmware updates, so I might as well take that opportunity to replace the 18650s as well. If you buy them in bulk, the cost will be closer to $2-3 each, so it’s a relatively small maintenance cost.
Installation Location
The best place to install a node is very high up. Unfortunately for most of us, this means mounting the node somewhere like the roof, which is difficult to get to.
Wherever you mount your node, plan to have to update the firmware at least once a year, perhaps more often.
Updating firmware
Currently there are two options to update your firmware:
- Connect to the device via a USB-C cable
- Connect to the device via Bluetooth and update OTA.
Option one isn’t very practical in a solar node: if you’re already keeping your node connected to your computer, why not just power it from there? Some builds install a Raspberry Pi in the enclosure and connect that to the node via USB-C, but Raspberry Pis are very power-hungry and not a good fit for a solar node. Neither will work well for this particular build.
Option two is outlined in the Meshtastic docs here. There are a few disclaimers to consider before trying this. First, as of the time of writing, this only works with the iOS app. And second, if the firmware update fails, you’re SOL. Your device isn’t bricked, but you will need to connect it to a computer to get the firmware back up and running.
There currently are no other options. Even if you power your node via POE, there is no way to update the node via Ethernet. You may be able to power a Pi via POE and use option one from a more suitable location, however it is likely the Pi will not be able to survive summer heat in the enclosure. I am testing that this summer to see. Regardless, the Pi takes too much power for a solar node.
As a result, at least for me, I am planning to retrieve my solar node from its mounting spot and update its firmware about once a year.
Management
If your node is easily within bluetooth range, you can manage it from your phone. However, if your solar node is installed somewhere where it’s inconvenient to connect via bluetooth (say, on the roof of a public building you don’t have regular access to), it’s recommended to set up an admin channel on your node so you can manage it via the mesh.
The Meshtastic docs explain this here.
Other best practices for unattended nodes
If this device is outside the range of bluetooth and you won’t be able to regularly check DMs, it’s recommended that you make sure a casual mesh user will be able to figure out how to contact you. For example, if the node is your roof node and you also have a handheld mobile node, you might want to make the long name “JS Base Station” and the mobile node’s long name “JS Mobile” so users can try to contact you on the mobile node if you don’t respond to the base station. If you have a personal domain or an identifiable username, you could put the URL or your handle in your long name. A recent version of the Meshtastic firmware (2.6.8) allows you to designate your node as “unmessagable”. This is located in the User section of the settings.
In Philly, all of our phillymesh.net nodes are named as such! This solar node is phillymesh.net-08. We also add secondary and tertiary management keys of other members so that if one member is out of town or unable to reach the mesh, the nodes can be administered by other trusted members.
All of these best practices make the mesh a friendlier place!
Putting all the pieces together
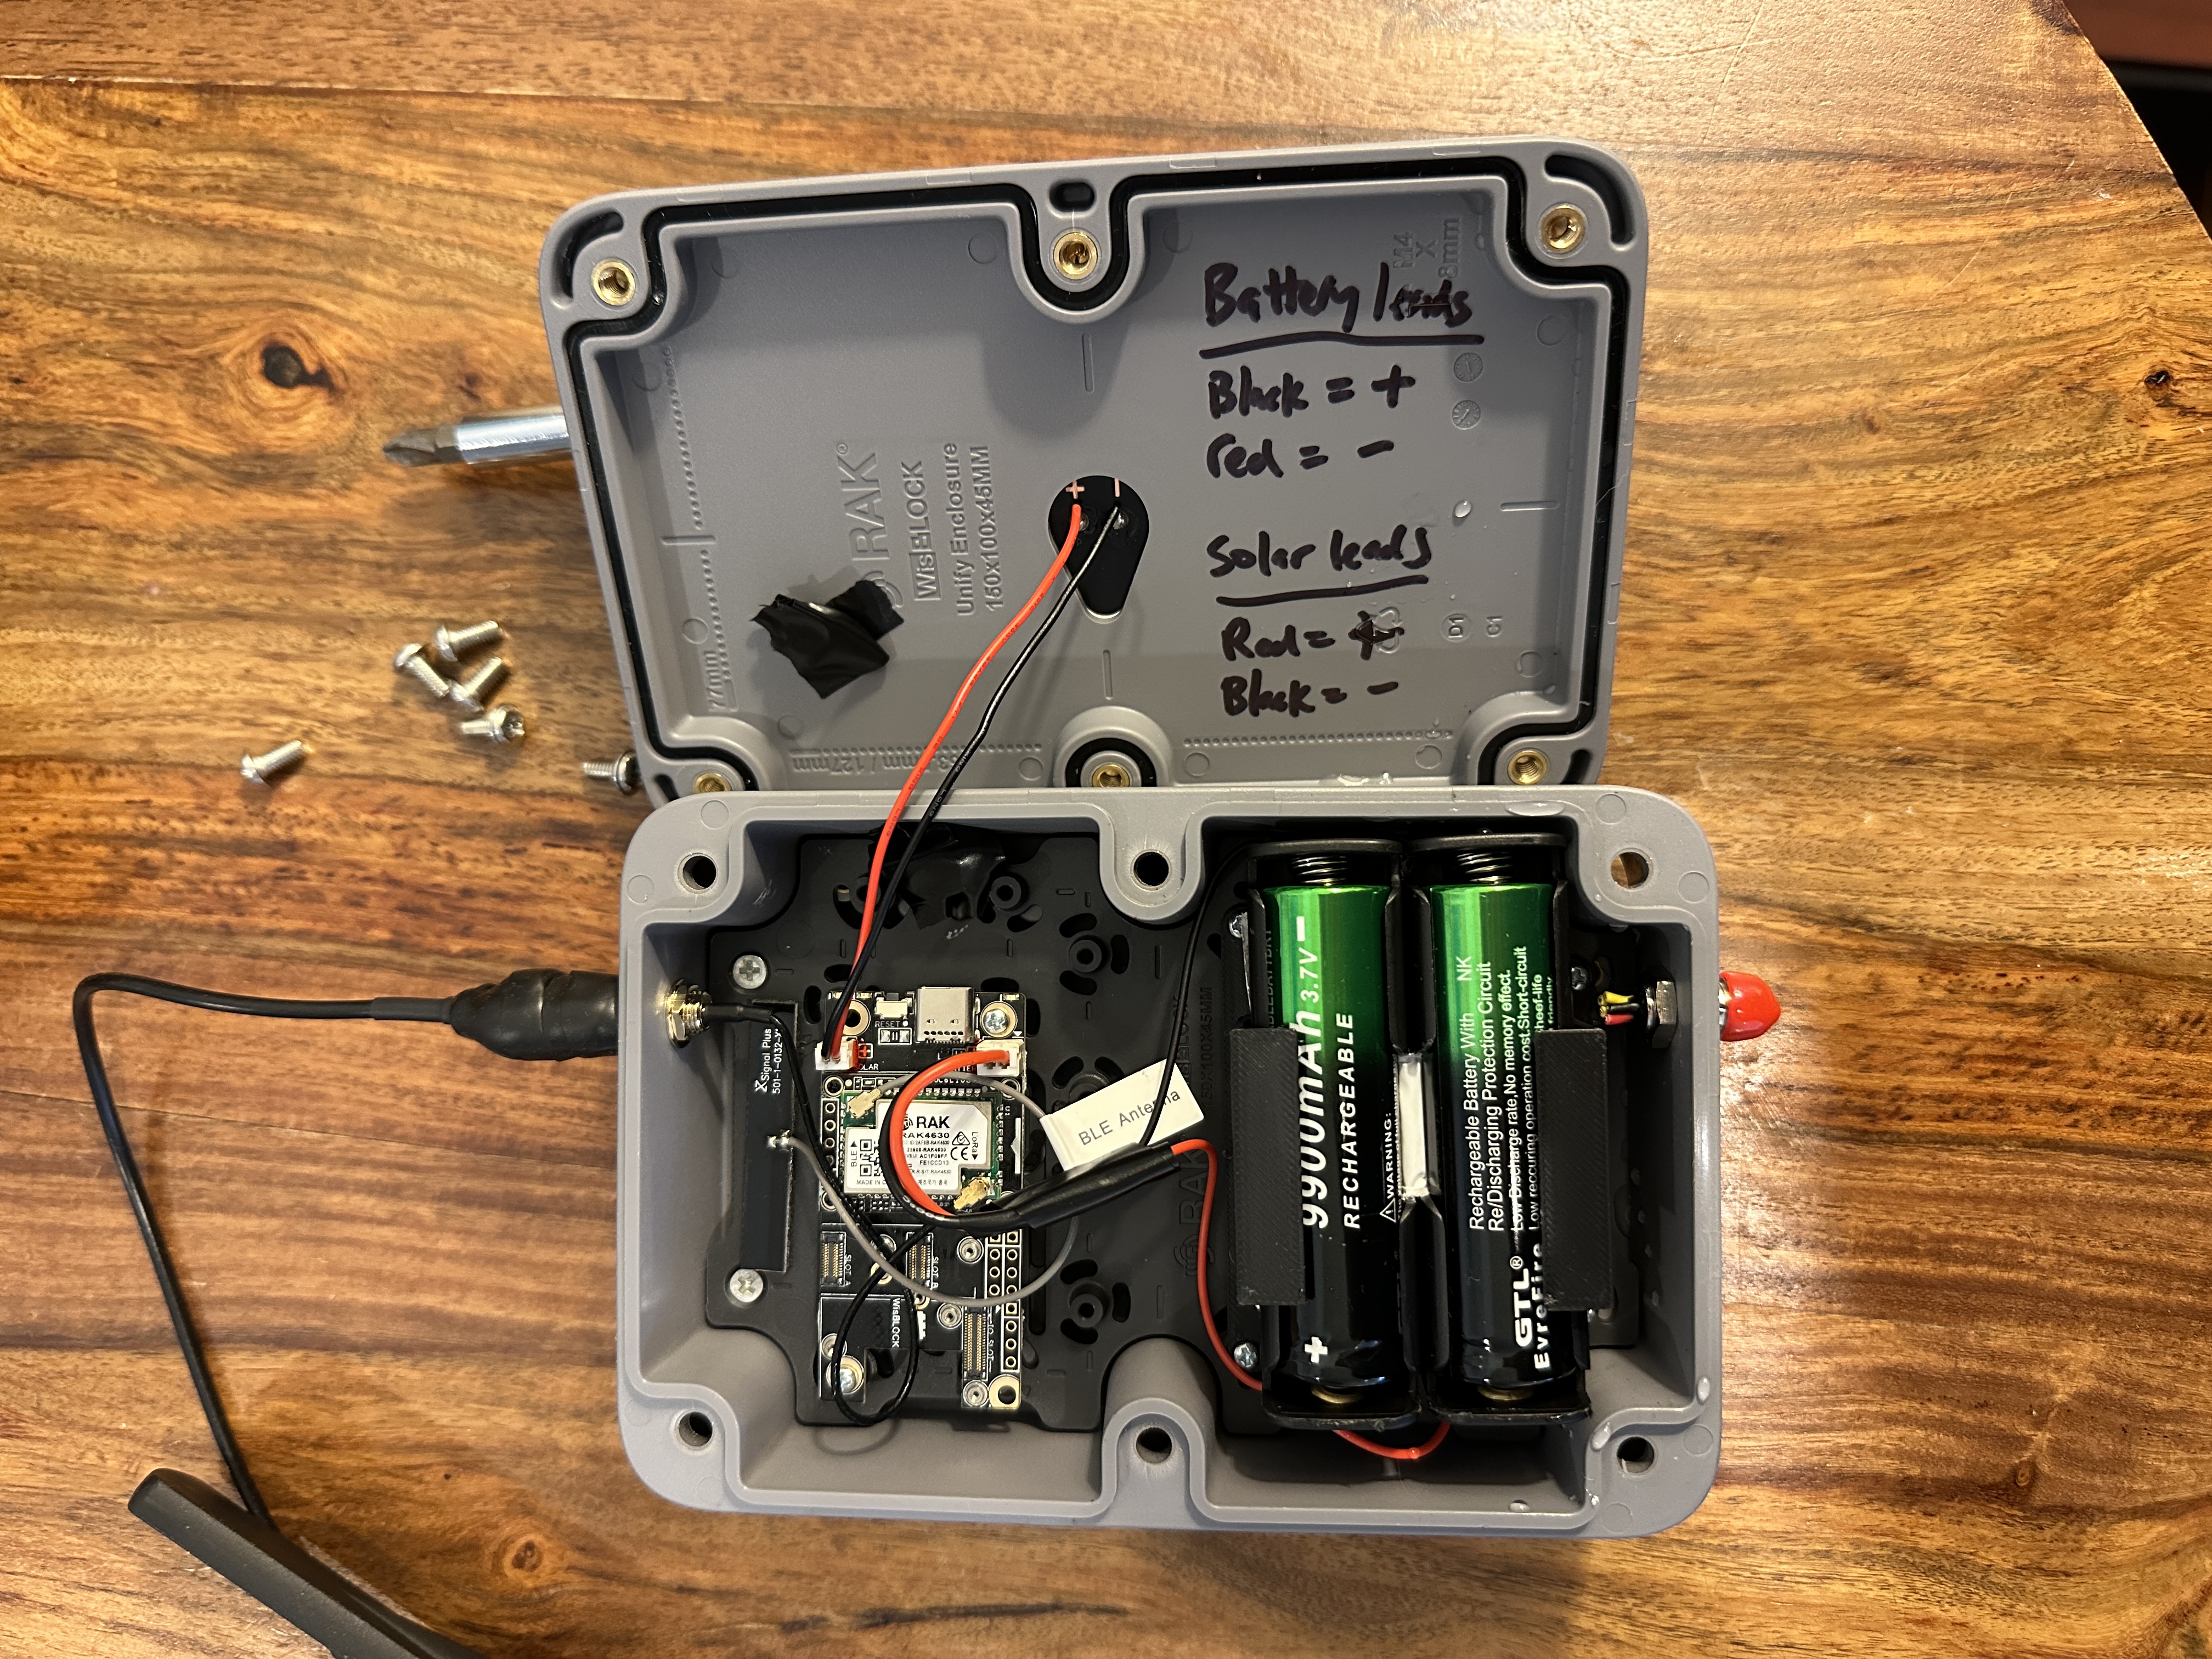
The WisBlock board has a spot in the top left of the enclosure where it screws into the backplate. I printed a small plate to hold my two battery holders together, and they fit snugly at the bottom of the enclosure. They fit so snugly that duct tape might also work. I don’t think that more than two batteries will fit inside this enclosure, so if you want more buy a bigger enclosure.
When soldering the battery holders together, you want them to be in parallel. Some battery holders on Amazon don’t specify whether they’re in series or parallel. It’s worth checking the voltage with a multimeter before connecting to your WisBlock, as your WisBlock will let out magic smoke if you connect too high a voltage. The voltage should be around 3.7V (if it’s closer to 7.4V, that means the batteries are in series and you do not want that).
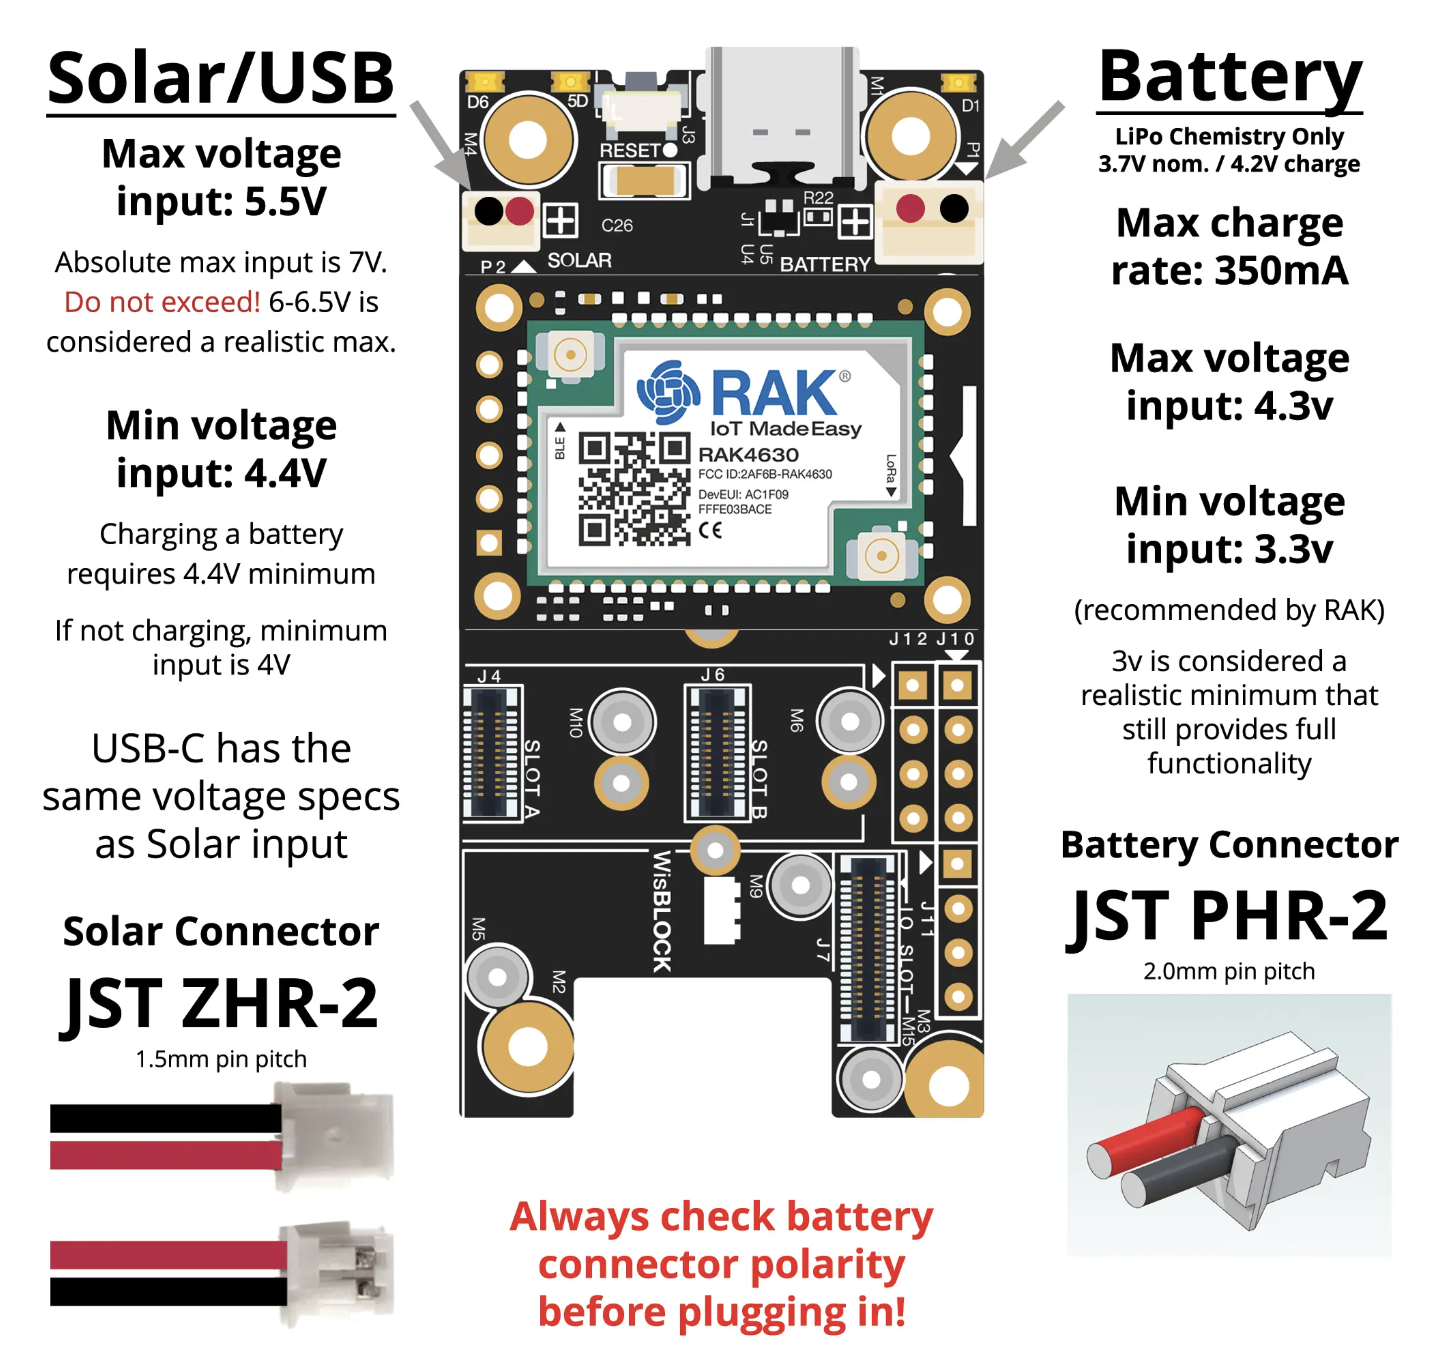
You battery holder will likely not come with the correct JST connector for the WisBlock board. Even if you buy a battery with JST connectors, they’re usually smaller than the correct size. Also, very important to note: the WisBlock battery connections are reversed from the standard (the solar connectors are normal). Rak claims “there is no standard”, but considering all the JST connectors I order on Amazon are the opposite of Rak’s choice, I disagree. Check the connectors you buy! I had to solder the red lead to the black lead and the reverse to make the connector attach properly, which continues to confuse me every time I open the enclosure. To reduce confusion, I wrote in sharpie on the interior of my enclosure which color is positive and which is negative. You will kill your board if you reverse the connectors.
Source: https://meshtastic.org/docs/hardware/devices/rak-wireless/wisblock/base-board/
Update 6/21/2025
I’ve had this node outside for about a month and each time I’ve opened it up I’ve noticed water inside the supposedly sealed node. This is likely due to humidity, Philly is very humid. I plan to add a weep valve to the node before installing on the roof. I will test for a while and then update the page again with more details.