CJDNS on OpenWRT – Part 3: Installing & Configuring CJDNS
Now that we have OpenWRT installed and ensured that we have enough space to experiment and install packages, we can proceed to install and configure cjdns.
I have opted to install a GUI package to allow for easier configuration (though I also wanted to see what it had to offer over editing configuration files). The package used here is luci-app-cjdns, relying on the LuCI interface that comes default in most OpenWRT images. If you want to install cjdns without the GUI or do not use LuCI, you can install the regular cjdns package. Note: The standard cjdns package was left out of OpenWRT 15.05.1, but should be in the older 15.05 image. The luci-app-cjdns package should be available in both versions, so you won’t have any issue with the remainder of this guide.
Now we are ready to install cjdns for LuCI. SSH into the access point and run the following command to update and install luci-app-cjdns.
opkg update && opkg install luci-app-cjdns
After this finishes, leave the SSH session open and then load up the OpenWRT web console in a browser and log in. By default, this interface can be reached via http://192.168.1.1. Now that we’re in the console, select cjdns from the Services dropdown on the top menu. An Overview page for cjdns will load (and look rather empty). Now, click the Peers sub-tab link near the top of this page.
Now, we can enter in the peering information for any number of peers to connect to. You will likely want to populate the Authorized Passwords and Outgoing UDP Peers sections as I have below.
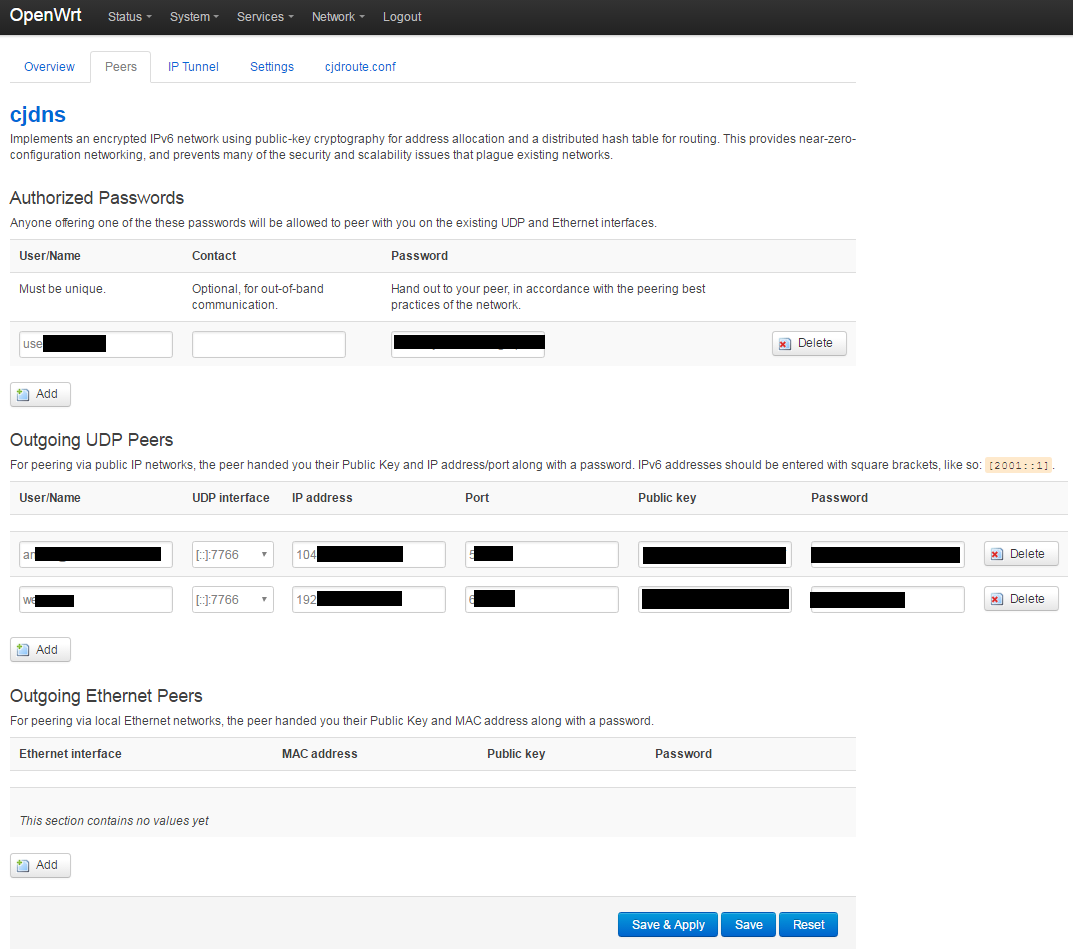
CJDNS Peers Tab
When finished, press the Save & Apply button to commit any changes and restart cjdns. These steps can be repeated to add as many peers as needed.
Now, navigate back to the Overview page by clicking on the Overview sub-tab link.
After loading, we should now have connection information about the configured peers as shown below.
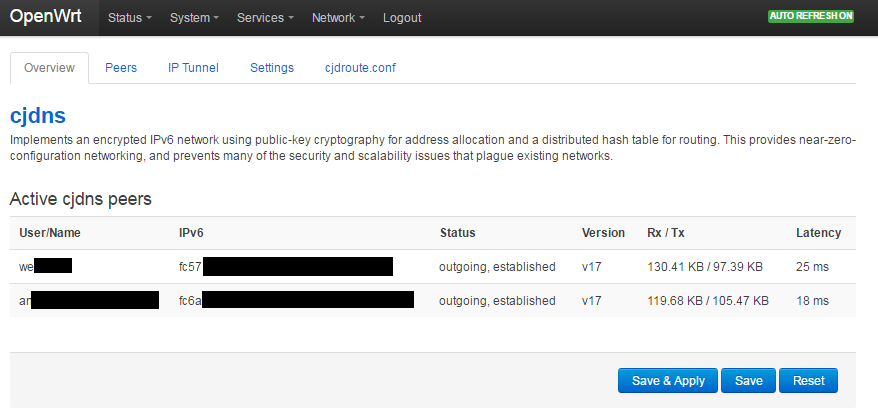
CJDNS Overview Page
That’s all there is to it! Back in our SSH session, we can try pinging a machine on Hyperboria to confirm a connection:
ping6 h.peer0.famicoman.com
PING h.peer0.famicoman.com (fc9f:990d:2b0f:75ad:8783:5d59:7c84:520b): 56 data bytes
64 bytes from fc9f:990d:2b0f:75ad:8783:5d59:7c84:520b: seq=0 ttl=42 time=4072.631 ms
64 bytes from fc9f:990d:2b0f:75ad:8783:5d59:7c84:520b: seq=1 ttl=42 time=3800.924 ms
64 bytes from fc9f:990d:2b0f:75ad:8783:5d59:7c84:520b: seq=2 ttl=42 time=4594.193 ms
64 bytes from fc9f:990d:2b0f:75ad:8783:5d59:7c84:520b: seq=3 ttl=42 time=4329.846 ms
^C
--- h.peer0.famicoman.com ping statistics ---
9 packets transmitted, 4 packets received, 55% packet loss
round-trip min/avg/max = 3800.924/4199.398/4594.193 ms
If all went as expected, you now have cjdns running on your OpenWRT router! This can be expanded in the future by copying an OpenWRT configuration onto several routers, and then linking them together wirelessly.